What Setting on Multimeter to Test Voltage
Learn the correct multimeter voltage setting for safe, accurate DC and AC voltage testing. Includes step-by-step guidance, safety tips, and practical troubleshooting from 10ohmeter.

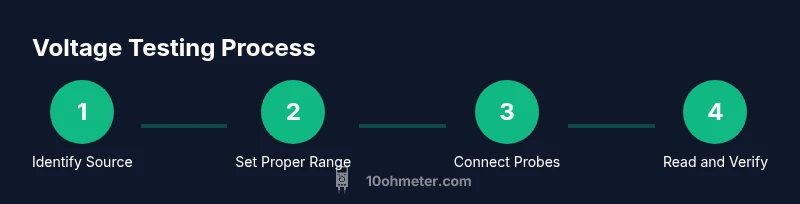
To test voltage with a multimeter, first identify whether the circuit is DC or AC. Set the meter to DCV for DC circuits or ACV for AC circuits, and choose a range that comfortably exceeds the expected voltage. Connect the black probe to COM and the red probe to V, test across the points, and read the value.
What setting on multimeter to test voltage
According to 10ohmeter, selecting the correct voltage setting is the foundation for accurate measurements. Start by identifying whether you’re dealing with a DC or AC circuit. For DC circuits, set the meter to DCV; for AC circuits, use ACV. The goal is to match the test type to the source you’re probing. Using the wrong setting can give you a misleading reading or, worse, damage the meter or circuit. In practice, many modern meters offer auto-ranging, which helps, but understanding the manual option is essential when you’re working with nonstandard supplies or unfamiliar devices. Always verify the circuit polarity or phase where possible, especially in automotive or power electronics work.
How to decide between DCV and ACV in real-world tasks
When you’re probing household electronics, automotive circuits, or power supplies, you’ll encounter both DC and AC sources. DCV is used for batteries, DC power adapters, and most control circuits. ACV is used for mains voltage and AC-powered equipment. If you’re unsure of the source, start with the largest safe AC range (or switch to auto-range) and then narrow down as you confirm the type of voltage present. This approach minimizes risk and protects the meter’s internal fuse.
Ensuring you’re within a safe range
A key safety principle is to never assume the voltage level. If your meter supports auto-ranging, enable it and verify the display. If you’re using a manual range, pick a range that is comfortably higher than your expected reading. For example, if you expect around 12 V, a 20 V or higher DCV range is appropriate. Avoid forcing the meter into a range that is too close to the expected voltage, as this can saturate the display and obscure spikes or transients.
Proper probe technique and contact quality
Probes should have clean, tight contact with the test points. Hold the probes steadily and avoid touching the metal tips with your fingers. In high-voltage or automotive tasks, use insulated gloves and keep your other hand away from conductive surfaces. If you’re measuring across a live conductor, isolate sensitive equipment and only bridge the circuit with the meter’s probe tips. Poor contact can cause fluctuating readings or spark hazards, especially on loose connectors.
Contexts: electronics bench vs automotive testing
On a bench with small electronics, DCV is the norm for most microcontroller power rails, while automotive environments often require a mix of DCV and ACV depending on the system (e.g., charging circuits, alternators). In automotive diagnostics, you’ll frequently test for 12 V DC with a 20 V or higher range, but you may encounter 24 V systems in commercial vehicles. Always verify the expected voltage range from the service manual or a trusted guide before testing.
Quick-check safety steps before you start
Power down the circuit when possible before changing ranges or probes. If you must test live circuits, keep one hand in your pocket to reduce the risk of a through-body current path, wear eye protection, and stand on a non-conductive surface. After testing, power down and disconnect the probes before inspecting connections or making adjustments.
Tools & Materials
- Digital Multimeter(Any handheld multi-meter with DCV and ACV ranges. Prefer auto-range if available.)
- Probe leads (red and black)(Insulated probes with compatible tips; ensure tips are intact.)
- Safety glasses(Eye protection when working with live circuits.)
- Insulated gloves (optional for high voltages)(Helps reduce exposure when testing near exposed conductors.)
- Non-contact voltage tester (optional)(Useful quick check before attaching probes.)
- Voltage reference/source (known-good battery or supply)(Helps verify meter accuracy during practice.)
- Clean workspace and mat(Prevents accidental shorts and provides stable surface.)
Steps
Estimated time: 15-25 minutes
- 1
Power down and inspect
Before touching any electronics, power down the circuit when possible and inspect connectors for corrosion or loose contacts. This reduces the risk of arcing and incorrect readings.
Tip: If you cannot power down, ensure the location is well ventilated and keep hands away from exposed conductors. - 2
Identify the voltage type
Observe the circuit to determine if you’re dealing with DC or AC voltage. Look for components like power adapters or battery symbols to guide your choice.
Tip: If unsure, start with the DCV setting and switch to ACV only if readings are nonsensical or unstable. - 3
Set the meter to the correct mode
Rotate the dial or select the appropriate function: DCV for direct current or ACV for alternating current. If your meter has auto-range, enable it to simplify the process.
Tip: Verify that the range is safely above your expected reading to avoid overloading the meter. - 4
Connect probes to the circuit
Insert the black probe into COM and the red probe into V or mV. Make steady contact with the test points, avoiding contact with metal tips.
Tip: Keep the probes at a right angle to minimize slip and ensure a solid connection. - 5
Power the circuit and measure
If testing a powered circuit, reapply power and observe the meter display. If the circuit is powered off, energize briefly only to take the reading.
Tip: If readings spike, temporarily disconnect and re-check connections to rule out a loose contact. - 6
Read the voltage value
Note the value on the display and confirm it matches expected ranges. If using auto-range, check that the range indicator aligns with the reading.
Tip: Record the unit (V, mV) and the sign if applicable for later analysis. - 7
Document and power down
After recording the measurement, power down the circuit, remove probes, and store equipment properly. Re-check connections if you plan further testing.
Tip: Label measurements with context ( DC vs AC, range used, time of day) for repeatability. - 8
Verify accuracy
If you have a reference source, compare readings to verify meter accuracy. Use a known-good supply to cross-check essential benchmarks.
Tip: If discrepancies persist, consider calibration or a battery replacement in the meter.
Your Questions Answered
What setting should I use to test DC voltage?
Use the DCV setting on your multimeter and select a range that exceeds the expected DC voltage. Ensure the circuit is safe to test and that probes are properly connected.
For DC voltage, set to DCV and use the proper range. Connect probes correctly and test across the circuit points.
Can I test voltage without powering the circuit?
Yes, you can test the component or supply if it’s isolated, but many voltage checks require power. Do not test voltage on live, exposed parts unless you’re trained and equipped for it.
You can test some non-powered parts, but many voltage tests need power. Be cautious and follow safety guidelines.
What’s the difference between auto-range and manual-range meters?
Auto-range meters pick the range automatically, making the process simpler. Manual-range meters require you to select a range; this can improve precision when you know your expected voltage.
Auto-range does the guessing for you, while manual-range needs you to pick the range.
What safety precautions should I take while testing voltage?
Wear eye protection, keep hands behind the probe guards, and work on a non-conductive surface. Never touch exposed conductors with the probes and power down when adjusting ranges.
Wear eye protection, stay safe, and power down when possible. Avoid touching live conductors.
Why might my reading be unstable or fluctuating?
Fluctuations can come from an unstable power source, poor probe contact, or a near-limit range. Check connections, confirm source stability, and consider a higher range if necessary.
Unstable sources or bad contact often cause fluctuations. Recheck connections and range.
How do I verify meter accuracy?
Use a known reference source, such as a calibrated supply, to compare readings. If readings diverge, recalibrate or replace the meter’s batteries.
Test against a known reference to confirm accuracy, and recalibrate if needed.
Watch Video
Key Takeaways
- Choose DCV for DC circuits and ACV for AC sources.
- Always select a range higher than the expected voltage.
- Use COM and V probes correctly to avoid misreads.
- Prioritize safety: eye protection, insulated hands, and careful probe handling.