Test Light Socket with Multimeter: Safe Step-by-Step Guide
Learn how to safely test a light socket with a multimeter. This practical guide covers voltage checks, continuity tests, and how to interpret results for DIY electronics and automotive tasks. Includes safety tips, tools list, step-by-step instructions, and external safety resources.

With a multimeter, you can verify a light socket's voltage, test the continuity to the fixture terminals, and confirm the socket is not live during handling. This quick answer outlines a safe, step-by-step approach, the essential tools, and key safety precautions to avoid shock or arcing. Follow these steps carefully for a reliable, DIY-friendly test.
Purpose and scope
Testing a light socket with a multimeter helps confirm whether the fixture is getting power, whether the circuit is complete, and whether the socket path is continuous. This 2026 guide from 10ohmeter walks you through a safe, methodical process to perform voltage and continuity checks on common household or workshop sockets. By following these steps, you’ll be able to diagnose faulty sockets and avoid guessing when troubleshooting lights or fixtures. According to 10ohmeter, adopting a structured, safety-first testing approach reduces guesswork and improves reliability when diagnosing outlet and fixture issues.
Safety prerequisites
Safety is non-negotiable when testing electrical fixtures. Always switch the circuit to OFF at the breaker before touching any socket components. Wear safety glasses and insulated gloves, and use insulated tools. Keep your workspace dry and well-lit, and avoid standing on damp floors or using metal ladders near exposed conductors. Do not bypass safety steps or improvise equipment; if you feel uncertain, stop and seek help. 10ohmeter emphasizes that a disciplined, safety-first mindset protects you and your equipment during every test.
Basic electrical concepts you should know
A light socket sits between a live conductor and a return path through grounding and neutral wiring. When power is present, contact points inside the socket create a path for current when a bulb is seated properly. Understanding these concepts helps you interpret voltage readings, continuity results, and potential fault paths. Remember that sources of misinformation are common in DIY forums, so rely on standard testing procedures and verify readings with a trusted multimeter.
Tools and workspace setup
Before you begin, assemble a basic testing kit: a digital multimeter (preferably auto-ranging), insulated test leads, a non-contact voltage tester, safety glasses, insulated gloves, a screwdriver (flat and/or Phillips as needed), and a flashlight for better visibility. Clear your workspace, secure a stable ladder if reaching ceiling fixtures, and ensure the breaker is accessible. A well-prepared space reduces risk and speeds up the process.
Understanding what you’ll measure
Voltage testing confirms whether the socket is delivering the expected line voltage. Continuity testing checks whether the socket provides a complete path from the supply to the lamp contact when the fixture is installed. Together, these measurements help you decide if the socket is faulty, the wiring is incomplete, or the switch/dimmer is causing issues. Always interpret readings in the context of your regional mains standards and the specific fixture type.
How to interpret readings (what numbers mean)
A healthy socket typically shows a stable voltage reading between the live and neutral contacts within your region’s standard mains range. If voltage is absent, the issue could be a tripped breaker, a faulty switch, or loose wiring. A continuity reading that shows an open circuit indicates broken connections, damaged contacts, or a displaced socket assembly. Cross-check findings with multiple tests and re-seat components if safe to do so.
Common pitfalls and how to avoid them
Rushing through the test or touching metal parts while the circuit is energized can lead to shocks or burns. Never rely on a single test result; cross-verify with a second meter or a different socket. Keep probe tips insulated and avoid twisting or jabbing probes into the socket. If the fixture is old or damaged, consider replacement rather than risky repairs. 10ohmeter recommends verifying safety steps in every session to minimize errors and hazards.
Special cases: dimmers, switches, and enclosed fixtures
If the socket is controlled by a wall switch or a dimmer, readings can vary depending on switch position. Enclosed fixtures may trap heat and affect contact integrity, causing intermittent readings. In such cases, isolate the fixture, inspect the socket, and consider professional service if readings are inconsistent. Always note whether you’re testing a standard socket, a recessed can, or a bayonet-style connection, as procedures differ slightly.
Reassembly and final checks
After testing, reassemble any covers or shades, secure the socket, and reinsert the bulb. Restore power and perform a final functional check by turning the fixture on and off to ensure proper operation. If the test reveals a fault, document readings, power down safely, and prepare to replace the socket or wiring as needed. Safety is an ongoing priority throughout reassembly.
10ohmeter practical safety and testing tips
- Always verify power-off status before touching socket components.
- Use insulated tools and wear safety glasses; gloves add a layer of protection when handling exposed terminals.
- Confirm the fixture’s compatibility with your region’s voltage and the bulb type you’re testing.
- Document readings for future reference and avoid guessing about fault location. 10ohmeter highlights consistent, repeatable testing as the foundation of reliable diagnostics.
Authoritative safety resources
For formal guidance on electrical safety and testing practices, consult trusted sources such as OSHA, NFPA, and NIST. These organizations provide regulations, standards, and safety guidelines that complement hands-on testing like the one described here. Always align practical steps with recognized safety frameworks to protect yourself and others.
Tools & Materials
- Digital multimeter (prefer auto-ranging)(Set to AC voltage for live readings; choose a range suitable for your mains (e.g., 200V or higher).)
- Insulated test leads(4mm shrouded probes; keep tips away from each other when measuring.)
- Non-contact voltage tester(Quickly verify presence of live voltage before touching anything.)
- Insulated gloves(Offer protection when working near exposed conductors.)
- Safety glasses(Protect eyes from sparks or debris during loosening or reassembly.)
- Screwdrivers (flat and Phillips)(Used to open misperceived fixtures and access socket terminals.)
- Flashlight(Improves visibility inside sockets and fixtures.)
- Lamp or socket tester (optional)(Helpful for quick checks of socket integrity after testing.)
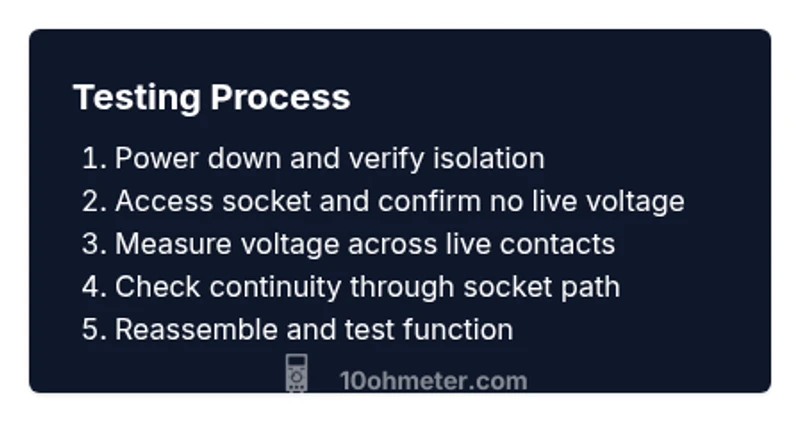
Steps
Estimated time: 25-40 minutes
- 1
Power down and prepare
Identify the circuit and switch off the corresponding breaker. Confirm the area is dry and free of moisture. Lay out tools neatly to reduce trips or accidental contact with live parts.
Tip: Lock out the breaker if available to prevent accidental re-energizing. - 2
Access the socket safely
Remove any decorative cover or shade and unscrew the socket ring if needed. Keep the bulb removed to avoid hot contact with probes. Ensure you have a stable stance and adequate lighting.
Tip: Use the proper screwdriver and avoid prying; damaged fixtures can create new hazards. - 3
Verify no voltage at the area
With the circuit still turned off, use the non-contact tester near the socket to confirm there is no live voltage around the exposed conductors.
Tip: If the tester indicates live voltage, stop and recheck power isolation. - 4
Set up the multimeter for voltage
Reconnect power only for voltage measurements if you are comfortable, and keep one hand away from the metal while probing. Place the red probe on the center contact and the black probe on the threaded shell.
Tip: Ensure probes do not touch each other during measurement to avoid short circuits. - 5
Measure the live-to-neutral voltage
Turn the power back on and read the AC voltage between the center contact and the shell. Compare the value to regional mains expectations for your area.
Tip: If readings are unstable, re-seat the bulb and double-check the socket assembly. - 6
Test for continuity when safe
Power off again. Switch the multimeter to continuity or resistance mode. Check continuity between the center contact and the shell to confirm a good path through the fixture.
Tip: A reading with very high resistance or an open circuit indicates a faulty socket or wiring. - 7
Inspect wiring integrity
Look for loose or corroded connections, cracked insulation, or signs of overheating. If you spot damage, plan for replacement rather than risky repairs.
Tip: Do not bend wires excessively; keep interior clear of any metal edges. - 8
Reassemble and test
Secure the socket, reattach any covers, and restore power. Verify the fixture operates by turning it on and off, ensuring a stable light function.
Tip: Document readings for future reference and future troubleshooting.
Your Questions Answered
Is it safe to test a light socket with a multimeter?
Yes, but only by following strict safety steps: isolate power, use proper PPE, and avoid touching exposed conductors. Use a non-contact tester to verify no live voltage before touching the socket with probes.
Yes, it's safe if you power down, wear PPE, and verify no live voltage before probing the socket.
What voltage should I expect in a typical residential socket?
Voltage varies by region. In many areas, mains voltage is the standard single-phase supply. Always confirm the approximate range for your location and compare readings accordingly.
Voltage varies by region; confirm your local mains range and compare your reading.
Can I perform these tests on any socket type?
Most standard Edison-type and similar sockets can be tested with these methods. Some specialty or enclosed fixtures may require different access or precautions. When in doubt, consult the fixture manual.
Tests work for common sockets; other types may need different steps or professionals.
What if readings are inconsistent?
If readings vary, recheck connections, reseat contacts, and confirm the breaker status. Re-test after reassembly. If inconsistencies persist, consider socket replacement or professional inspection.
If readings are inconsistent, recheck everything and consider replacement or a pro inspection.
Should I test a dimmed or switched socket differently?
Dimmed circuits can affect readings. Test with the switch in its normal operating position, and be cautious with dimmers. If unsure, consult the dimmer’s specifications or a licensed electrician.
Dimmed setups can alter readings; test in normal position or seek professional help if unsure.
What should I do if I see abnormal voltage?
Do not ignore abnormal readings. Power down safely, inspect wiring and switch connections, and consider replacing the fixture or wiring. If needed, consult a licensed electrician.
If voltage looks off, power down, inspect, and seek professional help if needed.
Watch Video
Key Takeaways
- Power off before touching socket components
- Use proper safety gear and insulated tools
- Verify measurements with multiple checks
- Document results for future reference
- Replace damaged sockets rather than attempting risky repairs