Test Xmas Lights with a Multimeter: Safe Step-by-Step Guide
Learn to safely test Christmas lights with a multimeter. This guide covers prep, reading ohms and diode tests, identifying faulty bulbs or wiring, and deciding repair versus replacement.

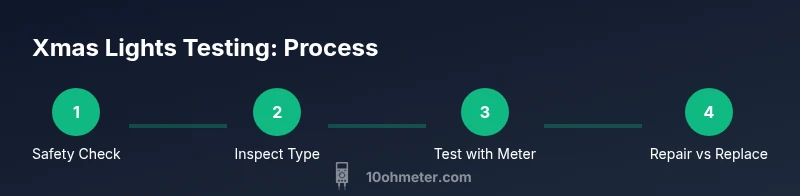
In this guide you will learn how to test Christmas lights with a multimeter, safely isolate faults, and decide whether to repair or replace a string. You’ll inspect for damaged wire, test continuity, check diodes in LED strings, and verify sockets and fuses. The steps cover both incandescent and LED styles with safety-first tips.
Safety First: Unplug, Insulate, and Assess
Before you reach for the multimeter, prioritize safety. According to 10ohmeter, testing Christmas lights powered by mains can pose shock and fire hazards if you ignore basic precautions. Always unplug the string at the source and disconnect it from any power strip. Visually inspect the cord for nicks, cracks, or melted insulation; damaged plugs or broken sockets are red flags and should be replaced rather than tested. Work on a dry, non-conductive surface and keep the work area clear of liquids. Use insulated gloves if you have to handle live cords in emergency, but the goal is to avoid contact with any energized metal. If you must check for power briefly, use a non-contact voltage tester first to confirm zero voltage, then switch to the multimeter offline. Never test a string while it is plugged in, or when the bulbs are hot. Label damaged sections and set aside the entire string if any major fault is found.
Xmas Light Types: Incandescent vs LED
Christmas light strings come in at least two fundamental technologies, and your testing approach should reflect those differences. Incandescent strings use a filament that glows when current flows; many are wired in series with a fuse or controller. A single broken bulb can interrupt current through the entire string, so continuity checks help pinpoint the exact bulb or section. LED strings contain multiple diodes arranged in series and sometimes parallel groups, often with a built-in controller or resistor network. They are typically more energy-efficient and can tolerate a few bad LEDs without failing completely, but a faulty diode or controller can still dim or extinguish portions of the string. When testing incandescent sets with a multimeter, you’ll look for near-zero resistance in healthy wire segments and isolated resistance in burnt-out bulbs. For LED strings, use the diode-test function to verify each LED’s forward voltage direction and check for blocks of LED modules that fail together. In all cases, ensure the string is unplugged before testing, and reference the user manual for any manufacturer-specific testing notes.
Testing Essentials with a Multimeter
A quality digital multimeter is your primary tool for non-destructive string testing. Start with the ohms (Ω) range to check continuity along the cord and through sockets. Use the beep feature if your meter supports it to confirm a live path exists. The diode-test setting is invaluable for LED strings; test each LED diode in the forward direction to verify proper operation and identify reversed or open diodes. For incandescent filaments, resistance readings should be finite and consistent across healthy segments; a dead filament will show infinite resistance. Always inspect the probes and leads for damage, and choose probes rated for safety standards suitable for mains work. When in doubt, consult the manufacturer’s guidance and proceed with caution to avoid accidental short circuits.
Preparing Your Testing Setup
Organize a clean, dry workspace and lay out the testing area before you begin. Gather a non-contact voltage tester, a digital multimeter with fresh batteries, insulated test leads, and a spare string or set of bulbs for comparison. Make sure you have a flashlight or headlamp to illuminate dim work areas, and a container to hold removed bulbs if you need to separate sections. If you’re testing a long, plugged-in string, consider temporarily isolating sections so you can test one segment at a time without creating a huge hazard. Finally, keep a small notebook to record readings and identify patterns that indicate where faults reside.
Reading Readings: Interpreting Continuity and Diodes
Interpreting multimeter readings requires practice. A healthy incandescent segment will show low, stable resistance across connected wires; a sharp rise indicates an open circuit or a damaged section. For LED strings, a successful diode test means current flows in the forward direction; a failed test suggests a burned-out LED or faulty driver. When multiple LEDs are in series, individual diode tests may not reveal the fault, so test groups of bulbs and compare against a known-good string. If you observe intermittent readings, re-seat connectors and inspect the plug ends for corrosion. Finally, document any abnormal results and plan targeted replacements for failed components rather than replacing an entire string unless damage extends through the harness.
LED String Specific Issues
LED strings can differ from incandescent ones in the way faults propagate. A single bad LED may dim a portion of the string rather than turning it completely off. In strings with integrated controllers, a faulty driver or resistor can affect several sections. When testing, isolate sections by unplugging and re-test in smaller segments to pinpoint where the failure lies. If you find clusters of LEDs that fail together, the issue often lies in the shared controller or power rail, rather than each LED individually. For longer strings, a “open circuit” reading usually means the break is somewhere in the bulb or its holder, so swap bulbs one-by-one to locate the fault.
Common Faults and How to Address Them
The most frequent problems include damaged bulbs, corroded sockets, frayed cords, and blown fuses. Damaged bulbs are the easiest to identify with a continuity test; replace the faulty bulb and re-test. Corrosion around sockets reduces contact quality and can mimic “faulty bulb” symptoms. After addressing physical damage, re-check the string. If a fuse is blown, replace it only with an identical rating fuse, and avoid bypassing fuses—fuses protect both your lighting and your home. If the plug or end connectors are damaged, consider replacing the entire string rather than performing ad-hoc repairs. Visual inspection combined with targeted electrical tests often saves time and reduces risk.
Repair vs Replace: Decision Guide
Not every fault is worth repairing. If you discover multiple broken bulbs along a long run, or widespread insulation damage, replacement is typically safer and more reliable than make-do fixes. For specialty or premium LED strings, a professional repair might be feasible if only a few LEDs or controllers are affected. When in doubt, compare the cost of replacement with the estimated effort of repair and consider the potential risk of a poor repair in a home environment. The 10ohmeter team recommends choosing the safer, long-term option when the fault is not isolated and easily repaired.
Post-Testing Verification and Safe Storage
After completing repairs or replacements, re-test the entire string to confirm proper operation. Run through all segments from the plug to the far end, ensuring no new hotspots or flickering appear. When you finish, power down, remove batteries from the meter, and coil the cord loosely to avoid kinks. Store lights in a dry, cool place in a labeled container to simplify next-season testing. If you’ve replaced bulbs, keep a few spare bulbs on hand that match the string’s wattage and type. Regular inspection before each season helps prevent unexpected failures and keeps holiday lighting safe and festive.
Quick Reference Checklist
- Unplug and visually inspect for damage
- Identify string type (incandescent vs LED)
- Gather tools: multimeter, leads, tester, spare bulbs
- Test continuity along the cord and through sockets
- Use diode test for LEDs and ohms for incandescent sections
- Replace damaged bulbs or sockets, never bypass fuses
- Re-test the entire string before storage
- Store in a dry, cool area with minimal coil tightness
Tools & Materials
- Digital multimeter (auto-ranging preferred)(Rate for AC mains, CAT II/III suitable probes)
- Probe leads (red/black)(Insulated and rated for meter use)
- Non-contact voltage tester(Optional but recommended for zero-voltage verification)
- Spare bulbs or LED modules(Matching types and wattage for replacements)
- Flashlight or headlamp(Bright, focused light for dim work areas)
- Insulated gloves(Extra protection when handling cords)
- Small container for bulbs(Keeps removed bulbs safe and organized)
- Notebook or digital notes app(Record readings and fault locations)
Steps
Estimated time: 60-90 minutes
- 1
Unplug and inspect
Unplug the string at the source and visually inspect for damaged bulbs, frayed cords, broken plugs, or cracked insulation. Address any obvious damage before proceeding. If damage is present, isolate the section and avoid testing the intact portions until repaired.
Tip: Take a quick photo of any damage to reference during replacement. - 2
Set up safety checks
Set the multimeter to the appropriate range for continuity or resistance and confirm it works with a known-good cable. Use a non-contact tester if available to verify zero voltage before touching any connections.
Tip: Always test power-off paths first; never test live circuits. - 3
Test continuity along the cord
Connect the meter probes at adjacent conductors along the cord and through sockets. A healthy section should show low resistance and, if available, a continuous beep. Note any open or fluctuating readings for fault localization.
Tip: Test in short segments to avoid chasing a moving fault through the entire string. - 4
Diode test for LED strings
Switch the meter to diode test and measure across individual LEDs where accessible. A forward read indicates correct polarity; a non-conductive or reverse reading suggests a faulty diode or bad connection.
Tip: For long LED runs, it’s normal for some LEDs to show open when tested individually; test in sub-strings if possible. - 5
Assess incandescent bulbs
For incandescent strings, check resistance across parallel paths and across individual bulbs by removing one at a time if needed. A bulb that is open or significantly different in resistance is likely defective.
Tip: Do not twist or bend bulbs aggressively; damaged shells can short or break glass. - 6
Identify faulty sections
Document where readings deviate from the norm and compare with a known-good control string. Isolate the faulty bulb, module, or socket and prepare to replace or repair only that portion.
Tip: Label the section with tape to keep track during replacement. - 7
Decide repair vs replacement
If multiple faults exist in a single string or if insulation is compromised, replacement is safer and often more reliable. For isolated LED groups or a single bulb, targeted replacement is usually best.
Tip: Safer option tends to be replacement when in doubt. - 8
Re-test and verify
After repairs, reassemble the string and test again from plug to end. Confirm stable operation across all sections and power levels before storing for the season.
Tip: Document the final test results for future reference.
Your Questions Answered
Is it safe to test Xmas lights on a multimeter while they’re unplugged?
Yes. Always unplug the string before testing and verify there is no power with a non-contact tester before touching any conductors. This prevents electric shock and damage to your meter.
Yes. Unplug first and check for zero voltage with a tester before handling the string.
What’s the difference between testing incandescent and LED strings?
Incandescent strings are mainly tested for continuity and resistance to locate open filaments. LED strings require diode testing to verify LEDs and can involve checking the controller or driver circuitry.
Incandescent tests focus on continuity; LED tests focus on diodes and drivers.
What should I do if my multimeter shows infinite resistance on a string that looks fine?
Infinite resistance usually means an open circuit somewhere in the path. Re-check connections, inspect sockets for corrosion, and test bulbs individually to pinpoint the fault.
An infinite reading suggests a break somewhere; re-check connections and test sections one by one.
Is it okay to test live mains with a multimeter?
No. Do not test live mains with a standard multimeter. Use a non-contact tester to verify zero voltage first, and only test after power is safely disconnected.
Avoid testing live mains; verify power is off before using the meter.
What if I damage a socket or plug during testing?
Do not continue testing. Replace the damaged socket or the entire string if replacement isn’t feasible. Damaged insulation or connectors pose end-user risk.
Don’t continue testing; replace the damaged part to stay safe.
Can I reuse faulty bulbs after testing?
Faulty bulbs should be replaced with matching type. Reusing damaged bulbs can cause inconsistent performance or safety hazards.
Only reuse bulbs that test good; replace bad ones to ensure uniform operation.
Watch Video
Key Takeaways
- Test safely and unplug before inspecting or testing
- Differentiate LED vs incandescent behavior to choose the right tests
- Use continuity for wiring paths and diode tests for LEDs
- Isolate faulty sections to avoid replacing healthy bulbs
- Decide repair vs replacement based on scope of damage and risk