Test plug with multimeter: safe, step-by-step
A practical guide to test a plug with a multimeter, including safety checks, continuity tests, and wiring verification. Learn to diagnose faulty plugs without energizing the circuit, with a practical, DIY-friendly approach.

Learn how to test a plug with a multimeter safely and accurately. This guide covers unplugging the device, selecting the right meter settings, verifying continuity, and checking for proper wiring and insulation. You’ll need a digital multimeter with continuity/beep mode, insulated probes, PPE, and an organized workspace. By following these steps, you’ll diagnose wiring faults without energizing the circuit.
Safety foundations for plug testing
Testing a plug with a multimeter is a common maintenance task, but it carries a real risk if done carelessly. The initial priority is to prevent electric shock, damage to equipment, or fire hazards. Work in a dry, uncluttered space and use only insulated tools. Before touching any metal contacts, verify the power is fully disconnected by unplugging the device and, if available, using a non-contact tester to confirm zero voltage. For the DIY community, adopting a conservative mindset—test on non-live circuits, document readings, and retire any plug with damaged insulation—will save time and prevent accidents. In this guide, we reference the safety practices advocated by the 10ohmeter team, emphasizing proper PPE, correct meter choice, and clear labelling of results. Remember: never assume a plug is safe just because it looks intact. A hairline crack in plastic or a hidden arcing path can pose a hidden hazard. If you must work near live circuits, you should have formal training and the right equipment. Treat every plug as potentially live until proven otherwise. In the end, safety always comes first when you test plug with multimeter.
Required tools and setup
Before you begin testing a plug with a multimeter, assemble a basic, protected workspace and gather all essential items. You will need a digital multimeter with continuity mode, insulated probes, PPE (eye protection and gloves), a non-conductive mat or surface, and electrical tape for labeling. Keep a clean area to prevent accidental tool contact and misreads. Optional gear like a non-contact voltage tester can help confirm power is off without touching contacts. Label each plug with a simple ID when you test multiple units. Ensuring the environment is dry and free from moisture is crucial since water increases the risk of shock, arcing, and meter damage. By preparing properly, you reduce the chance of accidents and improve measurement reliability when you test plug with multimeter.
Understanding the multimeter and test leads
A multimeter is a versatile tool for diagnosing plugs. For this task, you’ll primarily use continuity and resistance modes. Continuity mode provides an audible beep when a complete circuit exists between two points, which simplifies quick checks. Resistance mode lets you gauge how much resistance remains along a path, helping identify degraded wires or poor contacts. Test leads should be insulated and rated for your main supply voltage (CAT III 600V is common for outlet testing). Always inspect leads for nicks or exposed copper. When you test plug with multimeter, keep track of probe orientation and maintain consistent contact pressure to avoid reading noise. If you notice frayed insulation or bent prongs, replace the plug rather than force a test.
Safety-first setup: workspace and PPE
Organize your workspace to minimize accidental contact with live components. Wear safety goggles and insulated gloves if you will ever approach energized parts, and keep a fire extinguisher nearby in your workshop. Place the plug on an insulating mat and remove surrounding metal objects that could conduct electricity. Calibrate or verify your multimeter’s battery level before starting, as a dying battery can give erratic readings. If you’re unsure about any reading, stop and re-check your setup. When you test plug with multimeter, perform a final visual inspection of prongs and housing for damage before reusing the component.
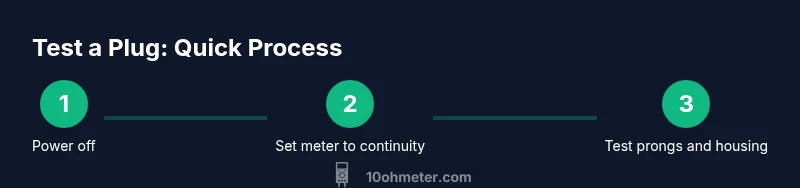
Step-by-step procedure overview
To test a plug with multimeter effectively, follow a structured approach. Start by disconnecting power and inspecting for visible damage. Next, set the meter to continuity mode and test each prong against the housing to verify a proper ground path. Then, test hot-to-neutral continuity to ensure a complete path when wired correctly. Finally, test for unintended shorts between hot-to-ground and neutral-to-ground. Document each result and compare against expected wiring patterns. Any abnormal readings indicate a faulty plug that should be retired or replaced. When you test plug with multimeter, maintain a consistent testing sequence to avoid missing a faulty connection.
Interpreting results and diagnosing common issues
Reading outcomes for a plug test with a multimeter requires understanding what constitutes a good path versus a fault. A continuous beep between hot and neutral generally indicates a proper, low-resistance connection. A beep between hot and ground should be present if a ground path exists; otherwise, there may be a missing ground connection. A lack of continuity where there should be a path suggests a broken wire or poor contact. A noticeable steady resistance in resistance mode that decreases as you apply slight pressure to the plug suggests a loose or corroded contact. If you observe any anomalous readings, re-check the setup and verify with a second measurement to rule out contact issues. By consistently applying these checks, you can reliably interpret results when you test plug with multimeter and determine whether it’s safe to continue using the plug.
Common mistakes to avoid
Common errors when testing a plug with multimeter include testing with power on, which risks shock or meter damage; using damaged leads; and assuming a steady reading means safety without verifying wiring orientation. Avoid touching exposed conductors during measurement, and never reach across live terminals. Do not reuse a visibly damaged plug; replace it instead. Finally, do not rush through tests—take time to silence ambient interference and ensure good contact, which reduces reading noise and improves accuracy when you test plug with multimeter.
Extending safety and maintenance: post-test steps
After testing a plug with a multimeter, cap off the procedure with a safety-focused wrap-up. Label the plug’s testing status and store the findings for future reference. If readings were within acceptable ranges and no damage was found, consider marking it as tested to prevent re-testing later. If any fault was detected, retire the plug and dispose of it safely; document the issue and replace with a new unit. Regularly inspect plugs and outlets as part of a preventative maintenance routine to catch wear and corrosion early, which reduces the chance of electrical faults in the field.
Tools & Materials
- Digital multimeter (with continuity/beep mode)(Prefer auto-ranging or at least 2000-count resolution)
- Insulated test leads/probes(CAT III rated for outlet testing; use with shrouded probes)
- Non-contact voltage tester (optional)(Helps verify power-off status without touching contacts)
- Insulating gloves (CAT III rated)(Use when near live circuits or as extra protection)
- Safety goggles(Eye protection during testing and potential arcing)
- Non-conductive working mat(Provides insulation and keeps tools in place)
- Electrical tape(Label results and secure any loose leads)
- Cleaning cloth or contact cleaner(Ensure clean contact surfaces before testing)
Steps
Estimated time: 20-30 minutes
- 1
Power down and inspect the plug
Unplug the device and perform a visual inspection for cracks, bent blades, or signs of overheating. Ensure the plug is cool to touch before handling. This initial check helps prevent unexpected shock while you proceed.
Tip: If you see damage, don’t test—replace the plug. - 2
Set meter to continuity and resistance
Turn on the multimeter and select continuity mode; switch to resistance/ohms for secondary checks. Verify the meter reads zero or near-zero resistance on a known short path to confirm the leads and meter are functioning properly.
Tip: Use a known-good lead connection to verify the meter’s function before testing the plug. - 3
Check prong-to-housing continuity
With the plug on an insulating surface, touch the meter probes to the plug’s metal prongs and the plug housing where applicable. A beep (continuity) confirms a proper ground path or pathway as designed.
Tip: Maintain the same probe orientation for consistency across tests. - 4
Test hot-to-neutral and hot-to-ground paths
Test continuity between hot and neutral prongs to ensure a complete circuit path when wired correctly. Then test between hot and ground to confirm an appropriate ground connection is present; absence or unexpected continuity suggests a fault.
Tip: If you detect a short where none should exist, stop and re-check the wiring and plug condition. - 5
Document readings and label the plug
Record the readings and mark the plug with a durable label indicating it has been tested. If readings are abnormal, retire the plug and replace it. This documentation helps with ongoing maintenance and future diagnostics.
Tip: Keep a simple log with date, readings, and observer initials. - 6
Re-check after any adjustments
If you rewire or re-seat components, re-run the continuity and resistance checks to confirm the issue is resolved. Do not reuse a plug until all checks pass.
Tip: Rerun tests immediately after any touch-up to confirm stability.
Your Questions Answered
Is it safe to test a plug with a multimeter while it's plugged in?
No. Always unplug the device and verify power is off. Use a non-contact tester to confirm status before testing. Never test live plugs with a multimeter.
Never test live plugs with a multimeter; unplug the device and confirm power is off before testing.
What measurements should I perform on a plug?
Check continuity between hot and neutral, ensure a proper ground path, and test for any shorts between hot/ground or neutral/ground. Use resistance mode to confirm resistance is within expected range for known-good wiring.
Test continuity between hot and neutral, check for a proper ground, and look for shorts. Use resistance to gauge contact quality.
What if I see no continuity between hot and neutral?
Inspect internal wiring of the plug, verify the prongs are not damaged, and re-test. If still no continuity, replace the plug or seek a qualified electrician.
If there's no continuity, check wiring and replace the plug if needed.
What equipment do I need for testing?
A digital multimeter with continuity mode, insulated leads, PPE, and a clean, non-conductive workspace. Optional tools include a non-contact tester and labels for documentation.
You’ll need a multimeter with continuity mode, insulated leads, and PPE.
How do I map prongs to terminals correctly?
Label hot, neutral, and ground first, then test in a consistent orientation. Double-check against the device’s expected wiring scheme and re-test if you make changes.
Label the prongs and test in a consistent orientation to map them correctly.
Key Takeaways
- Unplug power before testing to ensure safety.
- Verify continuity with correct prong mapping.
- Check for shorts between hot/ground and neutral/ground.
- Document results and replace damaged plugs.