How to measure voltage with a multimeter: A practical guide
Master how to measure voltage with a multimeter safely, covering DC/AC basics, proper tool setup, probe placement, and accurate readings for electronics and automotive tasks. A practical, expert guide from 10ohmeter.

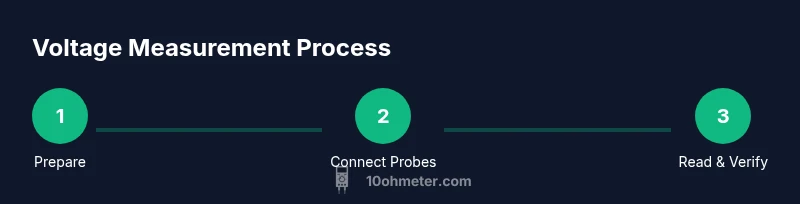
Learn how to safely measure voltage with a multimeter in four clear steps. You'll verify meter input, select the correct voltage range for DC or AC, connect the probes properly, and read the display. This guide emphasizes safety, correct technique, and practical tips to avoid common mistakes. Take notes and practice on a benign circuit.
What voltage means and how a multimeter measures it
Voltage is the electrical pressure that pushes current from a higher potential to a lower potential. In practical terms, measuring voltage tells you how much potential difference exists between two test points in a circuit. When you measure voltage with a multimeter, you are sensing that pressure without forcing current through the circuit. The 10ohmeter team emphasizes a clear distinction between DC voltage, which is steady, and AC voltage, which oscillates. A digital multimeter (DMM) samples the input and displays the value you would expect to see at that moment. The key is to select a safe test point, set the meter to the correct kind of voltage, and observe the display without altering the circuit. For DIY projects and automotive work, you’ll encounter both low DC supplies from batteries and controlled DC rails, as well as occasional AC voltages in home systems. Throughout this article, we consistently refer to measure voltage with multimeter as the core activity. Accuracy improves when you use the right range, a proper input jack, and correct probe placement. By following best practices and keeping the work area non-conductive, you minimize noise and measurement error. According to 10ohmeter, starting from a safe point and validating the test setup is half the battle.
Tools & Materials
- Digital multimeter (DMM)(Auto-range is preferred; ensure DCV/ACV modes are clearly labeled.)
- Red and black test leads with insulated probes(Probe tips insulated; inspect for wear before use.)
- Safety goggles(Eye protection when probing energized circuits.)
- Non-conductive work surface or mat(Helps prevent accidental shorts during testing.)
- Alligator clip adapters (optional)(Useful for hands-free testing on crowded layouts.)
- Non-metallic insulated gloves (optional)(For dry environments and lower-risk measurements.)
Steps
Estimated time: 15-25 minutes
- 1
Prepare safety and test environment
Inspect the test area for moisture, frayed wires, and loose connections. Ensure you’re wearing eye protection and that the circuit you’ll test is accessible without forcing you to touch live conductors. Confirm the device under test is de-energized when possible and that capacitors are discharged if instructed by the schematic.
Tip: Double-check that your work surface is non-conductive before touching any probes. - 2
Set up the meter and connect the leads
Turn on the multimeter and insert the black lead into COM and the red lead into the V/Ω jack. If your meter has a dedicated DCV/ACV switch or auto-range, set it accordingly. Ensure leads are firmly seated and that tips are clean.
Tip: Verify the leads are fully seated to avoid intermittent readings. - 3
Choose the measurement mode and range
For most beginners, use auto-range to let the meter select a suitable scale. If your meter is manual-range, start at a conservative high range and step down until you get a stable reading. Decide between DC for DC power rails and AC for mains or AC circuits.
Tip: If in doubt, default to a higher range to prevent range overload. - 4
Probe the test points safely
Place the black probe on the reference point (ground or negative) and the red probe on the test point. Do not move the probes while the circuit is live to avoid shorting or spark formation.
Tip: Keep fingers behind the probe bodies and avoid touching metal tips. - 5
Read and interpret the display
Read the voltage value on the display. For DC, remember polarity: the red probe indicates positive potential relative to the black probe. For AC, understand that the display may show an RMS value or an average depending on the meter.
Tip: Cross-check with a known reference if available. - 6
Power down and disconnect
After recording the measurement, remove the probes, turn off the meter, and return leads to their storage. If you measured a circuit in a live environment, follow safe shutdown procedures and document readings for future reference.
Tip: Store equipment in a dry, cool place away from direct sunlight.
Your Questions Answered
What is the difference between DC and AC voltage when measuring with a multimeter?
DC voltage is steady and unidirectional, while AC voltage alternates in value and direction. Your meter may display a direct readout for DC and an RMS value or average for AC depending on the feature set of the device.
DC is steady; AC fluctuates. Use DCV for DC circuits and ACV for mains or AC circuits, following your meter’s guidance.
Can I measure live mains voltage with a multimeter?
Yes, you can measure live mains voltage with a multimeter, but you must follow strict safety steps: use the correct probes, keep your hands away from metal tips, wear PPE, and consider using a category-rated meter for high-risk environments.
Only if you’re trained and equipped with proper safety gear and a meter rated for mains testing.
What should I do if the meter shows 0V where voltage is expected?
Check probe contact, ensure the circuit is powered, verify the correct mode and range, and re-test. Poor contact, wrong range, or a disconnected point are common causes of zero readings.
Recheck your connections and try a different range if your meter allows it.
How do I test a car battery with a multimeter?
Set the meter to DC voltage, place the red probe on the positive terminal and the black on the negative. A healthy 12V car battery should read around 12.6V when rested. A lower voltage indicates discharge or aging.
Measure at a resting state, not immediately after heavy usage or charging.
Why does my reading change when I move the leads?
Loose leads or poor contact can cause fluctuating readings. Ensure the probes are securely connected and that you’re testing stable points in the circuit.
Make sure the probes are firmly connected and not touching each other.
Is auto-range safer than manual-range for beginners?
Yes. Auto-range meters reduce the risk of selecting a range that’s too low and potentially damaging the meter or misreading the voltage. Manual-range users must pick the correct high-to-low sequence.
Auto-range takes the guesswork out and helps prevent mistakes.
Key Takeaways
- Measure voltage with accuracy by using proper modes and ranges
- Always establish a safe, isolated test point before probing
- Read the display carefully and note polarity for DC tests
- Power down and store tools properly after measurement