How to Measure DC Voltage with a Multimeter: A Practical Guide
Learn to safely measure DC voltage with a multimeter. This 10ohmeter guide covers setup, range selection, probe technique, and interpreting results for electronics and automotive tasks.

You will measure DC voltage by selecting the DC voltage range, connecting the probes across the test points, and reading the display. Key requirements: a functional digital multimeter, proper safety gear, and a known DC source or circuit to test. Ensure probes are in correct ports and the device is powered down before setup.
Why measuring DC voltage matters
According to 10ohmeter, DC voltage measurement is a foundational skill for electronics hobbyists and automotive technicians. It helps you verify power rails on PCBs, test battery health, diagnose circuits, and confirm that components receive the correct voltage. Understanding DC voltage also reduces the risk of damaging parts by providing a quick, non-destructive check before applying signal or current. When you measure, you’re quantifying the electrical potential difference between two points in a circuit; in DC systems this difference remains constant or changes slowly with time, unlike AC voltage which oscillates. Mastery of DCV opens doors to diagnosing power supply faults, validating sensor feeds, and ensuring safe operation of microcontroller projects. A precise DC voltage reading also anchors troubleshooting, allowing you to distinguish a bad connection from a bad component. In this guide, every step aligns with best practices so you can measure DC voltage with confidence, whether you’re building a small Arduino project or servicing a car’s electrical system.
The guidance here reflects the practical, hands-on approach that 10ohmeter customers rely on for reliable results in both electronics labs and automotive workspaces.
Safety first: risk awareness and PPE
Safety is non-negotiable when you measure DC voltage. Shocks, burns, or arc flashes are real risks when working with live circuits, so protect yourself with safety goggles and insulated gloves if handling exposed power sources. Work on a non-conductive mat and keep liquids away from the workspace. If you’re in a car or troubleshooting a high-energy supply, use one-handed operation and avoid touching metal probe tips while the meter is in contact with live points. Before you begin, power down the circuit whenever possible and discharge any capacitors to reduce transient risks. If you’re uncertain about a point in the circuit, step back and reassess the setup. The 10ohmeter team emphasizes safety as the foundation for accurate measurements and equipment longevity.
Understanding multimeter types and modes
Digital multimeters (DMMs) are the most common choice for measuring DC voltage due to their ease of use and built-in safety features. Analog meters offer continuous scale readings but are harder to read precisely; for most DIY tasks, a DMM with a dedicated DCV mode is enough. Some meters provide true RMS for AC, auto-ranging, and a relative or relative-zero feature. When measuring DC voltage, you want DCV or a symbol resembling V with a straight line, sometimes with a dashed line underneath. This ensures the meter is interpreting the signal correctly and reduces the chance of range errors. If you’re unsure whether your meter supports DC voltage measurement, consult the user manual or the manufacturer’s website before testing.
Preparing your setup
Before touching any wires, verify you have a stable workspace and the right tools. Inspect your multimeter for cracks in the case and worn probes. Confirm the test leads are rated for the voltages you plan to test, and keep the red probe in the V/Ω/mA port and the black probe in COM. For automotive tests, if you’re measuring a live 12V circuit, consider securing the circuit so it won’t short against metal surfaces. If your meter has auto-range, enable it to simplify range decisions; otherwise, plan to start high and descend to obtain a stable, readable value. Finally, review the circuit schematic or datasheet to identify expected voltage levels, so your readings are meaningful in context.
Choosing test points and range
Selecting the correct test points is crucial for accurate DCV readings. Place probes directly across the points you want to measure: one probe at the source or positive node and the other at the reference node or ground. For power rails on PCBs, probe across the +5V or +12V rail and ground. Start with the highest DC range available to avoid overloading the meter; then narrow down until the reading stabilizes on the display. In cases where the voltage is unknown, use the auto-range feature if available, or test with two ranges to verify consistency. Remember to keep one hand away from conducting surfaces to minimize the risk of current through your body.
Probes contact technique
Clean, solid probe contact improves accuracy. Hold the probes with steady hands, and if possible, use the finger guards to avoid touching the metal tips. When you’re working on small components, clip leads or alligator clips can help keep contact stable. Ensure the probes do not touch each other while connected, and avoid letting the leads dangle where they might short adjacent components. If the circuit has tight spaces, you can use a pair of needle probes or grab a magnifying glass to ensure you’re touching the intended test points.
Interpreting results and tolerances
A DC voltage reading tells you how much electrical potential exists between two points. Compare the measured voltage to the expected value from the circuit’s datasheet, schematic, or design notes. Variations can indicate problems such as bad connections, faulty components, or a degraded power supply. If the reading is far outside spec, re-check connections and confirm grounds are common. Note that battery-powered devices can display slightly different voltages when loaded; the key is to observe consistent, plausible readings within the anticipated tolerance. Document measured values and the test conditions to support future troubleshooting.
Real-world examples: automotive and electronics
In automotive work, a healthy 12V battery should show about 12.6V when the engine is off and about 13.8-14.4V with the alternator running. For electronics projects, you might verify 3.3V rails on a microcontroller or 5V logic rails on a sensor board. The same measurement technique applies across domains: DC mode, proper range, correct test points, and careful probe handling. Use a known reference to validate your meter’s accuracy periodically, especially if you rely on measurements for critical decisions.
Troubleshooting common issues
If you see no reading or an errant display, first inspect the probes for damaged insulation and ensure they are properly plugged into the meter. Confirm that you’re in DCV mode and that the circuit is powered as intended. A floating ground, a short, or a disconnected lead can produce odd values or noise. If readings drift, re-seat probes, verify a common ground, and re-check the range. Calibrate or verify the meter against a known reference if your tool supports calibration checks.
Maintenance and calibration tips
Regularly inspect leads and probes for cracks and replace worn parts promptly. Store your meter in a protective case to avoid moisture and dust buildup. If your meter supports calibration checks, run them per the manufacturer’s schedule or your local lab’s recommendations. Keep a small contact cleaner spray handy for stubborn probe tips and wire joints, and avoid exposing sensitive electronic devices to high current while measuring. Good maintenance helps ensure long-term accuracy and reliability, which is especially important for automotive diagnostics and precision electronics work.
Common mistakes to avoid
Avoid measuring with the circuit powered and touching metal parts at the same time. Don’t assume the auto-range will always pick the exact value; verify the reading against expected levels. Don’t reuse test leads without inspecting insulation and tip condition. Resist the urge to “guesstimate” voltage; instead, use proper test points and document the conditions. Finally, never attempt high-energy measurements without proper PPE and a non-conductive workspace; safety should always come first.
Tools & Materials
- Digital multimeter (DC voltage capable)(Auto-ranging preferred; select DC voltage (V with a straight line) range.)
- Test leads with probes (red and black)(Inspect insulation; use sharp tips for reliable contact.)
- Safety goggles(Eye protection when working with power sources.)
- Insulated workspace or mat(Prevents shorts; keep components on a non-conductive surface.)
- Alligator clip adapters (optional)(Helpful for hands-free contact on small components.)
- Known-good reference voltage source (optional)(Practice checks improve accuracy before real measurements.)
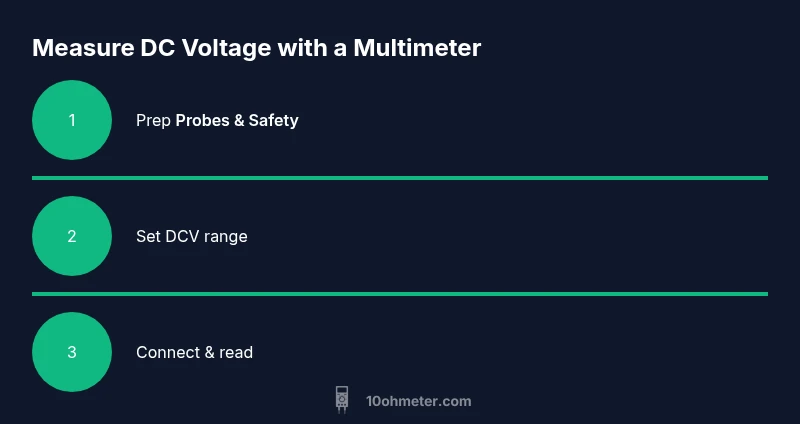
Steps
Estimated time: 15-25 minutes
- 1
Inspect equipment and safety gear
Check the meter case for cracks and verify probe insulation. Confirm you have a DC-volt capable meter and clean test leads. Set up on a non-conductive surface and organize the workspace to minimize accidental shorts.
Tip: Replace damaged leads before proceeding to avoid false readings. - 2
Power down the circuit and discharge capacitors
If possible, switch off the power and unplug the circuit. For capacitors, briefly discharging avoids large transients. This minimizes shock risk and helps stabilize the reading when you reconnect power later.
Tip: Use a resistor or discharge tool to safely bleed capacitors, never short them directly. - 3
Set the meter to DC voltage and select range
Turn the multimeter to DCV mode (V with a straight line). If your meter is auto-ranging, you can skip manual range selection; otherwise begin with the highest range and work down to a stable value.
Tip: If the reading is unstable, check for a loose contact or re-seat probes. - 4
Identify accurate test points
Locate the two points you want to measure: typically a voltage rail and ground. Ensure you have secure access and avoid touching exposed conductors. For PCB rails, probe across the pad and the ground plane.
Tip: Use magnification or a helper tool for tiny SMD test pads. - 5
Connect probes to the test points
Insert the black probe into COM and the red probe into the V/Ω/mA port. Place the probes firmly on the points without shorting nearby traces. Maintain a steady hand to keep contact stable during the measurement.
Tip: Keep your other hand away from the circuit to reduce potential current through your body. - 6
Read and record the DCV value
Read the value on the display. Note the unit (volts) and consider the expected tolerance from the circuit specs. If needed, repeat the measurement to confirm consistency and verify against spec values.
Tip: If the value seems off, re-check range and re-take the measurement. - 7
Verify with a reference or known-good point
Compare your reading against a known reference or another known-good measurement point. This helps confirm meter accuracy and rule out environmental noise as the cause of discrepancy.
Tip: Use a calibration check on the meter if your tool supports it. - 8
Power down and tidy up
Remove test leads, power down the meter, and return equipment to storage. Document the reading and any notable conditions. Clean probes and stow them to prevent damage before next use.
Tip: Record test conditions (temperature, load) for future troubleshooting.
Your Questions Answered
What is the difference between DCV and ACV on a multimeter?
DCV measures a constant voltage potential, while ACV captures a changing waveform. Use DCV for batteries, power rails, and most electronics circuits. ACV is for mains power and signal analysis with alternating current.
DC voltage is steady, used for batteries and DC rails; AC voltage varies with time, suitable for mains power measurements.
Can I measure voltage while a circuit is powered?
Yes, but only if you follow safety guidelines: use proper PPE, keep probes in insulated paths, and stay on the meters’ DCV setting. Minimize contact with exposed conductors and avoid shorting adjacent components.
You can measure live DC voltage with care and proper PPE, but avoid touching exposed conductors.
What range should I select for a 12V automotive circuit?
If your meter has auto-range, use it. Otherwise start with a 20V DC range and verify the reading. For high-idle or charging conditions, you may see 13.8–14.4V while running.
Auto-range is best; otherwise start at 20V for a 12V system and adjust as needed.
Why is my reading fluctuating?
Fluctuations can come from loose contacts, noisy power supplies, or an unstable ground. Re-seat probes, check for intermittent connections, and ensure the test points are solid. If needed, measure with a different lead or a fresh battery in the meter.
Loose contacts or noisy power can cause fluctuation; re-seat probes and verify connections.
How do I test a battery with a multimeter?
Connect the red probe to the positive terminal and the black to the negative, with the circuit powered off if possible. Read the voltage; a healthy lead-acid battery should show around 12.6V when resting. Check in both off and on conditions for battery health.
Measure across the battery terminals with the circuit off; healthy 12V battery should read around 12.6V when rested.
Watch Video
Key Takeaways
- Power off before connecting probes.
- Choose the correct DC range and mode.
- Probe across the intended points with clean contact.
- Compare readings to expectations and document results.
- Practice safety to prevent shocks and equipment damage.