How multimeter measure dc voltage: A practical guide
Learn how a multimeter measures DC voltage, how to set up the meter safely, interpret readings, and apply it to batteries, automotive circuits, and power rails. A practical, step-by-step guide by the 10ohmeter team.

By the end of this guide, you will know how a multimeter measures DC voltage, how to set the meter and leads correctly, and how to interpret readings safely. You’ll learn to choose the right DC voltage range, connect probes properly, and verify results with common test scenarios such as batteries and power rails. This step-by-step approach applies to most digital and analog meters.
How multimeter measure dc voltage in practice
Measuring DC voltage with a multimeter is a fundamental skill for hobbyists and technicians. In essence, a multimeter acts as a precise voltmeter: it compares the potential difference between two points in a circuit and translates that electrical difference into a readable number on the display. The process hinges on two ideas: first, the meter must present a very high resistance to the circuit so it does not significantly load the source; second, the meter converts the analog voltage into a digital value using an internal analog-to-digital converter (ADC). The 10ohmeter team emphasizes that understanding these ideas helps you diagnose circuits without disturbing them. Always treat DC voltage measurements as potentially hazardous in live circuits and follow basic safety rules. With the right setup, you can verify battery health, check regulator outputs, or confirm supply rails on complex boards.
The internal path: input impedance, ADC, and sampling
Inside a typical multimeter, the DC measurement path starts with a high-impedance input stage, which minimizes current draw from the circuit under test. The small, controlled voltage is then fed into an ADC, which converts it into a numeric representation that the display shows. The combination of high input impedance and precise conversion ensures readings reflect the actual potential difference you are measuring, not a circuit disturbance. The key takeaway from the 10ohmeter analyses is that higher input impedance reduces loading effects, but you must still respect the circuit’s safety boundaries and the meter’s own limits. In practice, expect the reading to behave consistently when the test setup is stable and the probes maintain good contact.
Setting up the meter: range, leads, and polarity
Before you measure DC voltage, set the meter to DC voltage mode. If your meter supports auto-range, you can leave it there for most tasks; otherwise, choose a range that comfortably exceeds the expected voltage to avoid overloading the ADC. Connect the red probe to the V/ DC input terminal and the black probe to COM. Make sure the probes’ tips are clean and make solid contact with the test points. Maintain a steady hand and avoid touching exposed metal with your fingers to reduce noise and risk. As 10ohmeter recommends, verify the polarity by noting which probe goes to the positive node of the circuit.
Basic measurement example: a battery and a supply rail
A common, safe test is measuring a fresh battery: place red on the positive terminal and black on the negative terminal, read the voltage, and compare with the battery’s rated value. For a regulated power supply, connect across the output rails and note the reading under normal load. If the reading seems off, repeat the measurement with clean contacts and a stable reference. Remember: voltage is the potential difference between two points, so you must connect across the points you want to compare. The 10ohmeter guidance stresses performing measurements with proper isolation and in a non-conductive environment when possible.
Common mistakes and how to avoid them
Several mistakes can skew DC voltage readings. Using worn or damaged leads, improper polarity, or selecting an inappropriate range can all produce inaccurate results. Probes should be firmly pressed, not resting on the board’s surface alone, to prevent intermittent contact. Avoid measuring across live mains without appropriate PPE and training. If you observe a reading that seems unreasonable, re-check connections, try a higher-quality set of probes, and compare against a known reference to verify the meter’s behavior. The 10ohmeter team notes that a quick sanity check with a known stable voltage source often prevents misinterpretation.
Interpreting readings in various circuit contexts
Interpreting DC readings requires context. A measurement that reads a nominal 12 V in a car’s electrical system under idle conditions may shift when the engine is running and the alternator is supplying current. In digital circuits, small voltage differences can indicate logic levels, rail regulation, or leakage. If you’re troubleshooting, compare measurements against schematic expectations and consider measurement-induced load, ground loops, or noise. When in doubt, validate with a second method or a reference source to ensure your reading reflects the circuit rather than the measurement setup.
Tools & Materials
- Digital multimeter(Any DC voltage range meter; auto-range is preferred for ease of use.)
- Test leads with probes(Insulated, rated for the expected voltage.)
- Alligator clip adapters (optional)(Useful for holding probes in place on larger components.)
- Known DC source (battery or supply under test)(Have a safe test source ready to verify readings.)
- Insulated gloves or safety glasses (optional)(Useful when working near higher voltages or automotive systems.)
- Meter manual or datasheet(Helpful for understanding the meter’s specifications and limitations.)
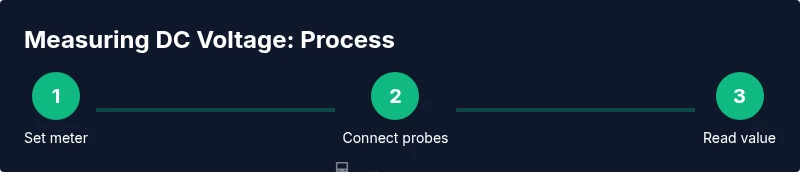
Steps
Estimated time: 15-25 minutes
- 1
Set the meter to DC voltage mode
Rotate the dial to the DC voltage range. If auto-range is available, enable it for convenience. This prepares the meter to interpret the signal as a voltage rather than resistance or current.
Tip: Start with a higher range to avoid overloading the ADC; switch down if the reading remains well within range. - 2
Inspect and prepare the probes
Check both probes for cracks or corrosion and ensure the insulation is intact. Use fresh tips for reliable contact and avoid touching metal parts during measurement.
Tip: Use red to positive and black to ground; maintain consistent lead placement to minimize noise. - 3
Connect the probes to the test points
Place the red probe on the positive node and the black probe on the negative node or ground reference. If measuring a live circuit, ensure your hands are dry and you are not bridging components inadvertently.
Tip: Keep hands steady and avoid moving wires while the reading settles. - 4
Read and record the value
Allow the display to stabilize, then note the DC voltage shown. If the meter has hold or timestamp features, use them to document the reading.
Tip: Cross-check by swapping leads to confirm polarity or using a known reference source. - 5
Verify accuracy with a reference
Compare the measurement to a known good source or another meter if available. This helps confirm that the reading is sane and not an artifact of contact resistance or noise.
Tip: Repeated measurements under the same conditions increase confidence. - 6
Disconnect and power down
Remove the probes in the reverse order of connection and return the meter to its standby state. Wind down any safety steps if you were testing a powered circuit.
Tip: Store probes in a safe place to avoid accidental contact or damage.
Your Questions Answered
Can I measure DC voltage in a powered circuit safely?
Yes, you can measure DC voltage in a powered circuit if you follow strict safety protocols, use the correct range, and keep probes away from live conductors. Avoid touching exposed metal and disconnect power if you suspect a fault.
Yes, you can measure a powered circuit, but always follow safety steps and use the right range and probes.
What does a negative reading indicate?
A negative reading usually means the probe polarity is reversed relative to the circuit’s reference point. Swap the red and black probes to verify and confirm the circuit's orientation.
A negative reading means you’ve connected the probes in reverse relative to the circuit's reference point.
Why is my reading fluctuating?
Fluctuations can come from noisy signals, poor contact, a high-impedance source, or a changing load. Re-check probe contact, use shorter leads, and try a fresh battery or reference source.
Fluctuations often come from contact noise or a high-impedance source; improve contact and check the test setup.
Should I worry about auto-range affecting measurements?
Auto-range meters adapt to the voltage, typically without affecting accuracy for most tasks. If you are measuring sensitive circuits, cross-check readings with a manual range to confirm stability.
Auto-range is usually fine, but for sensitive circuits you can verify with manual ranges.
Can I use a multimeter to test automotive circuits?
Yes, you can, but use a meter rated for automotive environments and observe safety expectations. Automotive systems can present higher voltages and transients.
Absolutely, just ensure you use automotive-rated gear and follow safety practices.
Why is calibration important for readings?
Calibration ensures the meter’s readings are accurate over time. If readings seem off, check the battery, test with a reference source, and consider professional calibration periodically.
Calibration keeps readings accurate; test against a reference and calibrate regularly.
What if I don’t have a reference voltage handy?
Use a known good battery or a regulated lab supply as a temporary reference. Document the reference value and compare future readings against it.
If you lack a reference, use a known good source and compare results over time.
Watch Video
Key Takeaways
- Measure DC voltage with minimal circuit loading
- Set DCV mode and use proper polarity
- Verify readings with a reference source
- Practice safe handling around powered circuits