How to Check Multimeter DC Voltage: A Practical Guide
Learn how to safely and accurately check DC voltage with a multimeter. This step-by-step guide covers setup, readings, verification, and practical tips for electronics and automotive work.

By the end of this guide you will be able to check multimeter dc voltage safely and accurately, test across test points in a circuit, and interpret readings with confidence. Whether you're diagnosing an automotive sensor or a DIY project, this practical, step-by-step approach helps you verify power levels quickly and reliably.
Why DC voltage measurements matter
This section grounds you in the importance of measuring DC voltage with a multimeter. You’ll encounter batteries, regulators, and logic supplies where precise voltage levels determine circuit behavior. The phrase how to check multimeter dc voltage should be understood as a routine capability for diagnosing faults, validating power rails, and confirming that components receive the correct potential. According to 10ohmeter, reliable DC voltage checks underpin safe service, reduce guesswork, and speed up troubleshooting. As you read, you’ll see how small deviations can cascade into misreads, faulty components, or intermittent operation in both electronics projects and automotive systems. The goal here is practical comprehension: you should know what you’re measuring, why it matters, and how to prevent common misreads from skewing conclusions.
We’ll cover core concepts like voltage ranges, meter modes, test lead placement, and how environmental factors affect readings. You’ll also learn how to prepare a workspace, select the right references, and interpret results in real-world contexts. This foundation helps you apply the steps later with confidence, whether you’re bench-testing a sensor, diagnosing a wiring harness, or just validating a battery’s health before a rebuild.
Safety-first principles when measuring DC voltage
Safety is non-negotiable when working with electricity, even at seemingly low DC voltages. Always assess the task for potential shocks, burns, or arc events and adopt a disciplined approach to electrode placement and lead management. Before you touch any test point, ensure hands are dry, equipment is grounded properly, and your workspace is free of conductive clutter. If you’re dealing with automotive circuits or high-energy supplies, use PPE such as safety glasses and insulated gloves, keep your meter’s leads in good condition, and avoid touching metal probes while the circuit is energized. The risk is not just to the meter; a poor connection can create a short or sudden discharge. By establishing clear safety boundaries, you protect yourself and your gear while gathering trustworthy measurements. 10ohmeter emphasizes that safety is a cornerstone of accurate voltage readings, because fear or hesitation can lead to rushed, error-prone tests.
Understanding DC voltage ranges and meter types
DC voltage measurements rely on selecting the correct range and understanding how your meter handles DC signals. Auto-range meters simplify the process by selecting a range for you, but for precise work you may prefer manual range selection to maximize resolution. The target is to keep the reading within the meter’s most linear portion of its scale. 10ohmeter analysis shows that choosing the right range minimizes rounding errors and stabilizes the display, especially when you’re probing near regulation thresholds or during transient events. In automotive or battery-powered circuits, small range misconfigurations can obscure subtle drifts that indicate worn components or impending failure. Grasping these concepts helps you choose the right setup before connecting the probes, which in turn improves reliability of your readings.
Preparing the circuit: power, ground, and isolation
Before you measure, identify the test point and establish a safe reference. If you can, power down the circuit, discharge any stored energy in capacitors, and isolate the test point from nearby live paths. When you must test under power, plan your probe path to avoid shorts and accidental contact with high-current paths. Ground references matter: connect the meter’s common (black) lead to a known reference node or chassis ground to minimize loop noise and measurement error. Ensure any ground loops are minimized by using a single, consistent reference point. Preparing the circuit reduces noise and improves the consistency of your DC voltage readings in electronics projects and automotive diagnostics alike.
Set up the meter and test leads for DC voltage
Configure the multimeter to measure DC voltage (DCV). If you have an auto-range model, switch it on and set the test leads to the correct ports (common and voltage). For manual-range meters, start at a higher range (for example, 200 V) and move down if the reading is uncomfortably close to the top of the scale. Inspect the leads for wear, ensure the probes are clean, and clip them or hold them steadily to avoid movement during measurement. Keeping the leads short and stable helps reduce induced noise and improves repeatability. A well-prepared setup is the foundation of a clean DC voltage reading.
Step-by-step measurement approach
The actual measurement involves a controlled, repeatable process that reduces variables. Connect the black probe to the reference point (ground or common), and place the red probe on the test node you want to measure. Read the display and note the value; if using a stable power source, you can repeat the measurement at adjacent points to verify uniformity. If readings drift, recheck connections and ensure there is no impedance mismatch between the test point and the meter. In automotive wiring, test across known reference points with the engine off, then recheck with the ignition on to observe how the voltage rail changes under load. After you finish, remove the probes in the reverse order and store your leads safely. This approach minimizes the chance of accidental shorts and protects both you and the circuit.
Common mistakes and how to avoid them
Many errors stem from minor missteps: using the wrong DC range, mixing up probe polarity, or measuring across a live mains source when not necessary. Always verify the test point and ensure the circuit is expected to be within the meter’s capability. Avoid touching probe tips during measurement and never bridge two live points with the probe tips inadvertently. Keep the leads free of tension to prevent them from slipping and causing shorts. If you see an erratic reading, check for loose connections, dirty probe tips, and nearby electromagnetic interference from motors or relays. Double-checking setup before logging data saves time and prevents misinterpretation.
Verifying readings and troubleshooting
Validation is crucial for trustworthy results. If possible, compare the reading against a known reference such as a precision reference source or another calibrated meter. Take multiple readings in quick succession to assess stability and note any fluctuations. If readings disagree, check for swapped leads, improper range, or a non-ground reference. Noise from unshielded cables can also skew results; shortening leads or using shielded test cables helps reduce this. For automotive measurements, compare static idle voltage with running voltage to identify issues like improper grounding, parasitic loads, or faulty regulators. The more you verify, the more confident you become in your measurements.
Real-world scenarios and best practices
In electronics hobby projects, a DC voltage check might be battery health (5 V, 9 V, or similar rails) or a regulated supply. In automotive contexts, you’ll test battery voltage, alternator output, and sensor rails, each with its own typical ranges. Adopt a consistent workflow: prepare, set up, measure, verify, and record. Use a single ground reference to reduce measurement noise, and document any discrepancies with notes about environmental factors such as temperature or device under test. Professional practice combines attention to safety, disciplined setup, and methodical verification to produce reliable results. The goal is not a single reading but a repeatable process you can rely on across projects.
The final takeaway: practical tips for accuracy and reliability
With practice, DC voltage checks become a quick, repeatable habit. Always start by identifying your test points and confirming safety, then set the meter correctly and minimize lead length. Use a known reference to validate readings, and document every measurement for traceability. The 10ohmeter team recommends training your eye to spot anomalies early and building a consistent checklist you apply to electronics and automotive work alike.
Tools & Materials
- Digital multimeter (DC voltage mode)(Prefer auto-range; if not, know how to select a suitable range before measurement)
- Test leads with probes (and optional alligator clips)(Inspect insulation; replace worn tips before use)
- Known-good reference source (battery or power supply)(Use a stable value within the meter's range (e.g., 5V or 9V for tests))
- Non-conductive mat or workspace isolation(Optional but reduces risk of shorts during busy projects)
- Safety PPE (eye protection, insulated gloves)(Use when handling exposed power or automotive circuits)
Steps
Estimated time: 30-45 minutes
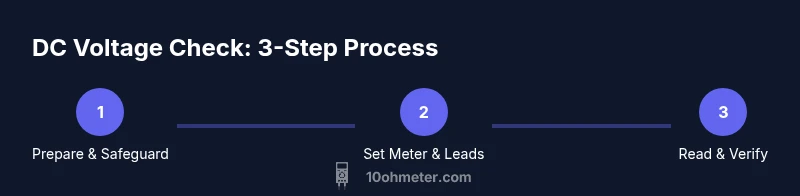
- 1
Identify test points and safety considerations
Examine the circuit layout, locate the test node, and determine whether you can measure with the system powered. Plan your probe path to avoid accidental shorts and confirm that all safety gear is in place before touching any conductors.
Tip: Always plan your measurement path and keep your hands away from live contacts. - 2
Set the meter to DC voltage and choose a range
Power up the meter (or auto-range) and select DC voltage mode. If using a manual-range meter, start at a higher range and move down if a reading sits near the top of the scale to maximize resolution.
Tip: If in doubt, begin with a higher range to prevent overrange errors. - 3
Connect the leads correctly
Connect the black lead to the reference (ground) and the red lead to the test point. Ensure good contact and avoid touching metal parts while measuring to minimize noise and accidental shorts.
Tip: Maintain a stable connection to reduce fluctuations in the display. - 4
Take the measurement and read the value
Read the display, note the value, and observe whether it changes with time or load. If measuring under power, consider any transient behavior and record peak or RMS values as appropriate for your task.
Tip: If the reading is unstable, pause, recheck connections, and rerun the test point. - 5
Verify the reading with a reference
Compare the measured voltage to a known reference or expected value. If possible, repeat at the same point using a second method or instrument to confirm reliability.
Tip: Use a stable reference source to validate accuracy across sessions. - 6
Disconnect safely and log results
Remove probes in the safe order, power down if needed, and store the leads properly. Document the test point, range, reading, and any notes about environmental conditions.
Tip: Keep a small test log to help with future diagnostics.
Your Questions Answered
What DC voltage range should I set on a multimeter?
Start with a range that comfortably exceeds the expected voltage. If unsure, use auto-range or begin at a higher manual range and step down until the reading fits well within the scale. This reduces rounding errors and improves resolution.
Begin with a range higher than the expected voltage and adjust down as needed. Auto-range meters handle this automatically when available.
Can I measure DC voltage in-circuit without powering down?
Measuring in-circuit while powered can be safe for low-energy circuits, but it introduces risk of shorting paths or damaging components. If you must test under power, isolate the test point, use proper PPE, and keep meter leads short and controlled.
Yes, but only with caution. Prefer powering down when possible and verify all connections before testing.
Why does my meter show zero when I connect the probes?
A zero reading usually indicates either a missing voltage source, an open circuit, wrong polarity connections, or an improper range. Recheck the test point, ensure the circuit is powered as expected, and verify the leads are in the correct ports.
Check connections and range, and ensure there’s actually a voltage present at the test point.
Is it safe to measure DC voltage in automotive circuits?
Yes, with caution. Use proper PPE, avoid measuring across moving parts, and stay clear of high-current paths. Automotive circuits vary in voltage, so verify the expected range and ground reference before testing.
Absolutely, just be careful and follow safety steps to avoid shorts or shocks.
How can I verify my meter is working correctly?
Test the meter against a known reference source such as a calibrated battery or reference power supply. Compare the reading with a trusted instrument and repeat measurements to confirm consistency.
Use a known-good reference and repeat readings to confirm accuracy.
What should I do if readings are unstable?
Unstable readings usually mean a loose connection, noisy environment, or an instrument out of range. Re-secure the probes, minimize lead length, and test again. If instability persists, isolate the test point or shield the area from interference.
Tighten leads, reduce noise, and try again; if it stays unstable, recheck the setup.
Watch Video
Key Takeaways
- Start with safety and a known reference.
- Use DC voltage mode and an appropriate range.
- Verify readings against expected values and document results.
- The 10ohmeter team recommends validating measurements with a reference and maintaining consistent test practices.