How to Check 240 Voltage with a Multimeter
Learn to safely measure 240 voltage with a multimeter. This step-by-step guide covers safety, meter settings, testing techniques, and troubleshooting for accurate mains-voltage readings in home projects.

In this guide you will learn how to check 240 voltage with a multimeter safely and accurately. You will verify mains voltage on AC circuits or outlets using a true RMS meter, proper test leads, and appropriate safety precautions. Follow the steps to select the right range, connect probes correctly, and interpret readings.
Why measuring 240 voltage with a multimeter matters
Measuring mains voltage is a foundational skill for DIY enthusiasts and technicians working with electronics or automotive systems. In many homes and shops, 240V AC powers heating elements, air conditioning, and other high-demand devices. Verifying that the supply is present and within expected range helps protect equipment from under- or over-voltage conditions and reduces the risk of shocks or arcs when you service or modify wiring. The 10ohmeter team emphasizes that safety, accurate readings, and repeatable methods are essential parts of any measurement routine. Before you begin, you should know what you are testing, where you are testing, and how your meter behaves under real-world conditions. With the right approach, you can confirm that your outlet, switch, or panel provides a stable voltage, and you can document results for future reference. This section prepares you to perform the check confidently, using a method that minimizes hazards and maximizes reliability while staying aligned with best practices in electrical work.
Understanding AC voltage, true RMS, and meter ratings
AC voltage describes a fluctuating electrical potential that alternates polarity. When you encounter 240V mains, the actual instantaneous voltage swings around that nominal value. A true RMS meter measures the effective voltage, which yields readings that reflect how devices behave under load, especially when nonlinear electronics or motors are involved. Many inexpensive meters use a basic average-responding circuit that can understate or overstate voltages with non-sinusoidal waveforms. For precise work on higher-voltage circuits, a meter with true RMS capability and adequate CAT safety ratings is recommended. The meter's safety category (CAT II, CAT III, etc.) indicates what types of circuit protection it has and what kinds of probes and accessories are permitted for measuring lines, outlets, or panels. By understanding these concepts, you will choose the right tools and interpret results correctly, reducing misreadings and unnecessary troubleshooting later in the project.
Tools, safety gear, and workspace setup
Before you test, gather the essentials and prepare your workspace for safe operation. Use a meter with true RMS capability and a CAT-rated probe set designed for mains work. Keep your workspace dry, uncluttered, and well-lit. Wear safety glasses and insulated gloves to minimize the risk of shock, arcing, or accidental contact with energized parts. Place the meter on a non-conductive surface, away from metal tools, and keep fingers clear of the probes when power is on. If you have access to a non-contact voltage tester, you can verify that a circuit is live before touching exposed conductors—though a tester is not a substitute for proper probe technique. Finally, confirm that you know the outlet or terminal you’ll test, and have a backup plan if power must be shut off. These precautions reduce hazards and create a repeatable, safe measurement environment.
Preparing the meter and test leads
Set up the multimeter according to the user manual and in a clean environment. Insert the black probe into the COM jack and the red probe into the V/Ω jack. Configure the meter to AC voltage and select a range that encompasses the expected 240V, preferably a 600V or higher setting. Inspect the test leads for any cracks or exposed conductors. Ensure the probes have secure, insulated handles and that the tip shields are intact. If your meter supports auto-ranging, enable it; if not, choose a fixed range that won’t clip the display. Calibrate or sanity-check the meter against a known live outlet if you have one available. Finally, confirm your PPE and workspace readiness before you connect probes to a live circuit. This preparation helps prevent false readings and protects you from accidental contact.
Step-by-step guide: how to check 240 voltage with a multimeter
This section provides a clear walk-through of the measurement process, written to be easy to follow in the field. Start with power-off checks where possible; if you must test live, proceed carefully with all protective equipment. Step-by-step actions are designed to minimize risk while delivering reliable data. First, re-confirm the circuit status using a non-contact tester and visually inspect the outlet or terminal for signs of damage or heat. Next, position yourself so you can access the two measurement points with a stable stance. Then, apply the probes as described in the preparation step, ensuring one probe contacts the hot conductor and the other the neutral or ground, depending on your test point. Finally, read the display, compare with the expected 240V, and record the result. If readings are inconsistent, repeat the test on a different outlet on the same circuit to rule out a flaky connection. Always power down after completing the check and store the equipment safely.
Verification and accuracy checks
To validate your measurement, repeat the test on a known reference outlet in the same area or on an identical circuit. Compare readings across multiple outlets and note any deviations. If you see a wide spread or a value far from 240V, inspect connections, test leads, and fuses in the meter. If the test point is an appliance or switch rather than a fixed outlet, ensure the device is off and that you are measuring across the correct terminals. Document the results with date, location, circuit identification, and meter model. Over time, this practice builds a reliable baseline and helps you spot drift that could indicate a problem with wiring, breakers, or the panel.
Common mistakes and how to avoid them
Common errors include using an incorrect voltage range, touching metal parts of the probes, testing on a live circuit without PPE, and misidentifying the measurement points. Always confirm you are testing live or de-energized before touching conductors, and avoid testing with damp or sweaty hands. Using a meter that lacks true RMS can produce misleading numbers when the circuit has harmonics or non-linear loads. Ensure the test leads are in good condition and rated for mains voltage; damaged leads can arc or fail during high-voltage testing. Finally, never assume a reading from a single test—verify with another outlet or test point to confirm consistency.
Safety after testing and documentation
After you complete testing, switch off the meter, disconnect probes, and store all equipment in a dry, secure place. Label any findings and store notes with circuit details for future projects. If you discovered a fault or unusual voltage, plan a follow-up assessment or consult a licensed electrician. Maintaining organized records helps with future maintenance and safety audits, and it supports reproducible results in your own electronics and automotive work.
When to call a professional
If you are unsure about any step, observe signs of overheating, scorching, or burning smells, or encounter readings that do not align with expected values, it is prudent to contact a professional. Electrical work at 240V can be dangerous and should not be performed beyond your comfort and training level. A licensed electrician can verify wiring, diagnose panel problems, and implement safe, code-compliant solutions.
Tools & Materials
- Digital multimeter with true RMS capability(AC voltage range of at least 600V; CAT II/III rating recommended)
- Test leads rated CAT II 600V(Shrouded probes preferred for extra hand protection)
- Non-contact voltage tester(Optional for quick live-check verification)
- Insulated safety gloves(Class 0 or 1 insulation for basic protection)
- Safety glasses(Eye protection during live testing)
- Insulated screwdriver set(For terminal access if needed)
Steps
Estimated time: 25-45 minutes
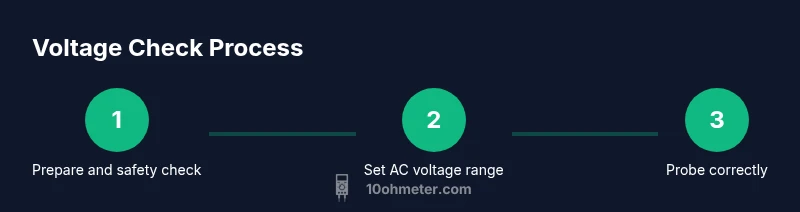
- 1
Power down and assess
If possible, shut off power at the breaker and verify it's de-energized with a non-contact tester before beginning. This minimizes the risk of arc flash and shock when you reach the outlet or terminal.
Tip: If the circuit cannot be shut off, assume it's live and treat all steps as live-work. - 2
Set the meter to AC voltage range
Set the multimeter to AC voltage, selecting a range that comfortably covers 240V, such as 600V or auto-range if available. This ensures the display can show the full magnitude without clipping.
Tip: Prefer true RMS mode for accurate readings with fluctuating loads. - 3
Connect the probes correctly
Insert the black probe into COM and the red probe into the V/Ω jack. Do not cross leads. When testing outlets, insert the probes into the two hot/neutral slots with hands steady and keep fingers behind the probe guards.
Tip: Maintain a stable grip and avoid touching metal parts of the probes. - 4
Make contact with the circuit
Carefully touch the probes to the two measurement points you are testing. For outlets, probe the two slots; for exposed terminals, bridge the red and black leads across the hot and neutral as required by the test point.
Tip: One-hand rule helps reduce potential path for current through your body. - 5
Read and verify the value
Read the voltage on the display, comparing to expected 240V. If the value seems off, recheck connections and test another outlet on the same circuit.
Tip: If the reading differs significantly, switch outlets to confirm consistency. - 6
Disconnect and power down
Remove probes, switch off the meter, and disconnect from the circuit. Reset the test setup to safe storage position.
Tip: Document the reading and date for future reference.
Your Questions Answered
Is it safe to measure 240V with a standard multimeter?
Yes, if the meter is rated for at least 600V and you follow strict safety steps. Avoid touching the probes and keep a safe distance.
Yes, but only with a meter rated for 600 volts and strict safety steps.
What meter settings should I use for 240V AC?
Set to AC voltage, choose a range at or above 600V, and use true RMS mode if available for accurate readings.
Set the meter to AC voltage in a range of 600 volts or higher, using true RMS if available.
Why is true RMS important for mains voltage?
True RMS provides accurate readings for non-sinusoidal loads, which can distort average readings on some meters.
True RMS gives accurate power readings even with distorted waveforms.
What should I do if I read 0V?
Double-check the circuit status, test points, and probes. Confirm power is present by testing a known live outlet.
If you see 0V, recheck test points and power status before re-testing.
What PPE should I wear?
Wear safety glasses, insulated gloves, and stand on dry ground. Keep tools insulated.
Wear safety glasses and insulated gloves; stay dry.
When should I call a professional?
If you are unsure about any step or the circuit is hazardous, consult a licensed electrician.
If unsure, call a licensed electrician.
Watch Video
Key Takeaways
- Use the correct AC setting on a true RMS meter
- Always use CAT-rated leads and PPE
- Prefer safety-first workflow: de-energize when possible
- Verify results with multiple outlets on the same circuit
- Document results for future reference