Test a Fuse with a Multimeter: Step-by-Step Guide
Learn a safe, step-by-step method to test fuses with a multimeter. Identify blown fuses, interpret readings, and replace correctly for electronics and automotive tasks.

By the end of this guide you will reliably test a fuse with a multimeter, verify whether it’s blown, and replace it safely. You’ll need a digital multimeter, proper test leads, and the correct fuse rating for the device under test. This process applies to electronics and automotive fuses alike.
The basics of fuse testing with a multimeter
Testing a fuse is a straightforward diagnostic that helps you determine whether a fuse is intact or blown. When you test fuse with multimeter, you measure continuity and resistance to decide if current can flow as intended. According to 10ohmeter, mastering this skill starts with understanding what the readings signify and how to isolate the component under test. A good fuse typically shows close to zero resistance and a clear continuity path, while a blown fuse presents open circuit behavior or very high resistance. Remember: a fuse is a safety device designed to protect wiring, components, and people from damage. If you skip it, you risk more extensive faults, fires, or equipment downtime. In practice, you’ll usually test across the fuse’s two terminals with the fuse removed, or, in some cases, check it in-line with the circuit if the device allows safe access. When possible, compare your measurement against a known-good fuse of the same rating and type to account for small manufacturing tolerances. With repeated checks, you’ll quickly see when a reading is within specification and when it clearly indicates failure. A methodical approach reduces guesswork and makes troubleshooting faster and safer in both electronic projects and automotive tasks.
Safety and prerequisites before testing fuses
Before you reach for the meter, establish a safe working environment. Disconnect power from the device or circuit under test and remove any connected batteries. Wear safety glasses and avoid loose jewelry that could catch on test leads. Use insulated tools so you don’t accidentally bridge conductive paths. If you’re working on automotive systems, disconnect the battery and avoid testing powered parts while the engine is running. Some fuses are located behind protective covers; in these cases, follow the manufacturer’s service manual to access the fuse without damaging surrounding components. Never bypass a fuse to observe an electronic symptom; that creates dangerous situations and can mask underlying faults. If you’re uncertain about the risk of a particular circuit, consult the device documentation or seek assistance from a qualified technician. By ensuring power is off, your meter probes won’t be exposed to live circuits, and your readings will reflect the fuse’s condition rather than a partly powered circuit.
Interpreting readings: continuity and resistance
Interpreting readings correctly is the core of reliable fuse testing. In continuity mode, a healthy fuse should produce a beep and show minimal resistance between its two ends. In resistance mode, a near-zero reading (often under a few ohms) is expected for a functioning fuse; a reading in the kilo-ohms range or infinite resistance indicates a blown fuse. Some fuses are designed to tolerate a small amount of resistance; in those cases, a higher but finite reading does not necessarily mean failure, but it warrants cross-check with a known-good fuse. When testing, ensure your meter probes are making solid contact with the fuse terminals; a poor connection can produce false readings. If the fuse is part of a circuit, parallel paths through other components may give misleading results; always test the fuse out of the circuit when possible. Document readings and compare them with the device’s specifications or standard fuse values provided by the manufacturer.
Test scenarios: electronics boards vs automotive fuses
Electronic devices: Glass or ceramic fuses on PC boards often sit in holders; these can be tested after removing from the board. Automotive fuses have higher current ratings and may be exposed to harsher conditions; correlate your test with vehicle electronics and the fuse type (blade, mini, or maxi). In both cases, ensure you use a properly rated fuse to avoid creating a new fault, and verify the circuit after replacement. If you find a fuse that tests as good but the circuit still behaves abnormally, the fault may lie elsewhere in the wiring or components.
Common pitfalls and how to avoid them
One common mistake is testing a fuse while the circuit remains powered; another is testing while the component remains installed in a live circuit. A third pitfall is using a cheap or damaged multimeter that gives inconsistent continuity readings. Always test with a known-good reference fuse and ensure your meter’s leads are clean and undamaged. Do not assume a low resistance means the fuse is safe in every condition; heat, intermittent faults, or special fuse types can alter results. Finally, replace fuses only with the exact rating (amp and voltage) and the same type (fast-blow vs slow-blow) to preserve circuit protection.
Practical examples and quick checks
Example 1: A blown fuse in a power strip — remove the strip from the wall, isolate it, and test the fuse leads; if the meter beeps, swap in a new fuse; Example 2: A fuse in a car's inline fuse holder — disconnect the battery, remove the fuse, and test across the terminals; if continuity fails, replace. These examples illustrate the general approach and highlight that a consistent process matters more than ad hoc methods.
Documentation and next steps
After testing, record the fuse type, rating, reading, and whether it is blown or intact. If you replaced a fuse, monitor the circuit for signs of continued fault; if the fuse continues to blow, the root cause exists somewhere else in the circuit. Use a systematic approach: confirm power-off, test with known-good fuses, re-test the circuit, and escalate if necessary.
Final reminders and safety wrap-up
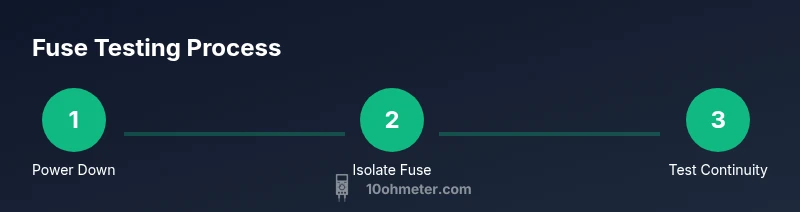
To maximize safety and accuracy, develop a routine test protocol: power down, verify connections, test with continuity, compare against a known-good fuse, and re-power only after replacement. Treat fuses like a first line of defense in your electronics or automotive projects, and document your results for future reference.
Tools & Materials
- Digital multimeter with continuity mode(Prefer models with audible beep and low resistance measurement)
- Test leads with probes(Shall be straight; ensure insulated handles)
- Replacement fuse of correct rating(Match device's fuse rating, check label)
- Known-good fuse for comparison(Optional for reference measurements)
- Non-conductive tweezers or tool(Useful for removing fuse from holders)
- Safety glasses and gloves(Personal protective equipment as needed)
Steps
Estimated time: 20-30 minutes
- 1
Power down and isolate the circuit
Ensure the device is unplugged or the battery disconnected. If testing automotive circuits, remove the battery ground and wait until any stored charge dissipates. The goal is to prevent shock or accidental shorts while you test. Use non-conductive tools when handling the fuse holder.
Tip: Double-check with your meter’s voltage setting before touching components. - 2
Access the fuse and remove it safely
Gently locate the fuse holder or cartridge. If possible, remove the fuse from the circuit using non-conductive tools to avoid damage or shorting. Photograph the fuse orientation if needed to ensure correct reinstallation.
Tip: Keep the fuse in a small tray to prevent loss or mix-ups. - 3
Set the multimeter to continuity or low-resistance mode
Turn the dial to continuity or the lowest resistance range. Confirm the meter is functioning by testing a known-good jumper or nearby metal contact. This step ensures your readings reflect the fuse state, not a meter error.
Tip: If your meter has a range option, start at the lo-resistance setting for quick checks. - 4
Test across the fuse terminals
Place one probe on each end of the fuse. A good fuse should show a beep (continuity) or very low resistance. A blown fuse will show no beep or an open circuit. Ensure solid probe contact for accurate readings.
Tip: If the reading is inconclusive, reseat the fuse or try a different set of probes. - 5
Compare with a known-good fuse
If available, test a known-good fuse of the same rating to establish a reference. Compare the readings against the suspect fuse to decide if it’s defective. This helps distinguish a marginal fuse from a clearly blown one.
Tip: Always use the same instrument and settings when comparing readings. - 6
Replace and re-test the circuit
Install a replacement fuse with the same rating and type. Reconnect power and verify circuit operation. If the fuse blows again, search for a short or overload in the circuit rather than repeatedly replacing fuses.
Tip: Document the replacement details and monitor the circuit after re-energizing.
Your Questions Answered
Can a multimeter accurately test a blown fuse?
Yes. Remove the fuse, use continuity or low-resistance mode, and check for a beep or near-zero resistance. A blown fuse will show no continuity. Always compare against a known-good fuse when possible.
Yes. Remove the fuse, test with continuity or low-resistance, and look for a beep or low resistance. If there’s no continuity, the fuse is blown.
What setting should I use on the multimeter to test a fuse?
Use continuity mode if available; otherwise use the lowest resistance (ohms) setting. A good fuse will beep or show very low resistance, while a blown fuse will show infinity or a high resistance.
Use continuity mode or the lowest resistance setting. A good fuse beeps or shows very low ohms; a blown fuse shows infinite or very high resistance.
Why might a fuse seem fine in-circuit tests but blow in operation?
In-circuit readings can be distorted by parallel paths through other components. Testing the fuse out of the circuit provides a clearer result. If the fuse still blows after replacement, investigate the circuit for a short or overload.
In-circuit readings can be distorted by other components. Test the fuse out of circuit for a clear result, and inspect the circuit if the fuse keeps blowing.
Can I test a car fuse with a multimeter?
Yes. With the vehicle off and battery disconnected, remove the fuse from its holder and test across the terminals. If continuity is present, replace with the same rating; if not, inspect for faults in the circuit.
Yes. With the vehicle off, remove the fuse and test across the terminals, using the same rating for replacement.
What should I do after replacing a fuse?
Re-energize the circuit and monitor for normal operation. If the fuse blows again, document the incident and continue troubleshooting the root cause rather than simply replacing fuses.
After replacing, power the system back up and watch for normal operation. If it blows again, investigate the root cause.
Watch Video
Key Takeaways
- Power down before testing to ensure safety.
- Continuity or near-zero resistance indicates a good fuse.
- Replace only with the same rating and type.
- If a fuse blows again, investigate the circuit for faults.