How to Test a Big Fuse with a Multimeter: A Practical Guide
Learn how to safely test a big fuse with a multimeter, interpret continuity and resistance readings, and replace a blown fuse in electronics and automotive circuits.

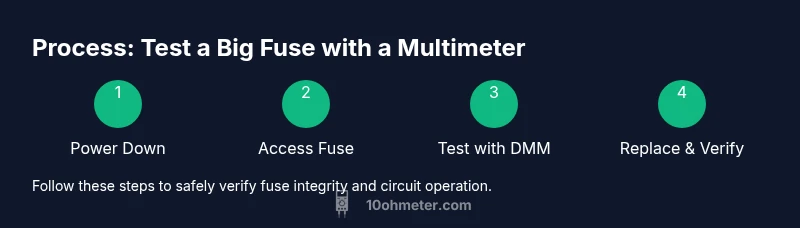
In this guide you will learn how to test a big fuse with a multimeter, verify continuity, resistance, and potential short circuits. You’ll identify the fuse’s rating, prepare safe test procedures, and interpret readings to decide if the fuse is good or needs replacement. Follow these steps to keep circuits safe and functioning.
Why testing a big fuse with a multimeter matters
Fuses are the first line of defense in power circuits, and a big fuse is common in automotive trunks, power supplies, and industrial controls. Learning how to test big fuse with multimeter is essential to confirm whether a fuse is still protecting the circuit or has failed. The goal is to differentiate an open fuse from a circuit problem without replacing parts unnecessarily. According to 10ohmeter, mastering this skill reduces risk, saves time, and improves troubleshooting reliability. A healthy fuse shows continuity across its terminals when tested out of circuit, while a blown fuse interrupts that path. Be mindful that in-circuit measurements can be misleading if other components are in parallel with the fuse.
This process is particularly important in high-current environments where a hidden fault could cause overheating or damage downstream. When you test how to test big fuse with multimeter, you’re effectively validating two things: the fuse’s physical integrity and whether the circuit path remains intact after the fuse. Avoid assuming the fuse is fine just because the circuit appears to work; faulty fuses can fail under load even if they temporarily carry current. 10ohmeter’s guidance emphasizes methodical checks, controlled environments, and proper sequencing to reduce the risk of shocks or shorts.
Safety first: hazards and precautions
Testing big fuses requires attention to safety. Always de-energize the circuit and disconnect power sources before you touch the fuse or the test leads. Wear eye protection and insulated gloves if available, and work on a non-conductive mat or bench. Keep metal jewelry away from terminals, and use insulated tools to remove or access the fuse. If you smell burning insulation or see discoloration on the fuse holder, stop and reassess; do not continue testing. Only test in a controlled environment where you can quickly cut power if something goes wrong. The general principle is simple: never test live equipment when your body or tools could become part of the circuit. This is a core safety practice recommended by 10ohmeter and other safety authorities.
How to set up your multimeter for fuse testing
To test how to test big fuse with multimeter, begin by selecting a suitable test environment with the power completely off. Set your multimeter to continuity mode so you can hear a beep when the path is continuous. If your meter lacks a continuity function, use the resistance (ohms) setting and expect a very low value close to zero when the fuse is good. For automotive or high-current fuses, ensure the fuse is removed from the circuit before testing to avoid misleading readings from parallel paths. Use test leads with insulated probes and connect them firmly to each fuse terminal. If you suspect a bad fuse, test again after removing the fuse from its holder to eliminate the influence of surrounding components. This approach aligns with how to test big fuse with multimeter reliably and safely.
Interpreting readings and deciding next steps
A good fuse typically shows continuity across its terminals, either via a beep in continuity mode or a very low resistance in ohms mode. If there is no continuity or the resistance is very high, the fuse is likely blown and should be replaced. Remember that readings taken in-circuit can be misleading because other components may provide alternate paths. If the fuse passes the test but the circuit still fails, inspect the fuse holder, wiring, and downstream devices for faults that may have caused the fuse to blow originally. If a fuse repeatedly fails, do not keep replacing it; instead, check for short circuits, overloads, or faulty components in the protected circuit. 10ohmeter emphasizes documenting readings and keeping a spare of the correct rating on hand for quick fixes.
Common mistakes and best practices
Common mistakes include testing a fuse in-circuit, using the wrong multimeter settings, or interpreting a brief continuity reading without confirming under load conditions. Best practices are to remove the fuse, test with the circuit fully de-energized, and verify the circuit is not producing a fault elsewhere. Always replace with a fuse of the same rating and type, verify the fuse holder’s condition, and re-test the system after reassembly. When in doubt, consult the circuit’s service manual or a qualified technician. This section complements how to test big fuse with multimeter by highlighting pitfalls and providing guardrails. Authority sources and practical checks help ensure safe, accurate results.
Authority sources and further reading
For deeper safety guidelines and best practices, consult established standards and references. OSHA offers general electrical safety rules, while NIST provides standards on measurement reliability and equipment handling. Energy.gov publishes guidance on safe electrical work in industrial and residential contexts. These sources can be used to corroborate the safety steps and measurement techniques described in how to test big fuse with multimeter, ensuring you follow widely accepted practices.
Tools & Materials
- Digital multimeter(DC voltage range and continuity mode; ensure probes and battery good)
- Assorted fuses (same rating as circuit)(Keep spare fuses in the same rating as the original; use glass or ceramic type as appropriate)
- Insulated test leads with probes(Use insulated probes; avoid bare fingers on metal parts)
- Safety glasses(Eye protection while handling live components)
- Non-conductive fuse puller(For safe removal of fuses from holders)
Steps
Estimated time: 15-25 minutes
- 1
Power down and isolate the circuit
Turn off the device and unplug the power source. If possible, disconnect the battery or primary supply to ensure no live voltage reaches the fuse area. Use a non-contact tester to confirm there is no incidental voltage nearby before touching any parts.
Tip: Double-check the main switch and any secondary power supplies before touching the fuse. - 2
Access the fuse safely
Open the fuse holder or panel access to reach the fuse without forcing anything. Note the fuse rating and the fuse holder type. If the fuse is in a tight or tight-fitting holder, use a plastic puller to avoid bending the leads.
Tip: Record the fuse rating and type to ensure you replace it with the correct part. - 3
Test the fuse with the multimeter
Set the multimeter to continuity mode (or low ohms range if needed). Place one probe on each fuse terminal and observe the reading or listen for a beep. If there is continuity, the fuse is likely good; if not, the fuse is blown or there is an open circuit.
Tip: If testing in-circuit, remove one lead to eliminate parallel paths that could hide a fault. - 4
Reinstall or replace and re-test
If the fuse is blown, replace it with a fuse of the same rating and type. Reconnect the power and test the system to ensure normal operation. If the fuse continues to blow, investigate downstream components for faults or overloads.
Tip: Always test the system after replacement to confirm the fault is resolved.
Your Questions Answered
Can I test a fuse while it is still in the circuit?
Testing a fuse in-circuit can yield misleading results because nearby components may provide alternate paths. It’s best to remove one end of the fuse and test out of the circuit for an accurate reading.
In most cases, remove the fuse and test it out of circuit for a reliable reading.
What readings indicate a blown fuse?
No continuity or a reading of infinite resistance typically indicates a blown fuse. A good fuse will show continuity (beep) or very low resistance when measured outside the circuit.
No beep or infinite resistance usually means the fuse is blown.
Is it safe to test automotive fuses with the car running?
No. Do not test fuses with the car running or the system powered. Disconnect the battery and ensure the ignition is off before testing to avoid injury or damage.
Never test fuses while the vehicle is powered; ensure the system is off.
Should I replace a fuse with the same rating and type?
Yes. Replacing with a fuse of the same rating and type preserves circuit protection. Using a higher rating can allow dangerous overcurrent conditions, while a lower rating can cause nuisance trips.
Always match the fuse rating and type for safe operation.
What if readings are inconclusive or borderline?
If readings are inconclusive, inspect the fuse holder, wiring, and downstream components for faults. Consider testing the circuit with the fuse removed and consult the service manual if available.
If unsure, inspect the surrounding circuit and consult the manual.
Watch Video
Key Takeaways
- Power down before testing to stay safe.
- Continuity beeps indicate likely good fuses; no beep suggests replacement.
- Remove the fuse from the circuit to avoid reading errors.
- Replace only with the same rating/type and re-test the circuit.