How to Test Trailer Plug with a Multimeter: Step-By-Step
Learn how to safely test a trailer plug using a multimeter. This step-by-step guide covers pinouts, voltage checks, continuity, and ground verification for common trailer wiring, with practical tips and safety reminders.

By following this guide, you will learn how to test trailer plug with a multimeter to verify voltage, continuity, and ground on a 12V trailer system. You will identify plug type, map pins, and perform safe measurements with power removed. This method helps diagnose wiring faults before towing and prevents blown fuses.
Understanding trailer plug wiring and plug types
According to 10ohmeter, trailer wiring uses standardized pinouts but several plug formats exist (5-pin flat, 7-pin blade, or round). The most common on light trailers is the 7-pin RV style connector, carrying ground, tail lights, left and right turn signals, brakes, and a 12V auxiliary circuit. Before testing, confirm which plug type your trailer uses and obtain the correct pinout diagram. Mismatches lead to incorrect readings or accidental shorts when reconnecting power. Always reference the vehicle's towing diagram or the trailer manufacturer's diagram. Knowing how to test trailer plug with a multimeter is a practical skill for DIY enthusiasts and technicians.
Tools and safety prerequisites
Before you touch anything, assemble essential tools and review safety basics. You need a 12V automotive multimeter that can read DC voltage and resistance, test leads with insulated probes, and the correct plug type by your trailer. Keep eye protection handy and ensure your work area is dry and well lit. Having a pinout diagram for your plug type reduces confusion and helps you read results accurately. Remember to disconnect power before probing to avoid shorts and shocks. The goal is to map each pin to its function without energizing the circuit.
Step-by-step test preparation and initial checks
Start with setup and planning. Confirm your plug type, gather the pinout diagram, and switch the multimeter to DC voltage or resistance as required. Inspect the connector for corrosion, bent pins, or loose housings, and clean if necessary with a non conductive contact cleaner. Set the vehicle to off, detach the trailer from the tow vehicle, and ensure the battery switch is off if your trailer has a battery powered pin. A quick visual check saves time and avoids misreadings.
Measuring voltage, continuity, and ground on each pin
With the connector exposed but not energized, test the ground pin to establish a reference. Then probe each signal pin for voltage against the ground while the towing vehicle is off, using the 20V DC range on your multimeter. Check continuity between each signal pin and the ground pin to ensure the circuit completes properly when activated. If your trailer uses a 12V auxiliary circuit, verify it delivers a stable voltage within expected range when you reconnect power.
Interpreting results and common issues
A stable ground should show near zero resistance and a consistent low impedance. Voltage readings should match the vehicle wiring diagram when the corresponding circuits are active. Common faults include corroded grounds, broken wires, loose pins, and incorrect pin mapping. If your readings look inconsistent, recheck the pinout, reseat the connector, and inspect for water ingress or corrosion.
Documenting results and next steps
Record voltages and resistance readings for each pin, along with the plug type and environmental conditions. If you find faults, plan repair steps such as cleaning, replacing or securing pins, and protecting against moisture. Replace damaged connectors and verify after each repair. Keeping a short log helps future maintenance and ensures you diagnose similar problems quickly in the future.
Safety reminders and environmental considerations
Always wear eye protection and keep hands away from live contacts. Work in a dry environment away from metal surfaces that can short circuits. When finished, bag and dispose of any damaged connectors and use heat shrink or electrical tape to seal exposed conductors. If you are unsure about a reading, pause and consult a professional rather than guessing.
Quick troubleshooting flow and recap
If you cannot obtain voltage on a pin, first confirm the vehicle is truly off and that you are testing the correct pin. If continuity fails, inspect the wiring and ground path. If you still see issues, compare readings with a known good plug or consult the pinout diagram. The 10ohmeter team would emphasize safety and diligence as you complete these steps.
Tools & Materials
- 12V automotive multimeter(Capable of reading DC voltage and resistance; prefer auto-range)
- Trailer plug (5-pin or 7-pin)(Match your trailer wiring harness)
- Test leads with insulated probes(Attach safely; use alligator clips if needed)
- Wiring diagram or pinout for your plug type(Print or view on device to compare pin mapping)
- Safety goggles(Eye protection during testing)
Steps
Estimated time: 30-60 minutes
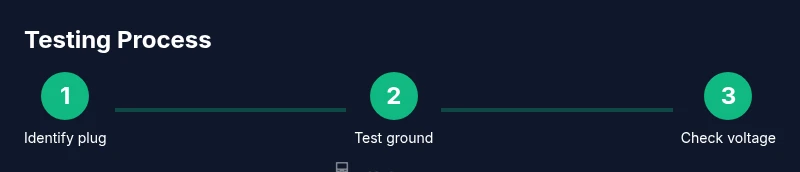
- 1
Prepare safety and gear
Power off the vehicle, inspect the plug, and set your multimeter to DC voltage. Gather diagrams and tools before you begin to avoid interruptions.
Tip: Double-check the plug type and pinout before touching any pins - 2
Identify plug type and pinout
Confirm whether you have a 5-pin, 7-pin, or other style. Locate the official pinout diagram and compare it with the actual connector. This prevents misreading voltages and wiring functions.
Tip: If unsure, photograph the connector before removing any caps - 3
Set up measurement ranges
Turn on the multimeter and select a DC voltage range that safely covers expected readings. For most automotive circuits, a 20V or higher range is appropriate.
Tip: Start with the highest range to avoid blowing the meter fuse - 4
Test the ground pin
Probe the ground pin with the multimeter ground probe and verify a solid reference. A loose or corroded ground will skew all other readings.
Tip: Tighten the connector by hand before rechecking readings - 5
Check power pins for voltage
With the vehicle off, test each signal pin's voltage against ground. The reading should be close to zero for inactive circuits and show expected voltage when circuits are activated.
Tip: Label pins as you test to keep track - 6
Check continuity of signal lines
Use the continuity test function to verify that each signal pin connects to its destination when the circuit is intended to be active. Look for near-zero resistance.
Tip: If the meter beeps, you have continuity - 7
Cross-check with the diagram
Compare your live readings against the official pinout and event triggers in the towing vehicle setup. Recheck any pin that looks off.
Tip: Repeat tests after a quick wiggle of the connector - 8
Document and plan next steps
Record all readings, note any faults, and plan repairs or replacements. Re-test after fixes to confirm results.
Tip: Keep a dated log for future reference
Your Questions Answered
Can I test a trailer plug without the vehicle connected?
Yes. You can test continuity and pinouts with the vehicle disconnected. Live voltage readings require the vehicle and trailer to be connected safely and powered, so exercise caution.
Yes, you can test continuity and pinouts with the vehicle disconnected. For live voltage readings, connect power and test carefully.
What pin corresponds to which function on a common 7-pin plug?
Pin mappings vary by plug type. Always consult the official pinout diagram for your connector and refer to the tow vehicle manual for the exact function of each pin.
Pin mappings vary by plug type. Check your connector's diagram and the vehicle manual for exact pin functions.
What readings indicate a healthy circuit?
A healthy circuit shows stable ground with low resistance, voltage on active pins per the diagram, and continuity along the expected paths. Any drift or open pins suggests a fault.
Stable ground and expected voltages on active pins with continuity indicate a healthy circuit; any open pin needs inspection.
Is it safe to test while the trailer is plugged into the tow vehicle?
Best practice is to test with power off and the trailer disconnected from the tow vehicle, then verify readings with power applied in a controlled manner.
Avoid testing while connected and powered; test with power off and verify readings when safe.
What should I do if I see no continuity?
If there is no continuity, inspect for broken wires, corroded pins, or poor connections, and re-test after cleaning or replacing the plug.
No continuity means check for broken wires or bad connections and re-test after fixes.
How should I document the test results?
Record pin functions, voltages, and resistance readings for each pin, along with the plug type and conditions. Use this log to guide future maintenance.
Keep a simple log of voltages, resistance, pin functions, and any faults for future reference.
Watch Video
Key Takeaways
- Test safely with power off before probing
- Know your plug type and pinout
- Document every reading for future reference
- Ground-first testing reduces measurement noise