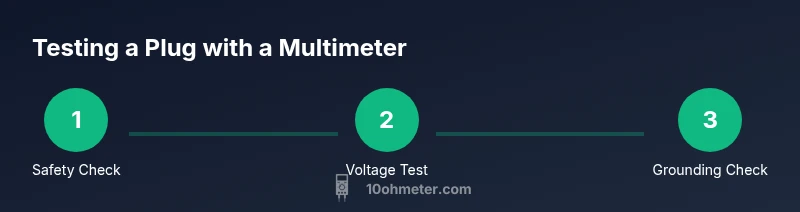
How to Test a Plug with a Multimeter: Safe Steps
Learn how to test a wall plug with a multimeter safely. This 1800-word guide covers voltage checks, polarity, grounding, and practical tips for DIY electronics and automotive tasks.

You can test a plug with a multimeter by checking voltage, polarity, and grounding. Start by unplugging the device and turning off the circuit when possible, then set the meter to AC voltage. Use proper leads and follow the step-by-step approach to confirm safe, accurate readings.
Why test a plug with a multimeter
Testing a wall plug with a multimeter is a practical way to verify whether the outlet provides the correct voltage, proper polarity, and a solid grounding path. For DIY enthusiasts and technicians, this can prevent misdiagnoses and electrical mishaps in electronics projects and automotive work. The 10ohmeter team emphasizes that understanding these readings reduces guesswork and improves safety when wiring or servicing devices. By measuring voltage between hot and neutral, and checking the grounding path, you gain a clear picture of outlet health and potential wiring faults. This knowledge helps you decide when to repair, replace, or call a licensed electrician, especially on unfamiliar outlets or older homes.
Safety First: Essential Precautions
Safety is non-negotiable when testing outlets. Always unplug devices and, if possible, switch off the circuit breaker before touching plug prongs. Use insulated tools, wear protective eyewear if you work around damaged outlets, and keep your fingers behind the meter leads to avoid accidental contact. If a non-contact tester indicates live voltage, do not proceed with a water- or metal-prone workspace. In summary, treat every outlet as potentially live, and verify zero voltage before connecting any probes. Following these precautions helps you stay safe while testing with a multimeter.
Understanding Multimeter Settings for Outlet Tests
A basic AC voltage test requires the multimeter to be set to AC voltage (VAC). If your meter offers auto-range, you can rely on it; otherwise, start with a higher range to avoid overloading the input. For many DIY contexts, you’ll primarily use VAC to measure hot-to-neutral and hot-to-ground readings. The continuity setting is useful to verify grounding paths or check for broken wires once power is removed. If you see an odd reading, ensure the device is properly unplugged and the plug is accessible. Always consult your meter’s manual to confirm the correct probes and terminal connections for live measurements.
What to Check Before You Start
Before poking a plug, inspect the outlet and the plug for obvious damage: burnt marks, bent prongs, or cracks in the wall plate can indicate dangerous conditions. Ensure your work area is dry and free of conductive liquids. Have a second set of hands available if you’re testing a hard-to-reach outlet. When in doubt, skip measurements and arrange professional service. A careful visual check often reveals problems that a meter would confirm once you have safe access.
Reading Voltage: A Clear, Methodical Approach
To check for proper voltage, insert the multimeter probes into the hot and neutral slots (or hot and ground for a polarity check) with the circuit de-energized if possible. In many regions, you should expect a nominal mains voltage; readings near this level indicate a healthy circuit, while readings far outside the expected range suggest a fault. If readings drift or show significant fluctuation, suspect a loose connection, a failing receptacle, or a compromised cable. Document readings and compare them against your region’s standard values.
Grounding and Polarity Checks
Grounding and polarity are critical for safety. Use the multimeter to verify continuity between the grounding prong and the outlet’s metal frame (if accessible) and to confirm correct polarity by testing hot-to-ground and hot-to-neutral readings. A balanced polarity test shows a consistent potential difference in expected directions. If polarity is reversed or the ground path is open, the outlet may be unsafe to use until repaired.
Continuity and Resistance Considerations
When power is removed, use the continuity mode to check that the path from the plug’s ground to the outlet ground is intact and that hot and neutral do not show a short. A reading of infinite resistance between hot and ground/neutral indicates no short, while a non-infinite reading may reveal a fault in the wiring. Remember: never perform continuity tests on live circuits. This step is about verifying wiring integrity and should be done after de-energizing the system.
Interpreting Results and Next Steps
Interpret readings in the context of your region’s standard voltage and wiring. If voltage is within the expected range, polarity is correct, and grounding shows a solid path, the outlet is likely safe. If any reading deviates, de-energize, inspect the wiring, and consider replacing the outlet or consulting a licensed electrician. Keeping a log of measurements helps track outlet health over time and supports maintenance tasks in electronics and automotive projects.
Real-world Scenarios: Household vs Automotive Outlets
Household outlets typically follow fixed electrical codes and have standardized voltages per region, while automotive circuits vary by vehicle and can involve DC measurements. When testing in different contexts, adapt your approach: use AC voltage tests for home outlets and be prepared for DC measurements in automotive testing. The core principles—safety, methodical measurement, and documenting results—remain the same across environments.
Tools & Materials
- digital multimeter with AC voltage capability(Auto-range preferred; ensure it can read at least the expected region's mains voltage)
- test leads with insulated probes and alligator clip adapters(Shrouded, properly rated for mains use)
- known-good plug or receptacle to test(Ensure the outlet is accessible and in good condition)
- non-contact voltage tester (optional)(Useful to quickly verify live circuits before probing)
- safety glasses or goggles(Eye protection in case of arcing or debris)
Steps
Estimated time: 10-15 minutes
- 1
Isolate the circuit and inspect
Unplug the device and, if possible, switch off the corresponding circuit breaker. Visually inspect the outlet and plug for damage, corrosion, or burns. Do not continue if you see obvious damage.
Tip: A quick visual check often reveals faults that meters cannot confirm. - 2
Configure the meter for safety
Set the multimeter to AC voltage (VAC). If the meter has auto-range, ensure it’s active. Verify the probes are properly inserted into the COM and V/Ω terminals before touching any metal parts.
Tip: Starting at a higher voltage range can prevent overload—you can step down if readings are safely within range. - 3
Test hot-to-neutral for voltage
With the circuit de-energized if possible, place the red probe on the hot slot/prong and the black probe on the neutral/ground. Read the voltage value and compare to your region’s expected mains range.
Tip: Keep the other hand away from metal surfaces to reduce shock risk. - 4
Check polarity
To verify polarity, test hot-to-ground first, then hot-to-neutral. A safe, correct polarity shows a consistent, expected reading direction and a valid ground path.
Tip: If polarity is reversed, replace the outlet or consult an electrician. - 5
Test grounding path
If you can access the grounding path, check continuity between the outlet’s ground and earth. A solid continuity path indicates proper grounding.
Tip: Avoid probing metal enclosures if you’re uncertain about their grounding status. - 6
Document and finalize
Record readings, note any anomalies, and recheck after any repairs. Ensure the outlet is re-energized only after confirming everything is safe.
Tip: Maintaining a brief log helps with future maintenance and diagnostics.
Your Questions Answered
Is it safe to test a live outlet with a multimeter?
Testing a live outlet can be safe if you use the right settings, wear protective gear, and keep hands away from metal parts. Where possible, de-energize the circuit first. If you’re unsure, consult a professional.
You can test a live outlet safely if you follow proper steps and turn off the circuit when possible. If in doubt, contact a professional.
What voltage should I expect on a typical household outlet?
Voltages vary by region, but you should expect a mains voltage range in your area. Check regional standards before testing, and compare readings only to local values.
Expect regional mains voltage values; compare readings to what’s standard in your country.
Can I use the same meter for automotive DC testing?
Yes, but you’ll switch the meter to DC voltage and be mindful of the different ground references in vehicles. Safety remains the priority.
Yes. Switch to DC mode and follow vehicle-specific safety steps.
What should I do if readings are unstable or incomplete?
Unstable readings usually indicate a loose connection, a damaged receptacle, or an intermittent circuit. Re-check connections with power off, and replace damaged components.
If readings are unstable, double-check wiring and consider replacement if faults persist.
Do I need professional help for older homes?
Older wiring can be dangerous. If you’re unsure about wiring age or safety, it’s wise to hire a licensed electrician for a thorough inspection and fix.
Older homes require careful inspection; consult a licensed electrician for safety.
What tools improve safety during testing?
Using insulated gloves, safety glasses, and properly rated test leads improves safety. A non-contact tester can help confirm voltage presence without contact.
Insulated gloves, eye protection, and rated leads boost safety during testing.
Watch Video
Key Takeaways
- Test only with de-energized circuits when possible.
- Verify voltage, polarity, and grounding for safety.
- Document readings to track outlet health.
- Replace damaged outlets and seek professional help for complex issues.
- Apply region-specific mains guidance and follow safety rules.