How to Check Trailer Lights with a Multimeter: Step-by-Step
Learn how to safely test trailer lighting circuits using a multimeter. This in-depth guide covers wiring basics, voltage and continuity checks, common faults, and maintenance tips for reliable trailer lighting in 2026.

By following these steps you will learn how to check trailer lights with a multimeter and confirm proper operation of the tail, brake, turn, and ground circuits. You’ll need a basic multimeter, test leads, and a working trailer connector. This quick guide gives you a safe, reliable method to diagnose issues before a road test.
Why checking trailer lights matters
According to 10ohmeter, trailer lighting reliability is a matter of safety, legality, and clear signaling to other road users. Faulty lights can lead to failures during inspection, increase the risk of accidents, and invite costly tickets. A systematic check with a multimeter helps you verify that each circuit – tail, brake, turn, and ground – behaves as designed, and it gives you a defensible record if you need to demonstrate compliance. This section lays the foundation by explaining what to look for, why readings matter, and how a good test translates into safer towing.
Wiring basics for trailer lights
Trailer lighting circuits typically share a common ground and rely on distinct positive feeds for tail lights, brake/turn signals, and marker lamps. A typical 4- or 5-pin connector maps each pin to a function: ground, tail/running lights, left turn/brake, right turn/brake, and sometimes auxiliary power. When the vehicle’s lights are activated, current flows from the tow vehicle through the connector to the trailer lights. A multimeter helps you verify continuity, voltage, and resistance across these paths, ensuring there are no open circuits or shorted wiring that could mute or misdirect signals.
Safety first when testing trailer wiring
Work on a dry, well-lit surface with the trailer disconnected from power when possible. Wear eye protection and avoid touching exposed metal with live circuits. If you must test with the vehicle connected, keep loose clothing away from moving parts and never probe near the battery terminals with metallic tools. A properly rated multimeter and insulated leads reduce the risk of shock or short circuits. Always disconnect power before inspecting damaged insulation or corroded pins.
Tools and setup you’ll need (quick overview)
Before you begin, gather a digital multimeter (true rms preferred), probe leads, a trailer wiring harness, and access to the vehicle’s electrical system. A spare flashlight, contact cleaner, and a small screwdriver can help with pin access and corrosion checks. Ensure your multimeter is on the correct setting for measuring DC voltage and resistance, and confirm the trailer connector is clean and free of debris for reliable contact.
Step-by-step testing overview (quick map to the detailed steps)
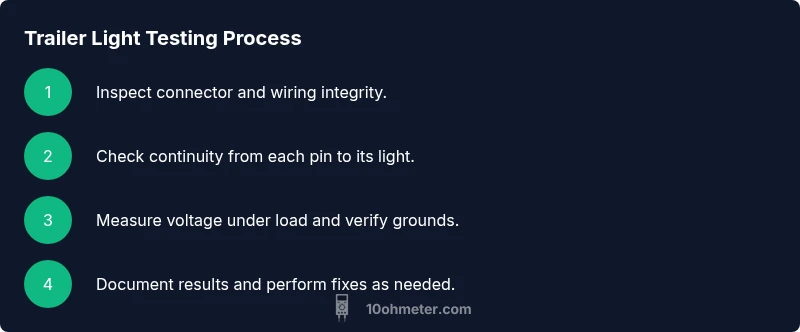
This section gives a high-level map of the testing flow: inspect the connector and integrity of the wiring, verify continuity from each pin to the corresponding light, measure system voltage when the vehicle is active, and document any readings that fall outside expected ranges. You’ll use the exact steps in the dedicated Step-by-Step block below to avoid missing crucial details.
Interpreting readings: what the numbers mean for trailer lights
A healthy circuit typically shows a solid ground reading (low resistance) and a clear voltage signal when the corresponding light is activated. Unexpected high resistance or zero voltage at a light pin can indicate loose connections, corrosion, or damaged wiring. If a brake/turn signal reads correctly at the harness but the light doesn’t illuminate, the fault likely lies in the light housing or bulb/socket. Recording readings helps you compare across tests and diagnose intermittent faults.
Common faults and practical fixes
Issues with trailer lights often stem from poor ground connections, corroded pins, frayed wires, or blown fuses. Typical fixes include cleaning contacts with isopropyl alcohol, re-crimping or replacing damaged connectors, restoring ground paths to bare metal, and replacing blown fuses with the correct rating. After repairs, re-test each circuit to confirm the fix is effective and that no new faults appear.
Maintenance tips to keep trailer lights reliable
Schedule periodic inspections of the trailer connector, wiring harness, and lamp housings. Apply corrosion inhibitors to metal contacts, store the trailer away from moisture-prone environments, and replace bulbs in a staged manner to avoid simultaneous failures. Keeping a small test kit and a log of test results can help you spot degradation trends before they cause outages.
Tools & Materials
- Digital multimeter (true RMS preferred)(DC voltage, continuity, and resistance modes; ensure battery is fresh)
- Test leads with alligator clips(Insulated probes; length 12–24 inches for comfortable reach)
- Trailer wiring harness and 4/5-pin connector(Clean contact surfaces; inspect for corrosion)
- Screwdriver or pin access tool(For accessing tight connector pins or removing covers)
- Isopropyl alcohol and lint-free cloth(Clean contacts and pins to ensure good readings)
Steps
Estimated time: 45-90 minutes
- 1
Inspect the trailer connector and wiring
Visually inspect the connector for corrosion, bent pins, and damaged insulation. Gently unplug and reconnect to ensure a snug fit. Clean any corrosion with isopropyl alcohol and a dry cloth before re-testing.
Tip: Take a photo of the connector before disassembly so you can reassemble correctly. - 2
Verify continuity from each pin to the corresponding light
Set the multimeter to continuity or the lowest Ohms range. Place one probe on the trailer pin for a function (e.g., tail light) and the other on the corresponding light socket ground. A continuous beep or very low resistance indicates a good path.
Tip: If there’s no continuity, inspect wiring harness and substitute a known-good ground temporarily to isolate the issue. - 3
Check ground integrity at the trailer frame
Connect one probe to the trailer frame ground and the other to the vehicle’s ground. A strong, low-resistance reading confirms a solid ground path; a weak reading points to a grounding fault in the hitch or frame.
Tip: A loose ball hitch or painted surfaces can create poor ground contact; scrape paint to bare metal if necessary. - 4
Measure voltage when lights are activated
With the vehicle running and lights switched on, set the meter to DC volts. Probe the tail light pin and compare voltage to the vehicle’s supply (should be near battery voltage minus any drop across a fuse or wiring). Repeat for brake/turn pins.
Tip: Be mindful of load; idle voltage can drop under heavy draw, so test with normal trailer load connected. - 5
Test each circuit under load
Turn signals and brakes to verify every function simultaneously. A functioning setup should show correct voltage for each active light without cross-talk or flickering.
Tip: If a light flickers, check for loose connectors, damaged insulation, or a compromised ground path. - 6
Document results and plan fixes
Record readings for each circuit, note any deviations, and outline a repair plan with estimated parts. Re-test after repairs to confirm all readings are within expected ranges.
Tip: Keep a running log; it helps spot gradual degradation over time and simplifies future diagnostics.
Your Questions Answered
What is the first thing I should check if a trailer light isn’t working?
Start with a visual inspection of the connector and wiring. Look for corrosion, damaged insulation, and loose pins. Then verify grounding and proceed with continuity tests.
First check the connector and wiring visually for corrosion or damage, then test grounding and continuity.
Do I need to disconnect the trailer from the tow vehicle to test safely?
Ideally yes for safety and to avoid back-feeding power. If testing with the vehicle connected, use proper PPE and keep power-off before inspecting any damaged insulation.
For safety, disconnect power when inspecting wires. If you must test with power on, be careful and wear protection.
Can a bad ground cause multiple lights to fail?
Yes. A poor ground can cause voltage drop and inconsistent lighting across multiple circuits. Fix the grounding path before blaming individual bulbs or sockets.
A bad ground can make many lights fail; fix ground paths first.
Is a multimeter necessary for trailer light testing or can a test light suffice?
A multimeter provides definitive readings for continuity and voltage, making it better for diagnosing faults. A test light can help with quick checks but won’t give precise values.
A multimeter is preferred for precise readings; a test light is good for quick checks.
What readings define a healthy circuit for tail lights?
Continuity to ground with low resistance, and a voltage close to supply when lights are on. If readings vary widely, inspect wiring and connections.
Low resistance and proper voltage indicate a healthy circuit; investigate anything outside that.
Watch Video
Key Takeaways
- Test continuity and grounding first before voltage checks
- Record readings to detect intermittent faults
- Repair damaged connectors and clean contacts for reliable results
- Verify readings under normal load to reflect real-world conditions
- Keep a log to track degradation over time