How to Test HVAC Capacitor with a Multimeter
Learn a safe, step-by-step method to test HVAC capacitors using a digital multimeter. We cover capacitance checks, safety, tolerances, and replacement guidance to keep your HVAC system running reliably.

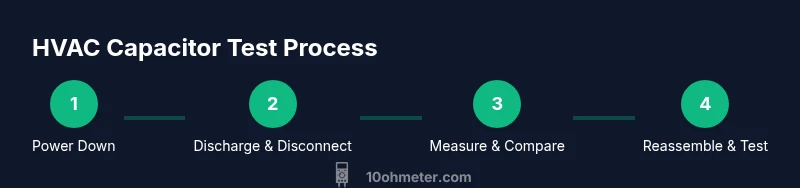
By following this guide, you will safely test an HVAC capacitor using a multimeter, verify the capacitance and health of the component, and determine whether replacement is needed. Ensure you discharge the capacitor, disconnect it from the circuit, and use the meter's capacitance function or an ESR meter if capacitance mode isn't available.
What HVAC capacitors do and why testing matters
HVAC systems rely on capacitors to assist electric motors in starting or running smoothly. A failing capacitor can prevent a compressor or blower from starting, cause buzzing noises, or reduce efficiency. According to 10ohmeter, learning to test capacitors in-place helps diagnose issues without replacing parts prematurely. A good-capacitor reading confirms health; a reading outside tolerance or a flatline resistance suggests a failing unit. Understanding these signals empowers you to plan safe maintenance and avoid unnecessary service calls. This section sets the stage for a practical, hands-on test routine you can perform with commonly available tools.
- Start capacitors provide a quick surge to get motors spinning.
- Run capacitors support sustained motor operation.
- Not allHVAC systems use the same capacitance values; refer to the label on the cap for nominal value and tolerance.
Safety and prerequisites
Working with capacitors in HVAC gear involves stored electrical energy that can cause shock or burns. Always de-energize the system before you begin. Unplug the unit, switch off the circuit breaker, and verify there is no residual voltage with a non-contact tester. Wear insulated gloves and eye protection, and work on a non-conductive surface. If you’re unsure about live circuits, pause and call a qualified technician. Discharging a capacitor correctly is critical to avoid a spark. Use a proper discharge tool or resistor method, and never bridge live components together. This approach minimizes the risk of arc flash or hidden energy release.
- Always double-check that the power is off before touching terminals.
- Keep tools insulated and dry; moisture increases shock risk.
Tools and materials you’ll need (and why)
Before you start, gather a digital multimeter with a capacitance function, the HVAC capacitor you’re testing, insulated safety gloves, insulated test leads, and a screwdriver or nut driver to access the panel. A discharge resistor or a meter with a built-in discharge feature is recommended to safely drain stored energy. Having a labeling method helps you reassemble connections accurately. If your multimeter can’t measure high μF values, you’ll still be able to perform a practical check using resistance or an ESR method if your device supports it. Always test in a clean, dry workspace and keep a copy of the system wiring diagram handy.
- Capacitance-capable multimeter: essential for direct μF readings.
- Discharge tool or resistor: critical for safety.
- Insulated gloves and leads: protect against shocks.
Step-by-step setup and preparation
- Power down and isolate the unit from any power source to eliminate shock risk. 2) Access the capacitor housing using the screwdriver or nut driver. 3) Identify the capacitor terminals and confirm the capacitor’s part number and labeled capacitance. 4) If accessible, loosen the terminals slightly; do not pry or force connections. 5) Create a safe workspace, ensuring the capacitor is physically stable and cannot roll or touch other components. 6) If the capacitor shows signs of damage (bulging, leaking), do not attempt further tests; replace it. 7) If you will discharge, use a safe method as described in the safety section. 8) Recheck that no tools bridge terminals inadvertently.
How to test with a capacitance-enabled multimeter
- Set your meter to the capacitance function, selecting a range that covers the expected capacitor value. If your meter requires you to zero or tare, follow the device manual before touching the capacitor. - Attach the leads to the capacitor terminals; polarity is usually not critical for non-polarized caps, but always consult the label. - Read the capacitance value and compare it to the printed nominal value and tolerance on the capacitor case. A reading within the tolerance range is typically acceptable; a reading far outside indicates a failed capacitor. - If you see a reading that drifts significantly as you touch or wiggle the leads, re-verify connections and test for a short or bad connection. - If the meter lacks a capacitance function, look for an ESR or resistance-based approach or use an external LCR meter.
Testing without capacitance mode: resistance and leakage checks
If your multimeter lacks a capacitance setting, you can still perform a practical check by measuring resistance across the terminals with the unit powered off. A good capacitor typically exhibits an initial low resistance that increases toward infinity as the capacitor charges, while a shorted capacitor will show near-zero resistance even after a short time. Use a controlled discharge after this test and compare results to the expected behavior. If the device shows a persistent low resistance, replace the capacitor. A high-quality ESR meter provides another route to evaluating capacitor health without disconnection.
Interpreting results: tolerances, signs of failure, and next steps
HVAC capacitors commonly have tolerances specified by the manufacturer. Read the label to identify the nominal value and tolerance (for example, a ±5% or ±10% range is common). A reading within tolerance typically indicates the capacitor is healthy. A result outside tolerance or one that drifts with time signals potential failure. If you replaced the capacitor in place, reassemble the panel and run a quick system test after ensuring all safety steps were completed. If you’re uncertain about the readings or the equipment, consult the unit’s service manual or a professional technician. The 10ohmeter Team notes that careful, repeatable testing reduces guesswork and protects equipment.
Common mistakes and pitfalls to avoid
- Testing without discharging can cause a dangerous shock. Always discharge first.
- Denoting polarity isn’t universal for all capacitors; verify label instructions.
- Measuring in-circuit without isolating the capacitor can produce misleading readings due to other circuit components.
- Rushing through steps or skipping labeled safety procedures increases risk of injury and inaccurate results.
- If your capacitor is physically damaged, do not test it—replace it to avoid risk of motor damage.
What to do next: replacement and safe reassembly
If the capacitor fails or readings fall outside tolerance, replacement is typically the safest option. Ensure the new capacitor has the correct capacitance and voltage rating and a compatible tolerance specified by the HVAC manufacturer. When reassembling, reconnect all terminals securely, re-close the panel, and restore power. Finally, run a brief system test to confirm proper operation and listen for abnormal sounds or cycling behavior. Always follow the manufacturer’s guidelines and local electrical codes.
Tools & Materials
- Digital multimeter with capacitance function(Ensure it can measure in the capacitor's nominal range; some meters require a separate adapter for high μF values.)
- HVAC capacitor under test(Label-bearing, removed from circuit and discharged before testing.)
- Insulated safety gloves(Wear during disconnection and handling of live-looking components.)
- Insulated test leads(Keep leads away from metal edges and avoid cross-contact.)
- Screwdriver or nut driver(To access the capacitor housing; use insulated tools.)
- Discharge tool or resistor (optional but recommended)(A 10 kΩ or similar resistor with proper safety precautions is commonly used.)
Steps
Estimated time: 30-60 minutes
- 1
Power down and isolate
Turn off the HVAC unit and switch off the circuit breaker. Verify the system is de-energized using a non-contact tester. This step eliminates shock risk before you touch any terminals.
Tip: Double-check by attempting to touch a terminal indirectly; if you feel any tingling, stop and recheck power isolation. - 2
Open access to the capacitor
Use the screwdriver to remove the access panel and locate the capacitor assembly. Identify the two terminals and the label listing its capacitance and voltage rating.
Tip: Avoid disturbing nearby wires; keep the work area organized to prevent misconnection. - 3
Discharge the capacitor
Safely discharge the capacitor using a discharge tool or resistor across the terminals for a few seconds. Do not rely on guesswork; a controlled discharge prevents a dangerous arc.
Tip: Hold the tool with insulated gloves and keep your hands away from the terminals during discharge. - 4
Disconnect capacitor leads
Loosen and remove the leads from the capacitor terminals. Label each lead if you plan to reassemble in a specific order. This reduces misconnection risk during reassembly.
Tip: Keep track of which lead came from which terminal to maintain correct wiring. - 5
Set multimeter to capacitance mode
Configure your meter to capacitance measurement and select a range that includes the capacitor’s nominal value. If your meter requires calibration, perform it before connecting.
Tip: If you’re unsure about range, start at the highest setting and work downward. - 6
Connect the meter and measure
Attach the meter leads to the capacitor terminals and read the displayed capacitance. For polarized capacitors, observe any orientation if the meter requires a specific polarity.
Tip: Ensure good contact and avoid touching the metal probes during measurement. - 7
Interpret the reading
Compare the meter reading to the capacitor’s labeled nominal value and tolerance. A reading within tolerance generally indicates a healthy capacitor; a value outside suggests replacement.
Tip: If readings drift with lead movement, recheck connections and repeat the test. - 8
Alternative check if capacitance mode isn’t available
If the meter lacks capacitance, perform a resistance test across the terminals after full discharge. A good capacitor will show rising resistance as it charges; a shorted cap remains low resistance. Consider an ESR meter for more detail.
Tip: Reset and discharge between tests to avoid residual charge affecting results. - 9
Reassemble and test the system
Reconnect the capacitor leads to their original terminals, secure the housing, and restore power. Run a quick functional test by cycling the HVAC unit to verify proper operation.
Tip: Observe for unusual noises or operations during the first cycle after reassembly.
Your Questions Answered
Can I test a capacitor without discharging it?
No. Always discharge the capacitor before testing to prevent shocks and meter damage. Handle components with insulated tools and avoid touching terminals during discharge.
Discharge first. It prevents shocks and meter damage, then test with the capacitor removed from the circuit.
What if my multimeter doesn’t have a capacitance function?
If capacitance mode isn’t available, you can use resistance and ESR checks or an external LCR meter to assess the capacitor health. These methods don’t provide exact μF readings but help identify major faults.
If your meter lacks capacitance mode, use resistance or ESR testing or an external LCR meter to gauge capacitor health.
What tolerance should HVAC capacitors have?
Tolerance varies by part and label. Check the capacitor’s label for the nominal value and allowed tolerance range; readings within that range are generally acceptable.
Tolerance depends on the part; read the label to know the acceptable range and compare your reading.
Is it safe to test a capacitor in place in the HVAC unit?
No, in-circuit testing can be misleading and risky. Isolate and discharge the capacitor, remove it when possible, and test it away from other powered components.
Don’t test in-circuit. Isolate, discharge, and remove the capacitor for accurate results.
How do I know when to replace a capacitor?
Replace if the reading is outside tolerance, drifts significantly, or the capacitor shows physical damage like bulging or leakage.
If it’s outside tolerance or visibly damaged, replace it.
Watch Video
Key Takeaways
- Discharge before testing to ensure safety.
- Use capacitance mode to read μF values when available.
- Compare reading to labeled nominal value and tolerance.
- Isolate the capacitor to avoid circuit interference.
- Replace if readings fall clearly outside tolerance or show drift.