How to Test a Capacitor with a Multimeter
Learn how to safely test capacitors with a multimeter, interpret capacitance readings, and troubleshoot common issues. This 10ohmeter guide covers safety, in-circuit checks, ESR basics, and practical tips for DIY enthusiasts and technicians.

In this guide you will learn how to test a capacitor with a multimeter, interpret common capacitance readings, and identify faulty components. You’ll cover both capacitance-mode tests and practical checks for leakage, ESR, and tolerance. Safety, setup steps, and troubleshooting tips are included to help DIY enthusiasts and technicians work confidently.
Understanding the role of the multimeter capacitor
A multimeter capacitor test focuses on validating a capacitor's nominal capacitance, checking for leakage, and spotting physical faults. The term multimeter capacitor refers to using a handheld digital multimeter (DMM) to measure capacitance and monitor circuit health. In many circuits, capacitors filter noise, stabilize voltage rails, and manage timing. When a capacitor ages, its ability to store charge degrades, which can cause subtle symptoms: unstable voltage, hum, or timing errors. According to 10ohmeter, mastering capacitor tests with a multimeter is a practical skill for DIY electronics repair and automotive diagnostics. This section explains how a capacitance measurement differs from resistance, and why a high-quality meter matters for readable results. You'll also learn how to interpret readings in relation to the component's labeled value and tolerance code, and how real-world factors like temperature and circuit loading can influence results. By the end, you'll know what a healthy multimeter capacitor test looks like and what red flags to watch for.
Safety prerequisites before testing capacitors
Safety is non-negotiable when testing capacitors. Always power down the device, unplug from any power source, and discharge capacitors before handling. Use a resistor to discharge slowly; never bridge terminals with metal tools. Wear safety glasses and keep your workspace dry and non-conductive. If you suspect high-energy capacitors (such as in power supplies or automotive systems), take extra precautions and consider using insulated tools and a non-conductive mat. Verify the capacitor's voltage rating and the circuit's exposure before proceeding. These steps reduce the risk of electric shock, arc flash, and damage to your meter. When in doubt, remove the board from the vehicle or power source and test in a controlled environment.
Essential tools and setup for capacitor testing
For effective capacitor testing you need a few reliable tools: a digital multimeter with capacitance measurement capability, quality insulated test leads, and a discharge tool (such as a bleed resistor) to safely discharge the capacitor before handling. A non-conductive work surface and basic safety equipment (gloves, eye protection) are also recommended. If you test capacitors frequently, consider a dedicated ESR meter for higher-frequency performance checks. Keep a small parts tray organized and label the capacitor under test. The goal is to create a consistent testing setup so readings are repeatable and comparable across sessions.
How to measure capacitance with a digital multimeter
Begin by turning off power and discharging the capacitor using a bleed resistor. Set the DMM to the capacitance range compatible with the capacitor under test. Connect the red and black probes across the capacitor terminals, ensuring solid contact and avoiding shorts. Read the displayed capacitance value and compare it to the capacitor's labeled value and tolerance. If the reading is within tolerance, the capacitor is likely healthy; if it's significantly off or shows zero, the part may be leaky or defective. For higher accuracy, remove the capacitor from the circuit when possible to avoid parallel paths affecting the measurement.
Tip: Always re-zero or calibrate the meter if your model supports it before starting measurements.
Interpreting capacitance readings and tolerances
Capacitors come with a labeled capacitance (e.g., 47 µF) and a tolerance (e.g., ±20%). When testing, a reading within the tolerance window indicates a healthy component. Extremely low values suggest leakage or dielectric breakdown, while readings higher than the labeled value can indicate measurement error or a damaged part. Temperature, aging, and voltage bias during measurement can influence readings. For small-value capacitors (nanofarads to microfarads), the meter’s accuracy matters more, so verify the meter’s specifications. If you’re testing in a circuit, remove the part to avoid parallel components skewing results.
In practice, record the reading, note the device’s operating environment, and compare against the known specification sheet to decide if replacement is warranted.
Testing different capacitor types: ceramic, electrolytic, film
Ceramic capacitors are common in high-frequency filtering; they typically exhibit stable capacitance with low leakage but can drift with temperature. Electrolytics store large capacitance values but may show higher leakage and significant tolerance variation. Film capacitors offer excellent stability and lower ESR but come in a wide range of values. When testing, be mindful of each type’s behavior: ceramics may appear accurate at room temperature but drift under heat; electrolytics may have degraded leakage resistance; film capacitors tend to hold value well but can still fail short or open. Your multimeter’s capacitance mode can reveal gross failures, while dedicated ESR tests reveal frequency-dependent health issues for electrolytics.
ESR and leakage testing with a multimeter-aware workflow
While a standard capacitance test checks stored charge, ESR (equivalent series resistance) affects high-frequency performance and can dramatically impact circuit behavior even when capacitance reads okay. Some multimeters include basic ESR measurement modes, but professional results often require a dedicated ESR meter. If your meter supports ESR, perform tests at relevant frequencies and compare against the part’s tolerance. Leakage testing involves charging the capacitor and observing continuity to ground; excessive leakage is a failure mode. If you suspect leakage, measure leakage current with a low-voltage supply or consider a dedicated leakage test method as needed.
In-circuit testing: pros, cons, and techniques
Testing a capacitor in-circuit saves time but risks including parallel paths that distort readings. If accuracy is critical, remove the capacitor from the circuit and test out-of-circuit. When in-circuit testing is necessary, desolder one leg or isolate nodes to minimize parallel leakage paths. Use a known-good capacitor as a control to verify meter function. Document any measurement shifts when components nearby (resistors, inductors, ICs) could influence the reading. In general, in-circuit tests are useful for quick checks but may not be sufficient for final verification.
Troubleshooting common issues during capacitance tests
If readings are erratic or unavailable, start with a few basics: ensure the capacitor is fully discharged, inspect for visible damage, and check that the meter is correctly set to capacitance, not voltage or resistance. Corroded leads or improper contact can produce false readings; clean contacts and re-seat probes. If measurements drift with time, recheck after a stable environment; some meters require a short warm-up period. For high-value electrolytics, note that leakage and voltage bias can affect readings; consider removing the capacitor from the circuit or testing at a lower voltage.
Practical testing workflow for electronics repair projects
A practical workflow begins with a quick visual inspection, followed by a safe discharge, then a capacitance test on the suspected capacitor. If the value is out of spec, replace or re-test the component in isolation. For assemblies, test related components (resistors and diodes) to understand circuit interaction. Maintain a running log of readings, part numbers, and tolerance expectations. This methodical approach helps you triage failures efficiently, save time, and improve repair success rates.
Tools & Materials
- Digital multimeter with capacitance mode(Choose a meter rated for the expected capacitor range; verify it supports capacitance measurements.)
- Insulated test leads(Use probes with proper insulation and correct tip shapes for secure contact.)
- Discharge resistor (bleeder) 1k–10k Ω(Use a resistor to safely bleed charge from electrolytics; avoid shorting directly.)
- ESD-safe workspace mat (optional)(Helpful for sensitive components and long inspection sessions.)
- Safety glasses(Protect eyes when working with charged capacitors.)
- Soldering iron and desoldering pump (optional)(Needed if you must remove components for out-of-circuit testing.)
- Small parts tray(Organize tested capacitors and related parts to avoid mix-ups.)
Steps
Estimated time: 15-25 minutes
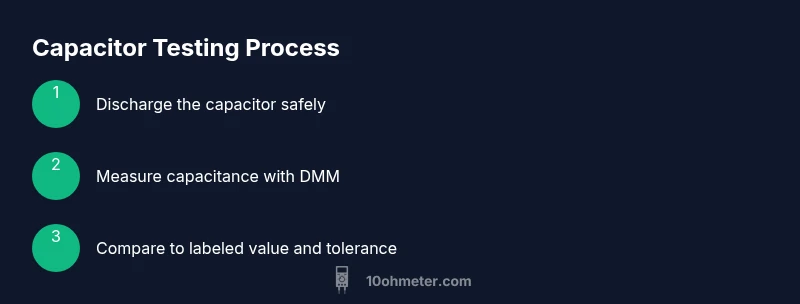
- 1
Power down and discharge
Turn off the device and unplug. Discharge the capacitor using the bleed resistor to a safe voltage. Do not short terminals with metal tools.
Tip: Always verify the capacitor is noncharged before handling with a DMM. - 2
Set the multimeter
Switch the DMM to capacitance mode and select a range appropriate for the suspected value. Ensure the meter is calibrated or warmed up if required by the model.
Tip: If unsure of range, start high and work down to the best fit. - 3
Connect the leads
Attach red and black probes to the capacitor leads, one on each terminal, keeping the leads in good contact and avoiding shorts.
Tip: Keep hands steady and avoid touching metal parts during measurement. - 4
Read the value
Read the capacitance value on the display and compare it to the labeled value and tolerance.
Tip: If the reading is unstable, re-seat the capacitor or test in a different orientation. - 5
Test different conditions
If possible, test at room temperature and again after warming to see if the value drifts with temperature.
Tip: Document any temperature-related drift for later reference. - 6
Evaluate in-circuit impact
If tested in-circuit, remove one leg or desolder to minimize parallel paths affecting the reading.
Tip: Compare with out-of-circuit results to confirm a fault. - 7
Record results
Log the reading, part number, tolerance, voltage rating, and any notes about measurement conditions.
Tip: Use a consistent template for easier future comparisons. - 8
Decide on replacement
If the value is outside tolerance or leakage/ESR is evident, replace the capacitor with a device of the same or better specs.
Tip: Always replace with a component rated for equal or higher voltage and similar temperature rating.
Your Questions Answered
Can a standard multimeter measure capacitance?
Yes, many digital multimeters include a capacitance measurement function. The accuracy depends on the meter and the capacitor range being tested. For high-precision or very large/small values, a dedicated LCR meter or ESR meter may be preferable.
Yes, a lot of digital multimeters can measure capacitance, but accuracy varies and for precise work you might need a specialized meter.
What should I do before measuring a capacitor?
Power down the circuit, unplug the device, and discharge the capacitor with a bleed resistor. Confirm the meter is in capacitance mode and that leads are properly connected.
Power off, discharge, and switch your meter to capacitance mode before measuring.
Can I test a capacitor in-circuit?
In-circuit testing can skew readings due to parallel components. For accurate results, remove the capacitor from the circuit or desolder one leg.
In-circuit tests can be misleading; remove the capacitor when precision matters.
What does a reading of zero or infinity mean?
Zero usually indicates a shorted capacitor, while infinity (open) means no capacitance is detected. Both imply a faulty component.
Zero means shorted, infinity means open circuit—both indicate a problem.
Why are ESR measurements important?
ESR affects high-frequency performance; a capacitor can have correct capacitance but high ESR, which harms the circuit.
ESR matters; a capacitor might read okay for capacitance but fail due to high ESR.
What are common mistakes when testing capacitors?
Not discharging, using the wrong range, testing in-circuit, or neglecting temperature can lead to incorrect results.
Common mistakes include not discharging and testing in-circuit.
Watch Video
Key Takeaways
- Discharge safely before testing any capacitor
- Use the meter’s capacitance mode and compare to labeled value
- Remove the capacitor from the circuit for best accuracy when possible
- Consider ESR and leakage as part of the health assessment
- Document results for future repair tasks