How to Test Flame Sensor with Multimeter
Learn how to test flame sensor health using a multimeter. This educational guide from 10ohmeter covers safety, readings, step-by-step testing, and interpretation to help DIYers and technicians diagnose ignition issues.

By testing a flame sensor with a multimeter, you can confirm the flame detection circuit is reliable and the burner will ignite consistently. This quick check helps isolate sensor faults from controller or wiring issues. You’ll need a functional multimeter, a basic safety setup, and the furnace’s service manual for sensor specifications and pinouts.
What is a flame sensor and why test it?
A flame sensor is a safety device in many residential furnaces and boilers that confirms the presence of a flame before the system allows continued gas flow. Most modern systems use a UV or IR flame sensor connected to the control board. Over time, sensors can become dirty, misaligned, or degraded, which may prevent the control board from recognizing a flame even when one exists. Testing the sensor with a multimeter helps you distinguish sensor faults from issues with the ignition module, wiring, or gas supply. Understanding how your specific model reads resistance, continuity, and sensor signals is essential, so always consult the furnace manual for model-specific values and pinouts. In the 10ohmeter analysis, routine sensor checks are a practical maintenance step that can prevent unnecessary diagnostics and downtime.
input_type_inferred_from_context_for_parsing_purpose_usable_for_tools_and_steps_and_warnings_if_needed_
word_count_estimate_unchanged
Tools & Materials
- Digital multimeter(Prefer auto-ranging; ability to measure resistance and diode/continuity tests.)
- Alligator leads(Insulated probes; avoid shorting with metal surfaces near the burner.)
- Screwdrivers (flat and Phillips)(For panel access; use insulated handles if possible.)
- Safety gloves and eye protection(Non-conductive gloves; eye protection when working near gas and flame.)
- Furnace service manual or sensor datasheet(Reference readings, pinouts, and model-specific guidance.)
- Non-conductive flashlight or headlamp(To clearly view sensor location in tight spaces.)
- Labels or tape(Mark wires when disconnecting to avoid miswiring.)
Steps
Estimated time: 25-40 minutes
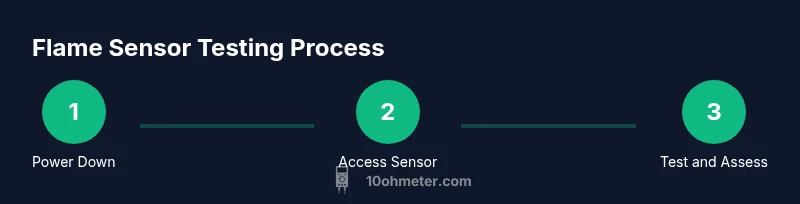
- 1
Power down and isolate the furnace
Begin by turning off the furnace at the breaker and, if accessible, the gas valve. Allow any capacitors to discharge for at least 30 seconds. This prevents shock and protects control electronics during inspection.
Tip: Use a non-contact voltage tester to verify there is no live voltage before touching any wiring. - 2
Open access and locate the flame sensor
Remove the furnace access panel per the manual and visually locate the flame sensor, typically a small rod or probe positioned near the flame. Note its orientation and ensure you can access the sensor safely without moving other components.
Tip: Take a quick photo of the sensor’s orientation before disconnecting anything. - 3
Disconnect sensor leads from the control board
Gently unplug the sensor wires from the harness on the control board. Label wires if necessary and keep connectors clean and dry to avoid contamination.
Tip: Keep track of which lead goes to which pin using tape or a marker. - 4
Test sensor resistance with the multimeter
Set the multimeter to the lowest resistance range, and measure across the sensor leads. A healthy sensor should show a readable continuity or a specified resistance per the manual. If the reading is infinite (open) or very low (short), the sensor is likely faulty.
Tip: If unsure about the expected range, reference the sensor datasheet or furnace service manual. - 5
Reconnect, power up, and observe the input
Reconnect the leads, restore power, and observe the flame sensor input as the burner attempts to ignite. If the control board logs an error or the flame is not detected, the sensor or related wiring may be problematic. Do not leave the unit running if you see abnormal signs.
Tip: If you’re uncertain about live tests, or the readings don’t align with the manual, replace the sensor rather than guessing at the fault.
Your Questions Answered
What is a flame sensor and what does it do?
A flame sensor confirms the presence of a flame before the furnace continues gas flow. It helps prevent unburned gas from accumulating. If the sensor fails, the system may shut down or fail to ignite. Always refer to your manual for model-specific behavior.
A flame sensor detects a flame to confirm safe ignition. If it fails, the furnace may shut down or not ignite, so check the manual for your model.
Can I test the flame sensor without removing it?
Yes, you can perform a non-invasive check by inspecting wiring continuity and the sensor's inline connections. Some quick tests can be done with the sensor in place, but more accurate readings usually require removing the sensor for direct measurement.
You can start with a non-invasive check, but removing the sensor often gives a clearer reading.
What readings indicate a good flame sensor?
A good flame sensor will show a definite continuity or a manufacturer-specified resistance when tested with the multimeter. Readings outside the expected range or an open circuit typically indicate a faulty sensor.
A proper reading shows continuity or the correct resistance per the manual. An open circuit usually means replacement is needed.
Is it dangerous to test a flame sensor?
Testing involves working near gas and live electrical components. Always ensure power is off and follow safety steps; if you smell gas or feel uncertain, stop and call a professional.
There’s some risk due to gas and electricity. Power down, follow safety steps, and seek help if unsure.
What should I do if the sensor seems faulty but readings are inconclusive?
If readings don’t match the manual and you’re unsure, replace the sensor and re-test. If unsure, consult a qualified technician to avoid safety hazards.
If readings don’t align with the specs, replace the sensor and test again, or call a pro for a definitive check.
Watch Video
Key Takeaways
- Power down safely before any testing
- Identify and isolate the flame sensor reliably
- Check continuity and resistance per the manual
- Reconnect and test with attention to safety indicators
- Replace sensor if readings are inconsistent with specs