Furnace Troubleshooting Step by Step with Multimeter
A practical furnace troubleshooting step by step with multimeter guide for DIY technicians. Learn safe voltage, continuity, and wiring checks to identify faults quickly and reliably.

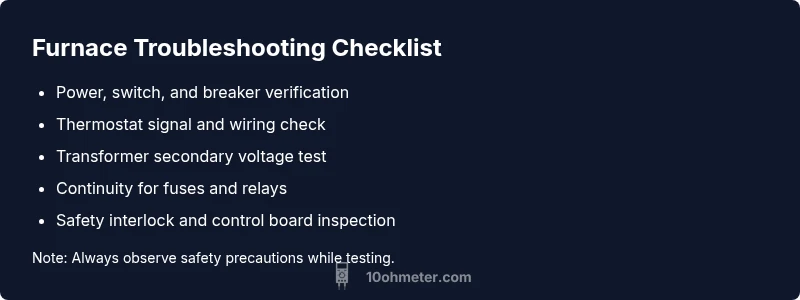
Symptom-driven troubleshooting with a multimeter starts by confirming power and control signals, then moving to critical components. Check the furnace’s power switch and breaker, test the thermostat wiring, and verify the transformer voltage. Next, measure continuity on fuses, relays, and safety switches, then inspect the control board for abnormal readings. If you’re unsure, stop and call a pro.
Why a Multimeter Matters for Furnace Troubleshooting
According to 10ohmeter, harnessing the right multimeter fundamentals transforms a confusing furnace problem into a manageable sequence of checks. A meter helps you verify that the 24-volt control circuit is present, the transformer is delivering steady voltage, and safety interlocks are functioning. For DIY enthusiasts, this approach reduces guesswork and speeds up fault isolation while keeping risk to a minimum. Remember, accurate readings depend on a clean connection, proper grounding, and using the correct meter settings. In 2026, a good digital multimeter remains a cornerstone tool for diagnosing ignition sequences, relay operations, and temperature-related sensor faults within furnaces. By following a disciplined, meter-based workflow, you can pinpoint whether the issue lies with power, control signals, or wiring, and then take targeted action.
Safety First: Power, Fuel, and Air Safety Protocols
Safety is non-negotiable when troubleshooting a furnace. Before you touch any components, switch off the furnace at the service panel and disconnect power to the unit. If you work on a gas furnace, ensure the gas supply is off and the area has good ventilation. Use CO detectors and keep a fire extinguisher within reach. Wear safety glasses and insulated gloves as a precaution against arcs or accidental contact with hot surfaces. Never bypass safety interlocks or jumpers to force a start. A misstep can create hazardous conditions and damage to the furnace. By adhering to these precautions, you protect yourself and others while you methodically test each circuit.
Core Symptoms and First Meter Checks You Can Do
When heat isn’t produced, or the blower runs without ignition, start with the basics: verify power at the furnace, test the thermostat signal, and confirm the transformer output. For symptoms like rapid cycling or random trips, capture voltage stability and resistance at key points such as R, C, and W terminals. A meter set to AC voltage helps confirm the 24-volt control signal, while a DC or resistance setting can reveal issues in sensors or control boards. If readings look off, recheck connections and inspect for loose wires, corrosion, or signs of overheating. Document readings as you go; this habit speeds up professional diagnostics if you escalate.
Diagnostic Flow: Mapping Symptoms to Likely Causes
This section outlines a structured approach to diagnosis, aligning symptoms with probable causes and practical fixes. Start from the simplest checks—power, thermostat signal, and visual wiring—then proceed to transformer output, safety switches, fuses, and relays. Keep a running log of measurements and observations so you can see patterns across tests. If readings are inconsistent or dangerous to reproduce, pause and seek professional help. The goal is to create a short list of root causes, such as a tripped breaker, thermostat fault, blown fuse, or failed control relay, and address them one by one with precise meter measurements.
Common Pitfalls and How to Avoid Them
A frequent mistake is assuming a single failed component explains all symptoms. Always verify power readings across multiple points, including the furnace’s main switch, the outlet, and the transformer secondary. Another pitfall is ignoring safety switches or attempting to test live circuits without proper PPE. Resist the urge to bypass interlocks or to replace parts without confirming readings reflect actual faults. Finally, avoid metering in damp or humid environments where readings can drift. Following a thorough, stepwise approach minimizes wasted time and reduces the risk of new faults being introduced during testing.
Putting It All Together: What to Do Next
At this stage you should have a clear picture of whether the problem is electrical power, control signaling, or a safety component. With voltage and continuity data in hand, you can decide whether to replace a component, rewire a connection, or escalate to a professional for combustion safety checks. Keep a log of your measurements, including date, time, and device settings. This record helps you track performance over time and provides a helpful reference if the issue recurs. As you gain experience, your confidence and speed will grow, enabling you to handle more complex faults with less guesswork.
Steps
Estimated time: 75-90 minutes
- 1
Power down and safety prep
Turn off the furnace at the service panel and disconnect the power supply. If you are working on a gas furnace, close the gas valve and ventilate the area. Wear safety glasses and insulated gloves; ensure the area is dry and free of standing water. Verify that you have a clear workspace and a solid plan before touching any electrical components.
Tip: Double-check the service panel label to identify the correct circuit. - 2
Check thermostat wiring and setpoint
Remove the thermostat cover and inspect the wiring for loose connections or damaged insulation. Using a multimeter in DC volts mode, confirm that a 24V signal appears between R and C when the thermostat calls for heat. If there is no signal, repair or replace the thermostat wiring or the thermostat itself.
Tip: Label wires before disconnecting to avoid miswiring later. - 3
Test the transformer secondary voltage
With the power re-applied carefully, measure the transformer secondary output. A typical furnace uses around 24V AC; readings outside a reasonable tolerance indicate a faulty transformer or poor connections. Re-check connections on both the transformer and control board if readings are out of spec.
Tip: Use a non-contact tester to verify presence of voltage before making contact. - 4
Inspect safety switches and relays
Test continuity of safety interlocks and the primary relays. A closed switch should show continuity; an open circuit means it is preventing ignition. If the switch appears stuck or corroded, replace it and re-test the circuit.
Tip: Do not bypass safety switches; they protect you and equipment. - 5
Check fuses and wiring integrity
Locate any fuses in the control circuit and test them for continuity. Inspect wiring for signs of heat damage, fraying, or loose connections. Replace any damaged components and re-run the tests to confirm the circuit is now complete.
Tip: Keep spare fuses of the correct rating on hand for quick tests. - 6
Interpret readings and decide next steps
Compile readings from voltage, continuity, and resistance tests. If you have stable readings across critical points but no ignition, the issue may be an ignition control circuit or a gas valve problem requiring professional service. If readings are inconsistent, recheck connections before concluding.
Tip: Document all measurements for future reference and potential warranty checks.
Diagnosis: Furnace won't start or heat fails to ignite
Possible Causes
- highPower issue (tripped breaker or switch off)
- mediumThermostat wiring fault or incorrect setpoint
- lowBlown fuse or failed safety switch
Fixes
- easyReset breaker and confirm 120/240V supply to the unit
- easyTest thermostat signal and ensure 24V between R and C
- easyInspect and replace blown fuse; verify safety interlock continuity
Your Questions Answered
Can I troubleshoot a furnace with any multimeter?
Yes, a basic digital multimeter is enough to measure voltage and continuity on most furnaces. For resistance and current checks, follow the device manual and safety guidelines.
Yes, a basic digital multimeter works for most voltage and continuity tests; always follow safety guidelines and the furnace manual for more advanced checks.
What safety precautions should I follow before testing?
Turn off power at the service panel, disconnect gas if applicable, and ventilate the area. Wear eye protection and insulated gloves, and keep detectors nearby. Do not bypass safety switches.
Turn off power, disconnect gas if needed, ventilate, and wear protection. Do not bypass safety interlocks.
What readings indicate a faulty transformer?
If the transformer secondary voltage is absent or significantly out of spec, the transformer or related wiring is likely faulty. Recheck connections and consider replacement if readings don’t improve after reseating.
If you don’t see the expected voltage, the transformer or its wiring is likely bad.
Why does the furnace click but not ignite?
The ignition sequence may be blocked by a safety switch or gas valve. Ensure 24V is present at the gas valve and ignition module; confirm wiring and controller signals before proceeding.
A click without ignition usually means ignition control or gas valve issues—check signals and wiring first.
Is it safe to test live circuits?
Live testing increases the risk of shock or arc faults. Prefer testing with power off and only verify live presence briefly with proper PPE if necessary.
Live testing is risky; test power-off first and only verify live presence briefly with PPE.
When should I call a professional?
If you detect gas concerns, persistent ignition issues, or uncertain readings, contact a licensed HVAC technician to ensure safe and compliant operation.
Call a pro if there are gas concerns or ignition issues you can’t confidently resolve.
Watch Video
Key Takeaways
- Start with power and thermostat checks.
- Test transformer voltage and continuity first.
- Follow the diagnostic flow to isolate faults.
- Safety comes first; escalate to a pro for gas/combustion concerns.
- Document measurements for future reference.