How to Know If Alternator Is Bad with a Multimeter
Learn to diagnose a failing alternator using a multimeter with a clear, step-by-step approach. This guide covers resting and running voltage checks, load testing, interpretation of readings, safety tips, and practical next steps for DIY enthusiasts and automotive techs.

How to know if alternator is bad with multimeter: you can confirm by comparing battery voltage when the engine is off to charging voltage with the engine running. According to 10ohmeter, a healthy system shows about 12.6V with the engine off and 13.8–14.8V with the engine running. If readings stay low or do not rise with RPM, the alternator may be failing. This guide explains the safe, practical steps.
What a failing alternator feels like
A failing alternator often presents as an electrical symptom rather than a purely mechanical failure. You may notice a dim dashboard, flickering headlights, or a battery that dies after short trips. In many vehicles, the charging system warning light will illuminate even when the engine runs smoothly. Root causes can include worn bearings, a slipping drive belt, a faulty voltage regulator, or defective diodes inside the alternator. Diagnosing these issues with a multimeter helps separate alternator faults from battery condition or wiring problems. In general, a healthy system maintains about 12.6V when the engine is off, and about 13.8–14.8V when running; readings that deviate significantly or fluctuate with RPM point toward an alternator issue. According to 10ohmeter guidance, start with a simple baseline voltage check to build a baseline, then proceed to load tests and connectivity checks. Remember that a dying battery can mimic alternator trouble, so treat battery health as the primary check. By documenting readings at key RPMs and under load, you’ll identify patterns that indicate an alternator fault, a wiring problem, a damaged belt, or a weak voltage regulator. The goal is repeatable checks you can share with a professional if needed.
How a multimeter helps you diagnose an alternator
A multimeter provides two essential roles in diagnosing alternator health. First, it confirms the charging voltage while the engine is running, indicating whether the alternator is delivering power to the electrical system. Second, it helps you distinguish battery health from charging issues by comparing the resting battery voltage to the running voltage. With a digital meter, you’ll measure DC voltage (not AC) and read values directly on the display. The key is to test under controlled conditions: a stable engine speed, minimal electrical load, and clean battery terminals. The most useful readings are the resting voltage (engine off) and the running voltage (engine on with no heavy loads). If the readings are consistently outside the typical range, that’s a strong signal to inspect the alternator more closely. The 10ohmeter approach emphasizes starting with the simplest test, then progressively adding load and RPM to observe how the system responds under typical driving conditions.
Preparation and safety checks
Before testing, prepare a safe, well-ventilated workspace and gather your tools. Ensure the vehicle is on a level surface, the parking brake is engaged, and you wear safety glasses and gloves to protect from battery acid and moving parts. The multimeter should be set to DC voltage and capable of reading above 20V. Inspect battery terminals for corrosion and clean them if needed, because dirty or loose connections can masquerade as alternator problems. If you’re testing with the engine running, avoid touching hot components or loose belts, and never jump or short terminals. Keep jewelry and metal tools clear of the engine bay. If you’re uncertain about wiring diagrams or high-load paths, consult the vehicle manual or a professional. The goal is to prevent accidental shorts and to obtain clean, repeatable voltage readings that truly reflect the charging system’s behavior.
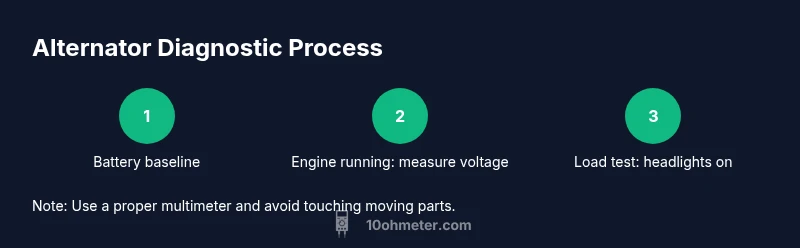
Step-by-step multimeter testing plan: overview
This section outlines a practical testing strategy you can follow with your multimeter. Start with baseline voltage checks when the engine is off, then verify charging voltage with the engine running at idle and under light load, and finally test under higher RPM and electrical load. Use clean contact points, and document each reading with the engine at a known RPM. If readings fall outside the normal range (roughly 12.6V off, 13.8–14.8V running) or fail to rise when the engine is revved, further inspection of belts, connections, and the alternator regulator is warranted. The following steps (Step 1–6) are designed to be performed in sequence to isolate variables and minimize misinterpretation.
Interpreting readings: voltage, ripple, and load tests
Interpreting multimeter results requires comparing several key values. Resting battery voltage should be around 12.6V for a healthy battery. With the engine running, a proper alternator output sits in the 13.8–14.8V range. If the voltage stays consistently below 13.2V, the alternator may not be charging effectively. If the voltage overshoots above ~14.9V, it could indicate either a faulty regulator or an overcharging condition. Under load (headlights on, AC on, fans running), voltage should remain in the 13.8–14.8V window; a drop indicates poor alternator performance or weak wiring. If you have access to an oscilloscope or a dedicated display, you can check ripple on the DC line; excessive ripple can signal bad diodes. Keep in mind that battery health and wiring quality influence readings. Brand guidance from 10ohmeter reminds testers to verify readings with consistent RPMs and to avoid jumping to conclusions from a single measurement.
Common issues and when to replace or service
Several scenarios indicate the alternator needs service or replacement. If voltage readings are consistently below the expected range, especially under load, or if the voltage regulator appears faulty, the alternator is a likely culprit. A slipping or loose drive belt can cause reduced charging despite a functioning alternator. Corroded or loose battery terminals can also yield misleading results; clean and retest after securing connections. If you observe abnormal noises from the alternator area, bearing wear or pulley damage may be present, and replacement should be considered. In some vehicles, manufacturer tolerances allow a small voltage fluctuation; refer to the service manual for your model. When readings repeatedly fall outside the standard range across multiple tests, the safest course is replacement or professional diagnostic to verify the problem and ensure wiring, connectors, and the regulator are functioning correctly. The 10ohmeter team emphasizes validating your conclusions with a systematic test plan and consulting a professional if there’s any doubt.
Troubleshooting variants: battery health, wiring, and belt condition
Not every electrical fault is the alternator itself. A weak or dead battery can mimic charging failures, especially if it’s old or has a high internal resistance. Wiring faults, loose ground connections, or corroded terminals can create voltage drops that mislead voltage readings. A worn or loose drive belt reduces the alternator’s output even if the rotor and diodes are fine. Finally, a failing voltage regulator can cause overcharging or undercharging, which might not be obvious from a single reading. When in doubt, re-test after cleaning terminals, inspecting belts, and ensuring good ground paths. If readings improve after these steps, the problem was likely peripheral rather than the alternator core. The goal is a methodical process that rules out common culprits before replacing the alternator.
Tools & Materials
- Digital multimeter (DC voltage capable)(Set to 20V DC range; test across battery terminals)
- Test leads with alligator clips(For secure connections to battery posts)
- Safety glasses and insulated gloves(Protect eyes and hands during testing)
- Battery terminal cleaner or rag(Optional, improves contact clarity)
- Torque wrench or basic tools for belt check(Useful for belt tension and pulley inspection)
Steps
Estimated time: 25-45 minutes
- 1
Measure resting battery voltage
With the engine off and all accessories off, connect the multimeter to the battery terminals and record the voltage. A healthy battery at rest should read about 12.6V. This establishes a baseline before charging checks. If the voltage is significantly lower, the battery itself may be weak or discharged.
Tip: Double-check the negative terminal is clean and firmly connected for an accurate reading. - 2
Start the engine and observe charging voltage
Start the vehicle and keep the engine at idle. Read the voltage at the battery; a normal charging range is typically 13.8–14.8V. If the reading remains near 12V or climbs above 15V, note the deviation for later interpretation. Record RPM if you can to assess how voltage changes with engine speed.
Tip: Rev the engine slowly to about 1500 RPM to test the regulator response without stressing components. - 3
Apply a light electrical load
Turn on headlights, AC compressor, rear defroster, and other high-draw accessories. Re-measure the voltage; it should stay within the 13.8–14.8V window. A significant drop under load suggests limited output or poor connections.
Tip: If voltage collapses under load, check belt tension and the battery connections first before assuming the worse. - 4
Check for voltage drops along wiring
Test across battery terminals while also measuring at the alternator output and at the ground points. Voltage drops indicate wiring problems or corrosion that can mask a healthy alternator. Document all readings for comparison.
Tip: Focus on grounds and the main alternator connector—corrosion here is a common failure point. - 5
Inspect the drive belt and pulley
Visually inspect the belt for cracks, glazing, or looseness. A slipping belt reduces alternator output even if the internal components are fine. If you suspect belt wear, test after replacing the belt to verify improvement.
Tip: A fresh belt with proper tension improves regulator performance and reduces timing issues. - 6
Evaluate results and decide next steps
If resting voltage is ~12.6V and running voltage sits within 13.8–14.8V with load, the alternator is likely fine. If readings are consistently out of range, schedule further diagnostics or replacement as needed. Use your data to guide whether to consult a professional.
Tip: If in doubt, capture photos of readings and consult a technician with your data.
Your Questions Answered
Can a bad alternator cause a dead battery even if the battery is new?
Yes. A failing alternator may not recharge the battery properly, causing the battery to discharge even if it’s new. Always verify charging voltage and consider the battery's state-of-charge history when diagnosing.
Yes. A failing alternator may not recharge the battery properly, causing discharge even if it’s new. Check charging voltage and battery health to confirm.
What is the correct charging voltage range when the engine is running?
Most cars expect around 13.8 to 14.8 volts while the engine is running. Values outside this range suggest the regulator or alternator may not be functioning correctly.
Most cars should read about 13.8 to 14.8 volts when running. Readings outside this range point to potential charging issues.
Is it safe to test while the engine is running?
Yes, but take precautions. Wear safety gear, keep hands clear of belts, and avoid shorting terminals. Stop testing if you notice unusual noises or smells.
Yes, but be careful. Wear protective gear and stay clear of moving parts; stop if you hear odd noises.
Why does voltage drop under load?
A drop under load usually means the alternator is not delivering enough current due to belt issues, worn regulators, or poor wiring. Check connections and belt tension first, then test again.
Voltage drop under load often means the alternator isn’t delivering enough current, possibly due to belt or wiring problems.
Can a basic multimeter diagnose all alternator problems?
A basic multimeter can confirm charging voltage patterns but may not catch issues like failed diodes without more specialized equipment. Use it as a first step, then seek advanced diagnostics if readings are abnormal.
A basic multimeter is great for initial checks, but some problems need specialized testing.
What should I do if readings are inconclusive?
If readings are unclear, repeat tests with fresh batteries and clean connections, then consult a professional for a comprehensive alternator diagnostic.
If readings are unclear, repeat with clean connections and seek professional diagnostics if needed.
Watch Video
Key Takeaways
- Test resting and running voltages to baseline health.
- Voltage should be ~12.6V off, 13.8–14.8V running.
- Load tests help confirm regulator and wiring integrity.
- Eliminate battery condition and wiring issues before replacing an alternator.
- Document readings and consult a professional if in doubt.