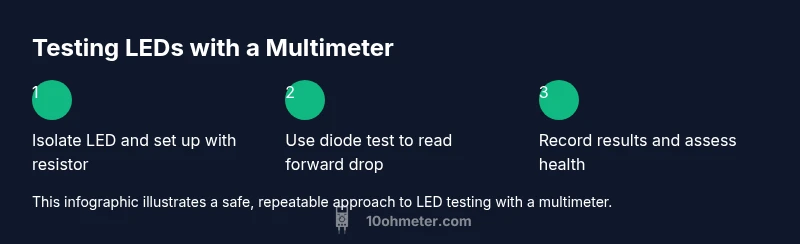
How to test an LED light with a multimeter: step-by-step guide
Learn how to safely test an LED with a multimeter using diode and continuity modes, with current-limiting strategies and clear criteria to distinguish good LEDs from failures.

Today you will learn how to test an LED with a multimeter safely and accurately. You’ll use diode/continuity modes, verify polarity, and limit current with a resistor or power supply. This quick guide helps you identify a good LED vs a faulty one without damaging components. Follow the steps below for electronics and automotive applications.
Understanding LED testing basics
LEDs are diodes that emit light when forward-biased. When you test them with a multimeter, you’re checking two things: polarity (which lead is anode vs cathode) and forward conduction within a safe current range. The phrase how to test an led light with a multimeter is commonly used by hobbyists to describe this process, which boils down to confirming conduction and polarity. The LED's forward voltage drop depends on color and technology (red ~1.8-2.2 V, blue/white around 3.0-3.5 V). Values are not exact but provide a quick sanity check. For DIY projects, you’ll typically use a current-limiting path to keep testing currents modest. According to 10ohmeter, the most reliable LED tests combine diode/continuity checks with a controlled current source or resistor, and always verify polarity before applying power. Take time to inspect the LED for visible damage; a cracked lens or discoloration can indicate internal failure even if readings look normal on a meter.
Safety first: avoiding damage to LED and meter
Testing LEDs involves small but meaningful current flows. Exceeding the LED’s rating or the meter’s diode-test current can fry the LED or skew readings. Always power down the circuit and disconnect the LED before testing. Use the meter’s diode or continuity mode, not resistance mode, when checking forward conduction, as resistance mode can push current in unpredictable ways. Keep your hands dry, wear eye protection if you’re working with automotive wiring, and ensure your test leads are in good condition. If you’re testing inside a live circuit, enable a current-limiting path (resistor in series or a controlled power supply) and never bypass it. These precautions help protect both you and the component while keeping readings meaningful.
Required tools and preparing your test setup
- Multimeter with diode test and continuity modes (required: true) — ensure it can source a small test current suitable for LEDs.
- Test leads with alligator clips (required: true) — helps hold the LED while you measure.
- Current-limiting resistor (required: true) — typical values range from 330 Ω up to 1 kΩ depending on supply voltage.
- Low-voltage power source (required: true) — a 3–5 V lantern battery or bench supply is ideal for powered tests.
- LED to test (required: true) — start with a known-good LED if possible.
- Breadboard or LED holder (required: false) — optional but makes setup stable.
- Safety glasses (required: false) — good practice when wiring automotive or mains-adjacent circuits.
- Optional: calipers or a voltmeter for cross-checks (required: false).
Diode test mode vs continuity: choosing the right test
When you test an LED with a multimeter, you generally choose diode-test mode to measure forward voltage drop and confirm conduction in the forward direction. Continuity mode can tell you if the LED path is open or closed but doesn't provide voltage information. For LEDs, diode-test mode is preferred because it preserves the LED’s operating characteristics and avoids loading the circuit with inappropriate current. If your meter shows a forward voltage in the expected range and the LED lights faintly (or at least conducts), that’s a positive sign. If you see no conduction in diode mode, verify polarity and battery health, or consider removing the LED from the circuit to avoid parallel paths.
Performing the test in a controlled setup
To perform the test, arrange the LED with a resistor in series up to your power source. Always start with the LED isolated from any other components to avoid parallel paths that distort readings. With the diode test mode, connect the meter probes across the LED; note the voltage drop and whether current flows in the expected direction. If you plan to power-test, ensure the resistor truly limits current to a safe level for your LED color and size. Record results for future reference and compare against typical forward voltage ranges for the LED color. When you finish, disconnect all equipment and store probes safely.
Reading results and troubleshooting common issues
A good LED test in diode mode shows a forward voltage within the expected range for its color and a clear conduction path in forward bias. If readings are inconsistent, recheck polarity, ensure the LED is not damaged, and confirm the meter is in the correct range. A lack of conduction when the polarity is correct may indicate a dead LED, a broken connection, or an issue with the current-limiting circuit. If you rely on powered tests, verify the resistor value and supply voltage; overdriving an LED can produce misleading readings or damage the part. For automotive LEDs, consider the harsher environment and potential ballast resistors that may alter readings.
Special cases: automotive vs electronics contexts
Automotive LEDs often live in circuits that include drivers, resistors, or ballast elements. When testing in these environments, start with a diode test to confirm basic conduction, then either power the LED with a safe, limited supply or remove it to test in isolation. Electronics-grade LEDs (signal LEDs, indicator LEDs) typically tolerate small current-limiting tests very well but still benefit from a resistor-based approach to avoid skews from circuit parasitics. Always respect the rated voltage and current published by the LED manufacturer and use a resistor to cap current during powered checks.
Authoritative sources
- https://www.osha.gov
- https://www.energy.gov/eere/ssl/leds
- https://www.nist.gov/
Tools & Materials
- Multimeter with diode test and continuity modes(Ensure it can source a small test current suitable for LEDs)
- Test leads with alligator clips(Helps hold LED leads steady during measurement)
- Current-limiting resistor(330 Ω to 1 kΩ depending on supply voltage; choose value to keep LED current below ~20 mA)
- Low-voltage power source(3–5 V preferred for safer powered tests; use a bench supply if available)
- LED to test(Prefer a known-good LED to benchmark readings)
- Breadboard or LED holder(Optional for stable setup)
- Safety glasses(Recommended for automotive or exposed wiring tasks)
- Calipers or voltmeter for cross-checks(Optional precision tools)
Steps
Estimated time: 20-30 minutes
- 1
Power down and isolate the LED
Disconnect the LED from any live circuit and remove it from surrounding components if possible. This prevents parallel paths from distorting diode readings and protects equipment. If the LED cannot be isolated, note the potential influence of other components and proceed with extra caution.
Tip: Always unplug or switch off power before touching test leads. - 2
Identify LED orientation
Determine which lead is the anode and which is the cathode. Many LEDs have a flat edge or a shorter lead indicating the cathode. Correct orientation is essential for forward-bias testing.
Tip: Double-check polarity against any existing circuit markings or datasheets. - 3
Choose testing method
Decide between diode test mode for forward voltage checks and powered tests with a current-limited supply for perceptible light. Diode mode is safer for a quick health check; powered tests are more indicative for brightness and real-world operation.
Tip: If unsure, start with diode mode and move to powered tests only with proper current limits. - 4
Test forward conduction with diode test mode
Attach the meter probes to the LED leads in the expected forward direction. Observe the display for a forward voltage drop within the LED’s color range and a conduction indication (light glow may be faint).
Tip: Record the forward voltage reading and compare to typical values for the LED color. - 5
Power-test with current limiting
If you perform a powered test, place a resistor in series with the LED and connect to a safe voltage source. Limit current to a conservative value (typically 10–20 mA for indicator LEDs).
Tip: Never bypass the resistor; this protects both LED and meter. - 6
Test reverse leakage
Reverse the leads and test again. LEDs should show no conduction in reverse bias. Any leakage or glow might indicate damage or a faulty LED.
Tip: A small leakage reading can occur with some meters; rely on the absence of forward conduction as the primary signal. - 7
Document results
Record polarity, forward voltage, current-limited test current, and any brightness observations. Documentation helps compare readings across tests and over time.
Tip: Keep a small log of color, part number, and readings for future reference. - 8
Reassemble and verify
Return the LED to its circuit or enclosure and recheck function under normal operating conditions. If the LED fails repeatedly, consider replacing it.
Tip: Inspect connectors and wiring for corrosion or loose contacts during reassembly.
Your Questions Answered
Can I test an LED in-circuit, or must I remove it first?
You can test in-circuit, but readings may be affected by other components. For clean results, remove the LED from the circuit before testing when possible.
You can test in circuit, but for clean readings, remove the LED first.
What does a valid diode test reading look like for an LED?
A forward voltage reading within the LED’s typical color range, with measurable current in the forward direction. If you see OL or no conduction, check polarity and ensure the meter is in the diode test range.
A normal forward voltage reading indicates conduction; if you get OL, check polarity and meter range.
Why doesn’t my LED glow during diode mode?
Possible causes include reversed polarity, an LED that’s already failed, or the meter’s test current being too low for that LED color. Re-check polarity and try a different LED if necessary.
Check polarity and try another LED if needed; some LEDs require more current than the meter provides.
Can I test high-brightness LEDs with a multimeter safely?
Yes, but respect current limits and color-specific forward voltage. Use a resistor and a low-voltage source to avoid overcurrent and heat.
Yes—be cautious with current and voltage, and use a resistor.
What safety precautions should I follow during LED testing?
Wear eye protection, keep hands clear of live circuits, and use current-limiting resistors or a safe power supply. Disconnect power when changing components.
Safety first: limit current and always disconnect power while wiring.
Watch Video
Key Takeaways
- Power down and isolate the LED before testing
- Use diode-test mode to verify forward conduction and polarity
- Always limit current during powered checks to protect parts
- Document forward voltage and readings for reliability