Check Alternator Without a Multimeter: Practical Guide
A practical, non-meter method to verify your alternator’s charging. Learn safe diagnostics such as dash lights, belt tension, headlight load test, and evaluating battery health.

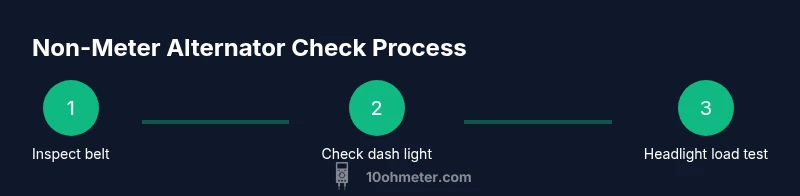
Learn how to check if alternator is working without multimeter by inspecting the belt, dashboard light, and a safe headlight load test. With a helper and careful steps, you’ll diagnose charging issues reliably.
Understanding the charging system and why the alternator matters
The alternator is the heart of your car's charging system, converting mechanical energy from the serpentine belt into electrical power to run accessories and recharge the battery while the engine runs. When it fails, you may notice the battery drains unexpectedly, dimming lights, and electrical glitches that come and go. In this guide we show how to check if alternator is working without multimeter, using safe, practical tests. According to 10ohmeter, the quickest clues often lie in belt condition, dashboard indicators, and how the electrical system behaves under load. This section lays the groundwork for diagnosing with non-meter methods, so you can decide whether you need professional service or a replacement. Remember: the goal is to verify that the alternator can maintain charging while the engine is running, not to measure exact voltages.
Safety first and prerequisites
Before you reach under the hood, ensure the vehicle is on level ground, the parking brake is set, and wheels are blocked. Remove jewelry and loose clothing, and wear eye protection and gloves. Disconnecting safety hazards and keeping a clear work area reduces the risk of injury when working near belts and hot surfaces. You don’t need a multimeter for these checks, but you do need a calm plan and a helper if possible. Never work on a live electrical system with bare hands or in a noisy engine bay where tools could slip. This block explains the mental checklist and safety steps that underpin all non-meter tests.
Visual checks: belt, wiring, and alternator connections
A healthy belt is essential for the alternator to spin and generate power. Look for cracks, glazing, or fraying in the belt, and verify it has the right tension according to your vehicle’s service manual. Inspect the belt routing around pulleys to ensure it isn’t riding on the wrong groove. Next, check the alternator’s electrical connections: clean battery terminals, tight ground strap, and the terminal on the alternator output stud. Corroded or loose connections can mimic alternator problems by interrupting charging. If you see obvious issues, address them before performing further tests.
Dash indicators and battery health cues
A healthy charging system keeps the dash battery light off after the engine starts. If the battery warning light flickers or stays on, it’s a red flag. Electrical issues can also manifest as dimming headlights, slow-starting engines, or unusual accessory behavior (radio glitches, motorized seats not moving smoothly). Remember that an aging battery can resemble a bad alternator; inspect the battery’s surface for corrosion, ensure clamps are tight, and consider its age. While you can’t measure voltage with a non-meter test, consistent signs across these indicators strongly point toward charge-system trouble.
Headlight load test: observe under-load behavior
Use a safe load test by turning on all lights (headlights, interior lights) with the engine running at idle. Observe how the lights behave as you increase engine speed slightly. In a healthy system, the lights should brighten smoothly and remain steady as the rpm rises. If the lights dim or fluctuate with engine speed, this suggests the alternator isn’t delivering consistent current under load. Keep engine rpm within a comfortable range to avoid belts slipping or excessive belt wear. This test is simple, inexpensive, and can reveal a marginal alternator that would soon fail.
Non-meter live test using a test light (no meter)
For a basic live test without a multimeter, you can use a 12V test light to check the alternator output under running conditions. With the engine running on a safe surface, ground the test light to the car chassis and lightly probe the alternator output stud (the big post where the belt drives). If the test light glows brightly, the system is producing voltage. If the light stays dim or off, there may be no output. For more reliability, have a helper hold the engine at around 1500-2000 RPM while you observe. If the light behavior changes with RPM, note it for later diagnosis.
Safety note: this test involves live electrical components. Keep hands clear of moving belts, wear protective gear, and never touch hot surfaces. If you’re unsure, skip steps that involve direct contact with hot metal or live terminals and consult a professional.
Interpreting results and next steps
If multiple non-meter indicators point to charging issues (dash light behavior, belt condition, load test response, and a glow from the test light), you should plan for professional diagnosis or belt replacement. If the belt appears fine and indicators are clean, but tests still suggest weak charging, the alternator may be failing internally or there may be a wiring fault. Document your observations, note engine rpm ranges where symptoms occur, and bring this information to a technician. Even a non-meter assessment can guide you toward the correct next step and prevent you from chasing the wrong culprit.
Common pitfalls and quick fixes
Don’t rely on a single symptom to diagnose an alternator. A weak battery, poor ground, or corroded terminals can produce false positives in non-meter checks. Always re-inspect belt tension and wiring after any observed issue, and be wary of accidental short circuits during testing. If you notice burning smells or crackling noises, stop immediately and seek professional help. With careful observation and methodical testing, you can distinguish between simple fixes (clean terminals, belt tension) and genuine alternator failure.
Tools & Materials
- Flashlight or headlamp(Bright LED, hands-free preferred for under-hood visibility)
- Safety glasses(Eye protection against debris and battery fumes)
- Insulated gloves(Protect hands when working near belts and terminals)
- Rags or shop towels(Wipe surfaces and dry any moisture or contact points)
- Test light (12V) or a simple lamp(Non-meter voltage presence test to verify charging flow)
- Basic hand tools (wrench set or pliers)(Optional for belt screws or terminal clamps)
- Wheel chocks or parking brake aids(Stabilize vehicle when performing tests)
Steps
Estimated time: 30-45 minutes
- 1
Prepare the vehicle safely
Park on level ground, set the parking brake, and block the wheels. Gather your tools, wear eye protection and gloves, and have a helper nearby if possible. Ensure the engine is cool before you begin and avoid loose clothing near moving parts.
Tip: Verify parking brake is engaged and wheels are chocked before approaching the engine bay. - 2
Inspect the belt and routing
Turn off the engine, pop the hood, and visually inspect the Serpentine belt for cracks, glazing, or fraying. Check belt tension by pressing the belt midway between pulleys; it should have slight give but not be loose. If you see damage, replace the belt before testing and avoid running the engine until corrected.
Tip: A worn belt can masquerade as alternator failure by not turning the alternator pulley properly. - 3
Check battery terminals and ground
Examine battery terminals for corrosion and ensure clamps are tight. Inspect the ground strap from the engine block to the chassis. Clean any corrosion and reseat connections if necessary. A flaky ground can show charging symptoms even with a good alternator.
Tip: Use a wire brush or terminal cleaner for best contact; apply a light coat of dielectric grease to prevent future corrosion. - 4
Observe dash indicators and general health cues
Turn the ignition to the On position with the engine off and note any warning lights. Start the engine and observe how quickly the battery light goes out. Note any flickers, dimming, or odd dashboard behavior that persists after the engine runs.
Tip: If the warning light stays on after start, this is a strong indicator to inspect the charging system. - 5
Perform a headlight load test
With the engine running at idle, turn on headlights and interior lights. Observe brightness as you slightly increase engine RPM. Lights should brighten and stay steady; dimming or flicker suggests charging problems or belt slippage under load.
Tip: Do not rev the engine excessively; keep to a controlled, safe RPM range. - 6
Conduct a live test with a test light
Ground the test light to the chassis and lightly probe the alternator output stud while the engine runs. A healthy system will illuminate the light indicating voltage, and ideally respond to RPM changes. If the light remains dark or flickers unpredictably, note the conditions for later diagnosis.
Tip: Only perform this if you’re comfortable with live electrical work and maintain a safe stance away from moving parts. - 7
Interpret results and plan next steps
Synthesize observations from belt condition, dash indicators, load tests, and the test light performance. If several signs point toward charging issues, prepare for professional evaluation or component replacement. If tests are inconclusive, reassess belt and connections or consider testing with a meter or at a shop.
Tip: Document signs and timing of observed symptoms to help a technician diagnose quickly.
Your Questions Answered
Can I test an alternator without a multimeter?
Yes, using dash indicators, belt inspection, headlight load test, and battery health cues can indicate charging status. A more definitive test may require a meter or professional equipment.
Yes. You can check using dash lights, belt condition, a headlight load test, and battery health cues. For confirmation, a meter is best.
What are the signs of a failing alternator?
Dim or flickering lights, a battery light on the dash, and accessories behaving erratically can signal alternator trouble, especially if the battery is newer or healthy.
Dim lights, a battery light on, and erratic electrical behavior are common signs of alternator trouble.
Is it safe to test while the engine is running?
Yes, but only with proper safety precautions: keep hands away from belts, wear protection, and avoid touching hot surfaces. Stop if you smell burning or hear grinding sounds.
It's okay to test with the engine running if you take safeguards and stop if you smell burning.
Will a bad alternator ruin my battery?
A failing alternator can prevent charging and eventually drain a healthy battery. If the alternator isn't keeping the battery charged, the battery will fail sooner.
Yes, a bad alternator can drain a good battery over time.
What should I do next if tests point to the alternator?
Check belt tension and connections again, then consider professional diagnosis or replacement. Bring observed symptoms to a shop for an accurate assessment.
If tests point to the alternator, recheck belts and connections, then seek professional help if unsure.
Watch Video
Key Takeaways
- Check belt and connections first to rule out simple causes.
- Dash indicators + under-load behavior reveal charging problems.
- Headlight tests show how the system performs under load.
- Battery health and grounds influence perceived alternator performance.
- Use a safe live test to confirm presence of voltage without a meter.