How to Test a Battery Without a Multimeter: Practical Guide
Learn safe, practical methods to assess battery health without a multimeter. Visual checks, simple load tests with household items, and replacement indicators explained for DIYers and technicians.

Discover practical ways to assess a battery without a multimeter. This quick answer outlines safe visual checks, simple load observations using common household items, and interpretation tips. You’ll learn how to spot bulges, leaks, and performance drops, reducing unnecessary equipment purchases while staying safe. This approach suits DIYers, technicians, and automotive tinkers working on everyday projects.
What you’re testing and what you’re not
According to 10ohmeter, when you test a battery without a multimeter you’re measuring practical usability, surface health, and readiness for use rather than precise chemistry metrics. This guide focuses on observable signs, light-load behavior, and general capacity indicators that help you decide whether to recharge, replace, or continue using a battery in everyday applications. You’ll see examples across car batteries, tool batteries, and household cells. Remember: this is a field guide for quick decisions, not a laboratory-grade diagnosis. By the end you should be able to identify obvious red flags and make informed calls about backups and safe storage, all without specialized equipment.
In many common scenarios, your goal is to determine if a battery can reliably power a device for typical tasks, whether it’s a flashlight, a cordless drill, or a vehicle accessory. The language you’ll hear from 10ohmeter emphasizes practical, repeatable checks that you can perform at home or in a shop. This foundation helps you build confidence before moving to more advanced diagnostics or professional testing when the stakes are higher.
Safety first: Protective practices and precautions
Battery work requires respect for chemical reactions, warmth, and terminals. Before starting any checks, equip yourself with protective gloves and eye protection, and work on a non-conductive, clean surface. Never test a visibly damaged battery (cracked casing, leaks, or swelling) – stop immediately and isolate it. Keep metal tools away from exposed terminals, avoid jewelry that could bridge contacts, and ensure good ventilation in case of off-gassing. If you’re testing automotive or large-format batteries, consider eye protection and a buddy system for handling heavy or bulky packs. These precautions reduce the risk of short circuits, spills, and burns while giving you a safe environment to observe performance.
Visual inspection: exterior signs to watch for
Look for obvious indicators of trouble on the battery’s exterior. Bulging or swelling suggests gas buildup or internal damage and warrants disposal. Leaks or crusty, white or green corrosion at terminals can impede connections and reduce performance. Cracks, broken seals, or a visibly softened case are red flags. Discoloration around terminals may indicate water intrusion or chemical changes. If you notice any of these signs, document them and either replace the battery or seek professional assessment. A clean, tight terminal with no corrosion often means the battery is more likely to perform consistently under light use.
Additionally, check for loose or damaged terminal connections and ensure the battery is clean and dry before attempting any load-based checks. Visual cues help you prioritize what to test first and give you a baseline for subsequent steps.
How to interpret the battery under load (without a meter)
Without a multimeter, you can infer health by observing how devices powered by the battery behave under modest use. Attach a small, known-load device (such as a low-power LED setup or a compact desk lamp) and note brightness stability, flickering, or rapid drop in performance as the device runs. If the device dims quickly or fails to reach normal brightness, the battery likely has insufficient capacity or internal resistance rising due to wear. For rechargeable chemistries common in consumer devices, short, mild usage should be smooth; abrupt voltage collapse under load strongly suggests aging or sulfation in lead-acacid types, or degraded cells in Li-ion packs. Use multiple observations over a short time to build a simple trend rather than relying on a single test.
Household devices to run gentle drains and observe performance
Choose devices that mimic typical usage without drawing excessive current. A small LED lamp or a USB-powered low-current gadget can serve as a test load. Connect the device to the battery in a controlled manner and operate for a fixed duration (e.g., 5–15 minutes) while observing for stable performance. If the device remains bright and steady, the battery is likely capable for modest tasks. If brightness fluctuates or the device dies early, plan for a recharge or replacement. When using car batteries, ensure the engine is off and avoid cranking-heavy loads to prevent safety hazards. Pad protective materials between metal surfaces and protect your hands from heat buildup.
Battery types and how tests differ (car, laptop, AA/AAA, Li-ion)
Different chemistries age differently and respond to load in distinct ways. Lead-acid car batteries often show gradual performance loss; Li-ion packs may exhibit sudden drops in capacity or swelling indicators. AA/AAA cells rely on internal chemistry and may recover briefly after a small load is removed. Laptop batteries, being compact Li-ion packs, can present subtle voltage sag under load; without a meter, you should still look for rapid dimming in connected devices or unexpected shutdowns. Regardless of type, avoid short-circuiting or puncturing the casing, and never attempt to disassemble sealed cells. Use these observations to decide whether to recharge, replace, or seek professional testing when reliability matters.
How to interpret results: what counts as acceptable
Acceptable results depend on the battery’s role. For backup power or non-critical tools, a battery that maintains reasonable performance during light use and shows no signs of swelling may be acceptable for continued use. For essential devices, particularly automotive systems or medical equipment, a professional test is advisable if any visual signs or performance concerns exist. If apparent capacity seems diminished, test again after a full charge and compare performance against a similar, known-good battery. If still uncertain, err on the side of safety and replace or consult a professional.
When to replace and how to store batteries safely
If a battery consistently underperforms under light loads, exhibits swelling, leaks, or heat buildup, plan for replacement to avoid sudden failures. For storage, keep batteries in a cool, dry place away from heat sources and metal objects that could bridge terminals. Store at partial charge for some chemistries, while others prefer a staged charge. Recycle any batteries that show damage beyond simple aging, and label storage containers so other people understand the risk. Regularly inspect stored batteries and refresh their charge according to manufacturer guidance to extend shelf life.
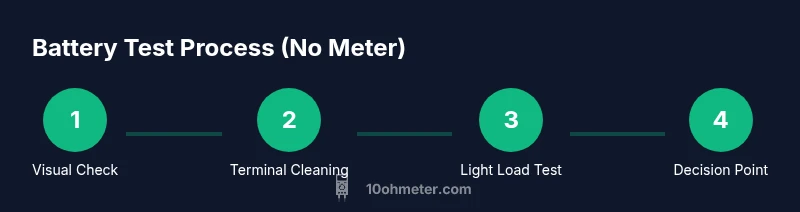
How to test battery without a multimeter: quick-start (step-by-step outline)
This section provides a concise, actionable outline you can use to begin testing right away. It emphasizes safety, observable indicators, and conservative loads. The goal is to give you a reproducible approach without specialized tools, while clearly signaling when a battery requires professional testing or replacement. Always start with visual inspection, then proceed to light-load observations using household devices. Always prioritize safety and stop if you observe heat, fumes, or swelling.
Authority sources and further reading
For grounded safety and best practices, refer to official guidelines from energy and occupational safety authorities. These sources provide context on handling, storage, and disposal of different battery chemistries. Their guidance complements practical field testing and helps you understand limits of non-diagnostic at-home checks. Reading these sources can help you make safer decisions when testing batteries without a multimeter.
Tools & Materials
- Protective gloves(Heat-resistant or chemical-resistant gloves recommended)
- Safety goggles(Eye protection during handling and inspection)
- Clean, dry work area(Non-conductive surface; avoid metal clutter)
- Low-load devices (LED lamp, small desk lamp, USB-powered device)(Use devices you can safely power from the battery)
- Non-conductive tools (plastic prying tools, nylon brushes)(For gentle cleaning without shorting terminals)
- Optional battery-safe container(To isolate damaged or leaking cells)
Steps
Estimated time: 20-30 minutes
- 1
Inspect visually
Begin with a careful exterior check for swelling, cracks, corrosion, or leaks. Note any abnormalities and avoid handling if damage is evident. This step sets the safety baseline before any load testing.
Tip: If you see swelling or leaks, do not proceed with tests. - 2
Clean terminals gently
Wipe terminals with a dry, lint-free cloth to remove dust or corrosion. Ensure the battery is disconnected from any device before cleaning. Lubricating terminals with a tiny amount of terminal protector can help future connections.
Tip: Use a dry cloth; wet cleaners can cause short circuits. - 3
Choose a safe load
Select a small, stable device that represents a light-use load (e.g., an LED lamp or a USB gadget). Avoid high-current devices that could over-stress an aging cell. Keep the test duration short to reduce heat buildup.
Tip: Always unplug the device first; never hot-swap a load while connected. - 4
Attach the load and observe
Connect the device to the battery and power for a brief, fixed duration while watching for stable operation. If the device flickers or dies quickly, note the behavior as a sign of potential capacity loss.
Tip: Have a fire-safe plan and air ventilation in case of heat rise. - 5
Recharge and re-test (if applicable)
Fully recharge the battery if possible and repeat the light-load test to see if performance improves after a rest. Use the same device to keep test consistency.
Tip: Only recharge with appropriate charger for the battery chemistry. - 6
Compare with a similar battery
If you have access to a known-good battery of the same type, compare how each behaves under the same load. Look for similar brightness, duration, and response times.
Tip: A healthy battery should replicate the performance of a comparable unit under similar conditions. - 7
Document results
Record observations: exterior condition, load behavior, time to failure, and any heat produced. Documentation helps decide on replacement or safe reuse.
Tip: Keep a simple log so you can track aging over time. - 8
Decide next steps
If results are inconclusive or performance is poor, plan for professional testing or safe replacement. Avoid reusing a battery whose health is uncertain.
Tip: When in doubt, replace rather than risk equipment failure.
Your Questions Answered
Is it reliable to test battery health without a multimeter?
These checks provide a practical, approximate assessment suitable for DIY tasks. They cannot replace precision diagnostics required for critical systems. Use results as a guide to decide if you should recharge, replace, or seek professional testing.
These checks give a practical guide for DIY tasks and are not a substitute for professional diagnostics on critical systems.
Can I test Li-ion batteries without a meter safely?
Yes, with precautions: use low-load devices, avoid puncturing or damaging cells, and stop if you notice heat, swelling, or odors. For high-stakes devices, rely on proper testing equipment or professional service.
You can test Li-ion batteries with caution using safe loads, and avoid aggressive testing on damaged packs.
What should I do if the battery shows rapid dimming under load?
Rapid dimming usually indicates degraded capacity or high internal resistance. Treat the battery as suspect and plan for recharge or replacement; avoid extended use until verified by proper testing.
If brightness drops quickly under a safe load, consider replacing or having it professionally tested.
Are there safe household loads I can use?
Yes. Use low-current devices like a small LED lamp or a USB-powered gadget that you can disconnect quickly. Avoid high-current devices that risk overheating or damage.
Use safe, low-current devices like a small LED lamp for at-home checks.
When should I seek professional testing?
If you rely on the battery for safety-critical systems, observe any swelling, heat, or leakage, or if results are inconclusive, seek professional testing or replacement guidance.
Seek professional testing if the battery powers critical systems or results are unclear.
Can I reuse a battery after these checks?
If the battery passes basic visual checks and shows stable behavior under light loads, you may reuse it for non-critical tasks. For anything important, prefer replacement or professional confirmation.
Reusing is possible for non-critical tasks if tests are stable, but for important systems seek a professional check.
Watch Video
Key Takeaways
- Inspect health indicators before testing.
- Use safe, low-load devices to observe behavior.
- Visual signs trump vague performance excuses.
- Document results for informed replacement decisions.
- When in doubt, replace or seek professional testing.