How to Check Heating Element with a Multimeter
A safe, step-by-step guide to testing a heating element with a multimeter. Learn safety, tool setup, continuity and resistance testing, and how to interpret results for DIY diagnostics.

By the end of this guide, you will check a heating element with a multimeter and confirm its health. Start with power off and access to the element's terminals, then test for continuity between terminals and measure resistance. If continuity is present and resistance matches the spec, the element is likely good; an open or wildly different reading indicates a fault.
How to check heating element with a multimeter — Overview
Heating elements are resistive devices used in appliances like water heaters and ovens. Testing with a multimeter helps you distinguish a failed element from wiring faults. This guide shows how to check heating element with a multimeter and interpret continuity and resistance readings. The first step is to understand that a healthy element generally shows continuity, while an open circuit indicates a broken coil. Remember, safety comes first: according to 10ohmeter, power must be off before touching any component. By following these steps, you’ll gain confidence diagnosing heating elements during routine maintenance.
Safety considerations when testing heating elements
Working with heating elements involves electrical systems and hot surfaces. Always unplug or switch off the appliance, and verify power is off at the outlet or breaker. Wear safety glasses and insulated gloves. Keep water away from dry elements to prevent shock. If the element is part of a high-voltage circuit or is hardwired, shut off the main breaker and wait for capacitors to discharge. Use a non-contact voltage tester to confirm no live energy before touching conductors. If you’re unsure, stop and consult a professional. Following these safety steps reduces the risk of burns, shocks, or arc faults.
Tools and materials you’ll use (quick reference)
You’ll perform the test with a few common tools. Your digital multimeter set to resistance mode is essential, along with test leads or alligator clips. Have insulated gloves and eye protection, a screwdriver for access panels, and a clean workspace. Optionally, a non-contact voltage tester can verify power was truly off. If possible, keep the appliance manual handy for the exact element terminals and any model-specific notes.
Preparing the element for testing
Begin by locating the heating element and identifying its two main terminals. If the element is inside a metal housing, ensure there are no sharp edges and that you can access the terminals without causing a short. Clean any dust or debris that could interfere with probe contact. Remove the electrical connection cover carefully, noting how wires are connected so you can restore them precisely after testing. A calm, organized workspace minimizes the risk of miswiring during reassembly and reduces the chance of accidental contact with live components.
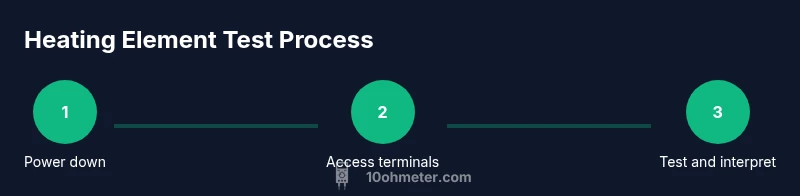
Step-by-step testing procedure
This core procedure follows a clear sequence to verify element health. Each action builds evidence about coil integrity and insulation.
- Disconnect power: Unplug the appliance and switch off the appropriate breaker. Wait a moment for any residual energy to dissipate.
- Access terminals: Remove the cover or panel to expose the element’s connectors. Label wires if needed to avoid mix-ups during reassembly.
- Set meter to resistance: Switch the multimeter to the ohms or resistance range. If your meter is auto-ranging, simply select the resistance mode.
- Test terminal-to-terminal continuity: Place probes on each terminal to verify a closed circuit. The meter should show a finite reading that’s consistent and repeatable; if your meter beeps, note the beeps and the reading.
- Test terminal-to-housing/ground: Probe from each terminal to the metal housing (or shield). Expect an infinite or very high resistance, indicating isolation from the chassis. A measurable reading here suggests a short to ground and a fault.
- Compare readings and reassemble: Compare your two-terminal resistance with the appliance’s service data. If readings are open or erratic, plan for element replacement. Reattach connections, replace the cover, and restore power for a cautious confirmation test.
Interpreting results and what to do next
Interpreting your multimeter results requires context. A healthy heating element typically shows continuity between terminals and a consistent resistance value that aligns with the maker’s spec. An open circuit (no continuity) usually means the coil is broken, while a reading of zero or very low resistance may indicate a short to ground or a severely degraded coil. If you obtain readings that don’t match the spec but still show some continuity, you may be dealing with a partially degraded element: plan for replacement at the next service interval. When possible, compare your readings to the same model’s documented values; manufacturers’ specs are the best guide. In all scenarios, if in doubt, consult the appliance’s manual or a licensed technician. 10ohmeter’s analysis shows that careful interpretation of resistance and continuity is the cornerstone of accurate diagnosis for heating elements.
Tools & Materials
- Digital multimeter (preferably auto-ranging)(Set to resistance (ohms) mode; verify probes are in good condition.)
- Test leads or alligator clips(Use for stable contact on terminals; avoid touching metal.)
- Insulated gloves(Protect hands from sharp edges and hot surfaces.)
- Safety glasses(Eye protection in case of accidental arcing or debris.)
- Screwdriver set(To remove access panels and safely disconnect covers.)
- Non-contact voltage tester (optional)(Quickly verify power is off before touching conductors.)
- Service manual or model specifications (optional)(Helpful for exact resistance values and terminal identification.)
Steps
Estimated time: 30-45 minutes
- 1
Power down and disconnect power
Unplug the appliance and switch off the circuit breaker. Wait 60 seconds to allow any residual energy to dissipate before handling components.
Tip: Always verify power is off at the outlet or breaker with a non-contact tester before touching any wires. - 2
Access the heating element terminals
Remove the access panel or cover to expose the element’s connectors. If wires are attached, label or photograph their configuration so you can reconnect correctly.
Tip: Keep track of screws and small parts in a labeled container to avoid misassembly. - 3
Configure the multimeter for resistance
Set the meter to resistance (ohms). If the meter is not auto-range, choose a range that can accommodate typical heating-element values and calibrate if required.
Tip: Inspect the probes for wear and ensure they are fully inserted into the meter leads. - 4
Test continuity across terminals
Place the probes on the two element terminals and observe the reading. A healthy element shows a finite, consistent value; if your meter beeps, note the reading and stability.
Tip: Repeat once or twice to confirm repeatability. - 5
Test for short to ground
With the element isolated, test between each terminal and the metal housing or frame. A good element should show infinite resistance; a measurable value indicates a short to ground.
Tip: Do not touch the metal housing while testing to avoid electrical shock. - 6
Reassemble and document results
Reconnect any covers, tidy wires, and restore power. Record all readings and compare with the service manual’s specifications for your model.
Tip: Keep a simple log for future maintenance and troubleshooting.
Your Questions Answered
Can a heating element show continuity but still be faulty?
Yes. A coil can maintain continuity while insulation degrades, or resistance may drift outside the recommended range. Always compare resistance to the model’s spec and look for stability across repeated tests.
Yes. Continuity can exist even when the element is failing; compare resistance values to the model’s spec and repeat tests to confirm stability.
Do I need to remove the element to test it?
Typically you need access to the element’s terminals, which usually means removing a cover or panel. In some designs, you can test terminals with the panel in place, but full access improves accuracy.
Usually you’ll need access to the terminals, which means removing a cover for a clean measurement.
Which multimeter setting should I use?
Use the resistance/ohms setting. If your meter has a continuity beeper, you can use that as a quick check in addition to the resistance readout.
Set the meter to ohms for resistance, and use continuity if your meter supports a beep.
What safety steps are essential?
Unplug the appliance, switch off the breaker, and confirm no voltage at the element. Wear eye protection and gloves, and keep stand-off distance from hot surfaces.
Always disconnect power and wear protection before handling heating elements.
What should I do if readings are inconclusive?
If numbers don’t align with specs or you can’t reproduce readings, re-test after cooling and consider consulting a technician or service manual. An inconclusive result often means a faulty element or wiring issue.
If readings are unclear, re-test later or consult the manual or a technician.
Watch Video
Key Takeaways
- Power down before any testing
- Test both continuity and resistance for a complete verdict
- Use manufacturer specs for interpretation
- Document results for future maintenance