How to Check a 12-Volt Battery with a Multimeter
Learn to safely test a 12-volt battery with a multimeter. This comprehensive, step-by-step guide covers safety, setup, reading voltage, and interpreting results for car and workshop batteries.

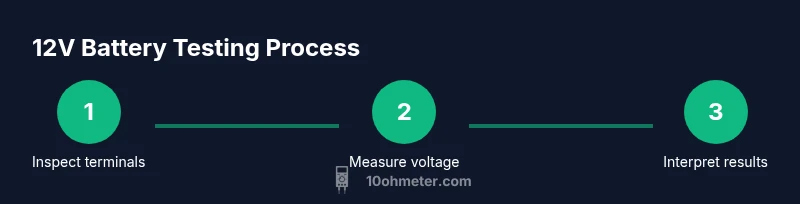
In this quick guide you will learn how to safely check a 12-volt battery with a multimeter to verify charge, diagnose common issues, and decide whether to recharge or replace. You’ll need a digital or analog multimeter, test leads, and basic safety gear. The core steps cover selecting the DC voltage setting, connecting probes properly, and interpreting a healthy vs. depleted reading.
Why checking a 12-volt battery with a multimeter matters
According to 10ohmeter, verifying a 12-volt battery with a multimeter is a foundational skill for DIY electronics and automotive work. It helps you confirm charge state, diagnose charging system health, and catch issues before they leave you stranded. A faithful reading guides decisions about charging, replacement, or further diagnostics. The technique is simple, but the interpretation requires context: resting voltage, load response, and connections all influence what you see on the screen. For beginners, a methodical approach reduces guesswork and increases safety, especially around lead-acid batteries that can emit hydrogen if mishandled. This section sets the stage for accurate measurements that translate into reliable, real-world decisions.
Understanding why voltage alone isn’t the whole story
Voltage is a snapshot, not a guarantee. A healthy battery resting voltage (no load, engine off) is influenced by temperature and recent activity. A battery can read high when fully charged but drop under load if capacity is degraded. Your multimeter helps you capture that snapshot and, when combined with a simple load test, reveals true health. The takeaway: use voltage as a first check, then consider how the battery behaves under a small electrical load to differentiate a weak cell from a failing charging system. In the 10ohmeter analysis, consistent, repeatable readings under controlled conditions are the most informative.
Quick interpretation tips
- Resting voltage around 12.6V–12.8V generally indicates a healthy, charged battery.
- Readings consistently below about 12.0V suggest a discharged or failing battery.
- If you see a good resting voltage but a rapid drop under load, the battery may be sulfated or unable to deliver current.
Boosting confidence with practical checks
When you’re learning how to check a 12-volt battery with a multimeter, corroborate voltage readings with terminal cleanliness and secure connections. Clean, tight terminals help ensure the reading reflects the battery’s true state rather than contact resistance. Always perform tests in a well-ventilated area, especially with automotive batteries that release hydrogen gas under certain conditions. The goal is accurate, repeatable results that you can act on with confidence.
Tools & Materials
- Digital voltmeter (DMM) or analog voltmeter(Set to DC voltage (DCV) with a range that covers at least 20V.)
- Test leads with probes(Insulated probes; check for cracked insulation and replace if needed.)
- Personal protective equipment (PPE)(Safety glasses and gloves for lead-acid batteries.)
- Clean cloth and terminal cleaner(Clean terminals to improve contact quality.)
- Battery terminal brush(Optional for corroded posts; do not abrade battery terminals aggressively.)
- Alligator clips or test jigs(Helpful for secure, hands-free connections.)
- Fire-safe work area or baking soda(Keep handy for neutralizing any accidental acid exposure.)
- Owner’s manual or battery specification(Check manufacturer guidance for specific battery types.)
Steps
Estimated time: 15-25 minutes
- 1
Prepare the testing area
Move to a well-ventilated, dry area. Wear eye protection and gloves. Disconnect the test subject from any circuit if feasible to avoid inline readings, especially in vehicles. Ensure the battery is cool before testing.
Tip: Ventilation matters for lead-acid batteries; hydrogen can accumulate in poorly ventilated spaces. - 2
Set the multimeter to DC voltage
Power on the meter, select the DCV function, and choose a range of at least 20V. Make sure the probes are in the correct jacks (common and voltage input).
Tip: If you’re unsure of the range, start with the highest DCV range and work down if needed. - 3
Connect the probes to the battery
Connect the black probe to the battery’s negative terminal and the red probe to the positive terminal. Ensure the probes have solid contact and avoid touching metal parts with your fingers.
Tip: Keep metal jewelry away from terminals to reduce arcing risk. - 4
Take a resting voltage reading
With the engine off and no load, read the voltage across the terminals. Note the value and repeat after a minute to check for stability.
Tip: Record the reading for comparison if you test again later. - 5
Optionally test under a light load
Apply a small load (e.g., turn on the headlights for ~10-20 seconds) while observing the voltage. A healthy battery should maintain a stable voltage under a brief load.
Tip: If the voltage sags significantly, the battery may be weak even if resting voltage looks ok. - 6
Interpret results and decide next steps
Compare readings to the healthy benchmarks. If resting voltage is high but under load dips, test charging system and consider a professional check if necessary.
Tip: If unsure, perform a formal load test or acid-free diagnostic at a service shop.
Your Questions Answered
What is a healthy resting voltage for a 12-volt battery?
A healthy resting voltage for a typical 12-volt lead-acid battery is generally around 12.6V to 12.8V when fully charged and at rest. Measurements significantly below this range suggest discharge or aging.
A healthy resting voltage is usually about 12.6 to 12.8 volts when the battery is at rest.
Can I test a car battery while it’s installed?
Yes, you can test a car battery in place, but make sure the engine is off and all accessories are minimized. If you want the most accurate health assessment, perform a load test or have the charging system evaluated.
You can test it in place with the engine off; for best accuracy, perform a load test or check the charging system.
How do I test a battery under load with a multimeter?
To test under load, apply a small, controlled electrical load for a short period and observe voltage stability. A healthy battery should maintain voltage without a sharp drop.
Apply a small load briefly and look for voltage stability.
What should I do if the reading is low but the battery is new?
Low readings on a new battery can indicate poor connections, a faulty charger, or a manufacturing issue. Check terminal cleanliness, ensure proper charging, and consider a warranty check.
If a new battery reads low, check connections and charging, and consider a warranty check.
Can a multimeter measure current or amperage?
A standard multimeter cannot measure amperage in parallel like a voltmeter. You must place the meter in series or use a dedicated ammeter/shunt.
You typically need to put the meter in series or use an ammeter.
What safety precautions should I take when testing a 12V battery?
Work in a well-ventilated area, wear eye protection, and avoid jewelry near exposed terminals. Keep metal tools away from posts to prevent short circuits.
Wear protection, ventilate the area, and avoid jewelry near the terminals.
Watch Video
Key Takeaways
- Measure resting voltage first to gauge basic health.
- Use DCV setting and correct probe orientation for accuracy.
- Interpret under-load behavior to distinguish battery from charging system issues.
- Prioritize safety and terminal cleanliness for reliable results.