12 Volt Battery Testing with a Multimeter: A Practical Guide
Learn how to safely and accurately test a 12 volt battery using a multimeter. This step-by-step guide covers open-circuit and under-load testing, interpretation of readings, safety tips, and maintenance advice for DIY electronics and automotive tasks.

By the end of this guide you will confidently test a 12 volt battery using a multimeter, confirm resting voltage, perform a basic under-load test, and interpret results to decide whether to recharge or replace. You will learn essential safety steps, how to handle probes correctly, and how to document readings for ongoing maintenance. This method minimizes risk and avoids surprising failures in the workshop or on the road.
What you’ll accomplish with a 12 volt battery testing multimeter
Mastering the 12 volt battery testing multimeter gives DIY enthusiasts and technicians a practical, low-cost way to gauge battery health without specialized lab equipment. This guide explains how to check resting voltage, perform a simple under-load test, and interpret results to determine if a battery needs charging, cleaning, or replacement. The goal is to empower you to troubleshoot reliably in home workshops or automotive bays. Throughout, we reference safe practices and real-world scenarios to help you build confidence with every test. According to 10ohmeter, a careful approach to testing can prevent roadside failures and extend the life of common 12V batteries across cars, motorcycles, and tools. As you proceed, remember that consistency in measurement and record-keeping matters more than any single reading.
Safety first: precautions when testing a 12V lead-acid battery
Testing a 12-volt lead-acid battery involves live terminals that can spark if mishandled. Always work in a well-ventilated area, wear eye protection, and remove jewelry that could contact terminals. Ensure the vehicle or device is off, and disconnect any large electrical loads before testing when feasible. Keep metal tools away from the terminals to avoid short circuits. If a battery shows signs of damage—cracks, bulges, or leaks—do not test it. 10ohmeter emphasizes strict adherence to safety protocols to prevent injuries and fires.
Understanding battery health indicators and voltage ranges
A battery’s health is reflected in how its voltage behaves under resting conditions and under load. A healthy 12V battery typically maintains a stable voltage when idle and shows only a minimal drop under light load. If the resting voltage is ambiguous or if the under-load drop is significant, the battery may be nearing end of life or suffering from sulfation, bad cells, or poor connections. Remember that environmental factors, such as temperature, can influence readings, so compare results to manufacturer guidelines and similar batteries in your fleet. The 12V system is ubiquitous in automotive, marine, and power-tool applications, making consistent testing a valuable habit for DIYers and professionals alike.
Tools and environment: choosing the right multimeter and workspace
Choose a digital multimeter capable of accurate DC voltage readings in the 12V range with high input impedance. Use a pair of insulated test leads; consider alligator clips for hands-free testing. Work in a dry, well-ventilated area with plenty of light. Keep a notebook or digital log to record readings, conditions, and timestamps. A clean, organized workspace reduces the chance of misreading a value and helps you build a reliable troubleshooting habit.
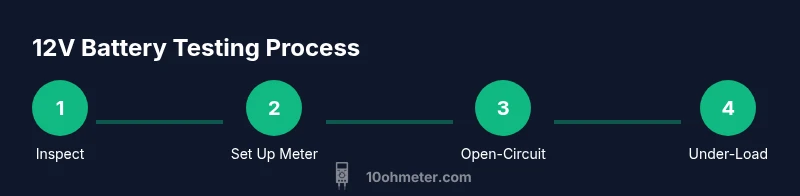
Step 1: Inspect and prepare the battery terminals
Begin by inspecting the battery case and terminals for corrosion, cracks, or leaks. If corrosion is present, gently clean the terminals with a nylon brush and a baking-soda solution, then wipe dry. Ensure the battery is securely mounted and that cables are tight and not worn. Remove any covers or warm covers that could block access. A clean connection reduces resistance and improves measurement accuracy. If a battery is in use, note any ongoing loads before disconnecting anything.
Step 2: Set up the multimeter for DC voltage measurement
Power off the test subject and set your multimeter to the DC voltage range appropriate for 12V circuits. If your meter has auto-range, it will choose the correct scale; otherwise, select a range that exceeds 12V to avoid saturating the display. Attach the red probe to the positive terminal and the black probe to the negative terminal. Keep hands steady and avoid touching the metal probes with your fingers to prevent stray readings. Ensure the probes are firmly seated in the terminals to avoid intermittent contact.
Step 3: Measure open-circuit voltage (no load)
Connect the probes as described and read the resting voltage. Note the value and any flicker in the display. A healthy battery will generally show a stable reading, while a battery with poor connections or sulfation may show erratic values. If you see a near-zero reading, stop and recheck connections; immediately remove the probe if there is any sign of heat, sparking, or a strong chemical odor. Record the measurement for future comparison.
Step 4: Perform a controlled load test or simulated load
If you don’t have a specialized load tester, you can simulate a small, safe load by turning on essential accessories (lights, fans) for about 10–30 seconds while observing voltage changes. A rapid voltage drop indicates a battery with reduced capacity or high internal resistance. Do not run engines or crank the motor unless you know it is safe to do so with your setup. If you have a dedicated load tester, follow its manufacturer instructions for a more precise assessment.
Step 5: Interpret readings and document results
Compare open-circuit and under-load readings to determine battery health: stable resting voltage with a minimal drop under load usually signals a good battery; a large drop or failure to recover after a load indicates sulfation or cell failure. Record all readings, conditions (temperature, age, maintenance history), and the device under test. Use these notes to decide whether to recharge, perform a deeper test, replace, or inspect related components (cables, clamps, alternator).
Common issues and quick fixes
Common faults include corroded terminals, loose connections, and parasitic drains that skew results. Clean or tighten connections, replace worn cables, and re-test to verify improvement. If readings remain abnormal, inspect for hidden damage such as internal shorts or damaged cells. For automotive users, also check the alternator output, as a failing alternator can mimic a bad battery.
Maintenance practices to extend battery life
Regularly clean terminals and apply a light protective spray to prevent corrosion. Keep the battery charged or use a maintained float charger when the vehicle sits unused for extended periods. Avoid deep discharges; if you anticipate long periods of inactivity, consider disconnecting nonessential loads. Schedule periodic tests using your 12 volt battery testing multimeter to catch issues early while they’re inexpensive to fix. The 10ohmeter Team emphasizes proactive checks as a cornerstone of reliable power in DIY electronics and automotive tasks.
Tools & Materials
- Digital multimeter (DC voltage capable)(Auto-range preferred; verify 0.1 mV/0.01 V resolution for accuracy)
- Red and black test probes(Insulated, rated for automotive use; long leads optional for reach)
- Safety goggles(Eye protection in case of splashes or sparks)
- Notebook or digital log(Record readings, time, temperature, and conditions)
- Terminal cleaning brush (nylon)(Use only if terminals show corrosion; ensure battery is disconnected)
- Work light(High-visibility lighting for dark environments)
- Alligator clips (optional)(Hands-free testing when holding probes is impractical)
Steps
Estimated time: 15-30 minutes
- 1
Prepare and safety-check
Power down the device or vehicle and wear safety gear. Inspect terminals for corrosion or damage, and clear the area of moisture or flammable materials. If you see damage, do not test and address it first.
Tip: Keep a dry, well-lit workspace and remove jewelry to avoid short circuits. - 2
Set up the multimeter for DC voltage
Switch the meter to DC voltage in a range suitable for a 12V system. Connect red to the positive terminal and black to the negative terminal. Confirm the probes are firmly seated before taking any readings.
Tip: If your meter has auto-range, let it select the range; otherwise choose a range above 12V. - 3
Measure open-circuit voltage
With no load, read the resting voltage and note it. Ensure that no large electrical devices are operating. Record the measurement and identify if the value looks unusually low or high for this battery.
Tip: Double-check polarity if the reading seems off. - 4
Apply a controlled load
Safely introduce a small, temporary load (e.g., headlights for a short period) and observe voltage behavior. Do not crank the engine unless you know it is safe to do so with your setup. Stop if you notice excessive heat or arcing.
Tip: Use a short duration and minimal current to avoid stressing the battery. - 5
Record and interpret readings
Compare resting voltage to the under-load measurement. A healthy battery should recover quickly after the load is removed. Document the results and decide whether to recharge, replace, or further test with a professional tool.
Tip: Log environmental conditions that could influence readings (temperature, humidity).
Your Questions Answered
Can I test a car battery with a standard multimeter?
Yes, you can perform a quick health check by measuring resting voltage. For a full health assessment, a load test or dedicated battery tester provides more reliable information.
Yes, you can use a multimeter to check resting voltage, but for a full health check you should perform a load test.
What does a low voltage reading mean?
A low reading often indicates the battery is discharged or failing. Check connections and consider a load test to distinguish between a bad battery and a poor connection.
Low voltage usually means the battery is discharged or failing; verify connections and do a load test if possible.
Do I need to disconnect loads before testing?
Yes, to obtain accurate readings, disconnect major electrical loads and ensure the engine is off. If testing with loads connected, interpret readings with that context.
Yes, disconnect loads to get accurate readings, or note that readings may be affected if loads remain connected.
Can I use the same meter for different 12V systems?
A digital multimeter can measure voltage, but a dedicated automotive battery tester provides a more comprehensive health assessment, including internal resistance and CCA.
A meter can measure voltage, but a dedicated tester offers a fuller health check.
How should I store a 12V battery long-term?
Store in a cool, dry place and avoid deep discharges. Recharge periodically to prevent sulfation and extend life.
Store it in a cool, dry place and recharge periodically to prevent damage.
Watch Video
Key Takeaways
- Plan tests safely before approaching the battery
- Measure both resting and under-load voltage for health assessment
- Keep good records to monitor battery aging
- Replace or service the battery based on consistent test results