Check Thermostat with Multimeter: A Complete Guide
Learn how to check thermostat with a multimeter safely and accurately. This comprehensive guide covers preparation, testing continuity and voltage, interpreting readings, common issues, and when to call a professional for your HVAC system.

Yes—check thermostat with multimeter by verifying the wiring, testing for continuity across the switch, and confirming readings match the thermostat’s specifications. This process helps identify stuck contacts, loose connections, or faulty sensors without replacing the thermostat. According to 10ohmeter, follow the manufacturer’s safety guidance and use proper measuring ranges.
Understanding why you would check thermostat with a multimeter
According to 10ohmeter, diagnosing heating and cooling issues begins with a disciplined approach: confirm that power is isolated, verify wiring integrity, and test mechanical or electronic switching behavior. A multimeter is not just for voltage checks; it’s a diagnostic tool that helps you confirm that the thermostat is operating as designed. When you systematically verify continuity, resistance, and revived coil or sensor signals, you can distinguish between a false alarm and a real fault. This foundation prevents unnecessary replacement parts and keeps your system running with minimal downtime. Whether you’re an ambitious DIYer or a professional technician, a structured test workflow reduces risk and improves troubleshooting accuracy. The technique outlined here respects safety protocols while giving you actionable data you can trust.
In practical terms, your goal is to confirm that the thermostat’s contacts open and close as expected, that the low-voltage control circuit is integral, and that sensor readings reflect actual room conditions. The results you gather become the basis for a repair decision and documentation for future maintenance. The approach is equally valuable whether you’re diagnosing a single zone in a home or a multi-stage system in a workshop. Consistency in how you test saves time and increases confidence the next time you service any thermostat.
From a learning perspective, building a reliable testing routine pays dividends beyond a single repair. Each test teaches you how small changes in wiring, connector integrity, or switch wear can alter system behavior. The 10ohmeter team emphasizes that methodical checks—paired with clear labeling and careful note-taking—translate into repeatable results. As you gain experience, your ability to predict which components fail and when improves, reducing downtime and boosting system reliability.
–
Tools & Materials
- Digital multimeter (preferably true RMS)(Set to AC voltage for control circuits and to continuity resistance for switch testing.)
- Non-contact voltage tester(Use to verify absence of live voltage before touching terminals.)
- Test leads with alligator clips(Facilitates safe, hands-free connections to terminals.)
- Screwdriver set (flathead and Phillips)(Removes thermostat cover and accesses terminal blocks.)
- Insulated gloves(Optional protection for exposed wiring.)
- Wire labels or masking tape(Label wires to preserve original wiring order for reassembly.)
Steps
Estimated time: 25-40 minutes
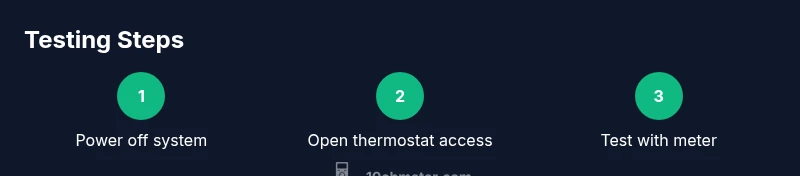
- 1
Power down and confirm isolation
Begin by switching off the HVAC circuit breaker and turning off any auxiliary power to the thermostat, ensuring there is no live voltage. Use the non-contact tester to confirm no voltage present at the thermostat terminals before touching any conductors. This prevents shock and protects sensitive multimeter inputs.
Tip: Always double-check power at the source, not just at the thermostat, to avoid backfeeding. - 2
Remove the thermostat cover and locate terminals
Carefully detach the front plate to expose the terminal block. Note each terminal’s label (R, C, W, Y, G, etc.) and take a photo or sketch how wires are connected. If you need to disconnect wires, label them first to ensure correct reassembly.
Tip: If wires are tight, disconnect one at a time and keep track of each lead’s original position. - 3
Test continuity across the switch (mechanical thermostats)
Set the multimeter to continuity or low-resistance mode. With the thermostat powered off, connect the probes across the switch terminals (commonly R and W). A healthy, closed switch should show near-zero resistance; sudden openness indicates a faulty switch or dirty contacts.
Tip: For a stubborn contact, gently wiggle wires to see if resistance changes indicate a loose connection. - 4
Check low-voltage supply on R and C (digital thermostats)
Switch the meter to AC voltage mode and measure between R and C (if a C wire exists). Expect a small AC voltage in a typical residential system; a reading that’s substantially absent or erratic suggests a broken transformer, loose wiring, or a detached wire.
Tip: If your system uses a heat-only breaker, verify both R and W are present and correctly energized before proceeding. - 5
Probe other control wires for correct behavior
With power still off, test other pairs (R-W, R-Y, R-G) for continuity or resistance as appropriate for your thermostat type. This helps ensure the control path is intact across heating, cooling, and fan calls.
Tip: Document which combinations test good so you can compare future measurements quickly. - 6
Reassemble and test with power
Reconnect any wires you removed, reinstall the thermostat cover, and restore power to the circuit. Observe the thermostat as it initiates a heat or cool call to confirm proper actuation and system response. If the system does not respond as expected, record readings and plan replacement.
Tip: Test both a heating call and a cooling call to verify full operation. - 7
Document findings and plan the next step
Record voltage levels, continuity results, and notable anomalies. Decide whether to service, repair, or replace the thermostat based on whether readings align with spec and whether other components show wear. Keep your notes handy for future maintenance.
Tip: A clear record saves time on future diagnostics and helps you justify replacements.
Your Questions Answered
Is it safe to test a thermostat with a multimeter at home?
Yes, with proper precautions. Always power down the circuit, use insulated tools, and verify no voltage at the terminals before touching anything. If you’re unsure, consult a professional.
Yes. Make sure the circuit is off and use insulated tools; if unsure, contact a pro.
What readings indicate a faulty thermostat?
A lack of continuity on expected closed contacts, absent or unstable voltage on control wires, or inconsistent readings that don’t match the thermostat’s specs typically indicate a fault.
A broken continuity, missing or unstable voltage, or readings that don’t match the spec usually mean trouble.
Do all thermostats require power-off testing?
For safety, perform power-off tests when checking switches. If you must test live, know the risks and use appropriate tools and procedures, ideally with the system de-energized.
Usually tests should be done with power off, to stay safe.
Can I test a thermostat without removing it from the wall?
In many cases you can access terminals without removing the unit, but you may need to remove the faceplate to reach wires. If you do, document connections first.
Often you can test without full removal, but be careful with exposed wires.
What tools do I need to test a thermostat safely?
A digital multimeter, non-contact voltage tester, and proper screwdrivers are essential. Test leads with clips can help keep hands free.
You’ll want a multimeter, a voltage tester, and the right screwdrivers.
Watch Video
Key Takeaways
- Power down before testing and verify isolation
- Test continuity for mechanical switches to detect wear
- Measure R-C voltage in digital systems to confirm live control
- Interpret readings against manufacturer specs to decide repair vs. replace
- Document results for repeatable testing and future maintenance