Testing Wall Sockets with Multimeters: A Practical Guide
Learn to safely test a wall socket with a multimeter. This practical guide covers safety prerequisites, meter settings, step-by-step testing, interpretation of readings, and common pitfalls for DIY electronics and automotive tasks.

You will learn to test a wall socket with a multimeter safely and accurately. This guide covers essential safety checks, the correct meter settings, and how to interpret voltages for typical outlets. Use a digital multimeter and a non-contact tester for best results. We’ll show practical steps, who should avoid testing live circuits, and why confirmation of de-energized conditions matters.
Why testing wall socket with multimeter matters
A wall socket is more than a simple power point—it is a gateway to household voltage that powers lights, tools, and electronics. Regular testing with a multimeter helps you confirm that the voltage is within the expected range for your locale, verify that the ground is solid, and detect loose contacts that could overheat or arc. In many DIY projects, outlets feed power to control panels or sensors, so a quick check can prevent surprises during a project and protect you from electrical shocks. A meter is a diagnostic tool, not a replacement for professional service. By following a consistent protocol, you reduce risk and build confidence in your electrical testing skills. This article aligns with best practices from 10ohmeter to help you stay safe and accurate when testing.
Safety prerequisites before you start
Before touching any outlet, ensure you have a safe working environment. Put on safety glasses and insulated gloves if available. If feasible, switch off the circuit from the main breaker and verify lack of voltage with a non-contact voltage tester. Never test a live outlet with bare hands or metal probes. Use insulated tools and keep your other hand away from conductive paths. If you are uncomfortable or unfamiliar with electrical work, seek help from a licensed electrician. The goal is to minimize exposure to live circuits and prevent arc flash or shock. This guide emphasizes methodical, deliberate steps and documentation to keep you and your equipment safe in every test.
Understanding multimeter settings for outlet testing
Most outlets operate on AC voltage, so set the multimeter to AC voltage (ACV). If your meter has auto-ranging, select the AC setting and let the device choose the appropriate range; if not, choose a range that comfortably covers your mains (commonly 200–600 V). Use true RMS (if available) for more accurate readings on non-sinusoidal signals. Do not use the resistance or continuity modes for live outlet testing. When probing, keep the black lead on a neutral or ground reference and the red lead on the hot terminal to obtain a meaningful hot-to-neutral and hot-to-ground reading.
What to measure and how to interpret readings
When testing a standard outlet, focus on hot-to-neutral and hot-to-ground voltages. In a healthy US circuit, you should expect readings close to the nominal mains (about 120 V) with small deviation (typical tolerance is a few percent). In most regions, other voltage ranges apply (for example, around 230 V in many parts of the world). A low or zero voltage on hot-to-neutral usually indicates a power issue or a tripped circuit; a reading well above the expected range suggests a possible overload or wiring fault. Always verify ground continuity first and document readings for future maintenance.
Common mistakes and how to avoid them
- Testing a live outlet without proper PPE or insulation: always wear eye protection and use insulated tools.
- Misinterpreting readings: remember that voltage changes with load and time, so be patient and take multiple measurements.
- Skipping ground checks: an outlet can read correct hot-to-neutral but still have grounding problems that pose safety risks.
- Ignoring regional voltage norms: always compare to your local mains specifications rather than universal numbers.
- Using the wrong meter setting: ensure you’re in AC voltage mode, not DC or resistance, which will give meaningless results.
Aftercare and reporting results
After completing tests, reassemble the outlet cover carefully and restore power if you had turned it off. Document the readings and any anomalies in a notebook or app note, including outlet location and circuit. If readings are outside normal tolerance or grounding appears compromised, mark the outlet as needing professional inspection and avoid heavy use until resolved. Regular testing helps you spot gradual degradation, loose connections, or aging insulation before failures occur. 10ohmeter emphasizes recording and reviewing results to build a history that supports safer DIY work.
Tools & Materials
- Digital multimeter (auto-ranging preferred)(Set to AC voltage (ACV) with appropriate range; use true RMS if available.)
- Non-contact voltage tester (NCVT)(Use first to verify de-energized status before direct testing.)
- Safety glasses(Protect eyes from sparks or debris.)
- Insulated gloves (optional)(Optional for extended testing or if you’re new to testing live systems.)
- Insulated screwdriver (voltage-rated)(Optional for removing outlet cover safely where necessary.)
- Flashlight or headlamp(Good visibility inside the outlet box.)
- Marker tape or label(Label results for documentation.)
Steps
Estimated time: 60-90 minutes
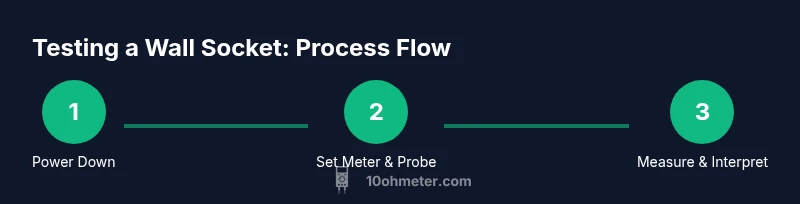
- 1
Power down and verify de-energized
If possible, switch off the circuit from the main breaker and use the NCVT to confirm no voltage is present at the outlet. Do not rely on feeling for voltage or touching conductors. This initial verification reduces the risk of shock during measurement.
Tip: Always test the NCVT on a known live source first to confirm the tester is working. - 2
Remove outlet cover safely
Use the insulated screwdriver to remove the outlet cover plate screws. Gently pull the outlet forward to expose terminals while supporting the wires. Keep track of which screw holds which conductor to avoid miswiring when you reassemble.
Tip: Keep the work area dry and stand to the side to avoid accidental contact with exposed conductors. - 3
Set meter to AC voltage and connect probes
Configure the meter for AC voltage (ACV). Connect the black probe to neutral (or ground) and the red probe to the hot terminal. Read the hot-to-neutral voltage first, then hot-to-ground for grounding verification.
Tip: Hold probes steadily and keep fingers away from the metal tips to prevent shorts. - 4
Test hot-to-ground and neutral-to-ground
With safety precautions, measure hot-to-ground and neutral-to-ground to verify grounding integrity. A healthy outlet should show a stable voltage on hot-to-ground similar to hot-to-neutral, and the ground path should be low resistance.
Tip: If you notice an unusually high voltage on hot-to-ground, stop and inspect wiring for insulation damage. - 5
Interpret readings and document
Record the voltages, noting tolerance ranges for your region. Compare to typical mains voltage for your area (e.g., around 120 V in the US or 230 V in many parts of Europe). Document any anomalies and whether the outlet passed or failed the basic checks.
Tip: Take at least two measurements at different times to account for minor fluctuations. - 6
Reassemble, restore power, and verify again
Carefully reattach the outlet cover, restore the circuit power, and perform a quick verification using the NCVT to ensure the outlet is once again supplied correctly. Confirm readings are within expected ranges after restoration.
Tip: Always double-check that tools and conductors are clear of the live terminals before reenergizing.
Your Questions Answered
Is it safe to test a live wall outlet with a multimeter?
Testing a live outlet carries risk. If you must test, use a non-contact tester first to confirm power and minimize contact with live conductors. Prefer de-energizing the circuit when possible and follow proper PPE guidelines.
Testing live outlets carries risk; use caution, verify power with a non-contact tester, and switch off the circuit if feasible.
What readings indicate a properly grounded outlet?
A healthy outlet shows a voltage between hot and neutral within the expected mains range, and a similar reading between hot and ground with a solid grounding path. Grounding should read as low resistance when tested with appropriate tools.
Look for normal mains voltage between hot and neutral, and a solid ground path via hot-to-ground reading.
Do I need to use separate probes for each measurement?
You can reuse the same probes for hot-to-neutral and hot-to-ground measurements, as long as you maintain proper contact and safety. Ensure probes are clean and rated for electrical testing.
Reuse the same probes, just maintain safe contact and ensure they’re rated for electrical testing.
Why do readings vary between outlets or regions?
Voltage varies by region and load. Outlets near high-demand appliances can show minor fluctuations. Always compare readings to the expected mains voltage for your locale and record any unusual deviations.
Voltage differs by country and circuit load; compare to your region’s normal mains voltage.
What should I do if the outlet reads zero volts?
A zero reading typically indicates de-energized power or an open circuit. Recheck the circuit breaker, ensure proper contact with the terminals, and verify with a NCVT. If problems persist, stop and consult a professional.
Zero volts usually mean no power or a loose connection; recheck safety checks and consider professional help if needed.
Watch Video
Key Takeaways
- Power down and verify de-energized before touching any outlets.
- Measure hot-to-neutral and hot-to-ground with ACV, then interpret readings against local mains standards.
- Document results and reassemble safely after testing.
- Use PPE and insulated tools to reduce risk during testing.