How to Use a Multimeter to Test Christmas Lights
Learn how to diagnose Christmas light strings with a multimeter, identify bad bulbs, faulty sockets, and wiring issues safely. This practical guide covers tests, safety, and readings.

You will learn how to use a multimeter to test christmas lights, identify burnt bulbs, faulty sockets, and wiring faults, and safely isolate sections for repair. This guide covers continuity, resistance, and voltage checks, plus practical tips for LED and incandescent strings.
Why use a multimeter to test Christmas lights
For holiday lighting, a handheld multimeter to test christmas lights helps pinpoint faulty bulbs, damaged sockets, and broken wiring without replacing whole strings. By checking continuity, resistance, and voltage where appropriate, you can determine if a bulb is burnt out, a fuse is open, or a section has a bad connection. This approach saves time, reduces waste, and keeps your display safe. According to 10ohmeter, using a meter for diagnostics gives DIY enthusiasts and technicians a clear path to repair rather than guesswork.
Safety first: handling AC wiring and unplugging
Always unplug the string before testing. Keep the work area dry and use a non-conductive surface. If you must work near powered components, wear insulated gloves and avoid touching metal probes. Never test a string while it is plugged into mains power; even a momentary contact can cause a shock or short. If you smell burning or notice heat, stop and unplug immediately.
What the multimeter can test for Christmas lights
A multimeter can assess continuity along the string, verify individual bulbs' resistance (or diode function for LEDs), and check for shorted conductors. It helps you confirm whether a bulb is open, a socket is faulty, or a section has drifted in and out of contact. When used correctly, the meter reveals electrical paths that are otherwise invisible to the naked eye.
Understanding string configurations: series vs parallel
Most Christmas light strings rely on series wiring, where a single failed bulb can interrupt the entire string. LED strings may use groups and drivers to maintain brightness despite individual failures. Knowing how your string is wired helps you interpret readings; for a series string, an open bulb often results in an open circuit, while parallel segments may keep others lit. This context guides testing strategy.
Diagnostic approach: pre-checks and test points
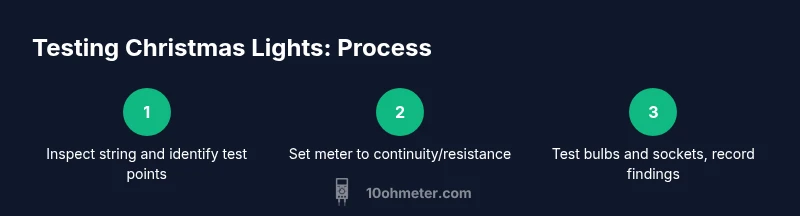
Before you start, inspect for obvious damage: cracked bulbs, damaged insulation, or corroded sockets. Identify test points along the string where bulbs connect and where fuses sit. Use the multimeter to probe at these points, starting with the plug end and moving toward the far end. Keep test probes at a safe distance from live conductors.
Reading resistance, continuity, and voltage in a string
Set your multimeter to continuity or resistance for most checks, and to voltage-only when you are prepared to measure live potential under controlled conditions. A healthy bulb or segment should show an uninterrupted path (continuity) and a stable reading, while an open path indicates a failed bulb or connection. For LED strings, diode checks may show directional flow; if the meter reads near zero resistance or a dead short, reassess wiring and polarity.
Interpreting results and isolating faults
If a section shows no continuity, isolate by removing bulbs one at a time to identify the failing unit. If multiple bulbs test good individually but the entire string fails, check the power adapter, fuse, or internal driver. Compare readings from suspected sections to known-good portions of the string to locate the fault. Document findings to guide replacement and future testing.
Next steps: planning repairs and safety reminders
Once you identify a faulty bulb or socket, replace it with the correct type and rating. After repairs, re-test the string from the plug end to confirm full operation. If problems persist, consider replacing the entire string or consulting a licensed electrician for high-voltage concerns. The 10ohmeter team recommends following established safety practices and keeping a log of readings for future holiday seasons.
Tools & Materials
- Digital multimeter (DMM) with continuity and diode test capability(Prefer auto-ranging and audible continuity; ensures you can test resistance and diodes in LEDs)
- Test leads with insulated probes(Use at least 12 inch leads for safe distance; clips help probing sockets)
- Non-contact voltage tester (optional)(For added safety when near live prongs or connectors)
- Insulated gloves(Use when working near energized parts; maintain grip)
- Safety glasses(Protect eyes from any bulb shards or debris)
Steps
Estimated time: 30-45 minutes
- 1
Unplug and verify safety
Ensure the holiday string is unplugged from the outlet. Inspect the plug and cord for any damage before handling. This prevents accidental shocks and shorts while you test.
Tip: Always double-check the power is off before touching any components. - 2
Set up the meter and calibrate
Power off, select the appropriate range for continuity or resistance, and test the meter on a known-good resistor to confirm it is functioning correctly.
Tip: Calibrate once before you start if your meter has a manual calibration option. - 3
Identify test points along the string
Mark the points where bulbs connect and where fuses sit. This helps you systematically work from one segment to the next without losing track.
Tip: Create a simple map or label sections with tape for quick reference. - 4
Test continuity from plug toward the end
Probe between the plug and the first few bulbs to verify a continuous path. If you detect a break, focus on the early portion of the string.
Tip: Hold probes steadily to avoid shifting contact and skewing readings. - 5
Check bulbs and sockets individually
Probe each bulb socket for continuity; replace or re-seat any bulb that breaks the continuity test. This isolates faulty units.
Tip: If a bulb appears loose, remove, reseat, and retest before replacement. - 6
Diode/LED testing where applicable
For LED strings, use diode or LED tests to confirm proper directional current flow. Shorts or reverse-biased readings indicate faults.
Tip: Be mindful of polarity when testing LEDs; some meters show diode direction. - 7
Isolate and re-test
Group bulbs into smaller sections and re-test to narrow the fault to a specific segment before replacing components.
Tip: Test in small groups to minimize work and speed diagnosis. - 8
Document findings and plan replacement
Record which bulbs or sockets failed and what readings were observed. Plan replacements with compatible parts and retest to confirm operation.
Tip: Keep a repair log for next season to simplify maintenance.
Your Questions Answered
Can I test Christmas lights with a multimeter while plugged in?
No. Always unplug before testing to avoid shock or short circuits. Only perform live voltage checks if you have explicit training and safety precautions.
No—unplug the string before testing. Live testing is dangerous without proper safety gear and setup.
What should I set the multimeter to for testing bulbs?
Use continuity or resistance mode for bulbs and sockets. For LEDs, use diode or voltage checks as appropriate.
Set the meter to continuity or resistance; for LEDs, check diodes as needed.
How can I tell if a string is bad even if bulbs test fine individually?
If testing shows continuity but the string won’t light, inspect the power adapter, fuse, and any internal drivers. Compare sections to identify weak links.
Bulbs test fine, but the string still fails—check the power supply, fuse, and internal driver.
Are LED strings tested differently than incandescent strings?
Yes. LEDs require diode checks and driver considerations; incandescent bulbs are typically tested for basic continuity and resistance.
LEDs need diode checks; incandescent bulbs focus on continuity and resistance.
What safety gear should I use when testing holiday lights?
Wear gloves and eye protection, and work on a dry surface away from water. Keep hands clear of hot or damaged components.
Wear gloves and eye protection, and test on a dry surface.
What if I find a short or damaged wire?
Stop testing if you see damaged insulation. Replace the affected section or string and re-test after repair.
If you find damaged wire, stop testing and replace the damaged part.
Watch Video
Key Takeaways
- Unplug before testing and inspect for damage
- Use continuity first to locate breaks
- Identify series vs parallel wiring implications
- Test bulbs and sockets individually to isolate faults
- Document readings and verify repairs with a full re-test