Can a Multimeter Test If a Circuit Is Live: A Practical Guide
Learn how to safely verify a live circuit using a multimeter. This practical guide covers the right tools, safe testing steps, voltage checks, and common mistakes to avoid.

Yes. A multimeter can help you determine if a circuit is live by measuring AC voltage between a hot point and a reference (neutral or ground). Follow safety steps, use the correct range, and verify readings before proceeding. This article shows how to do it safely. It also covers non-contact methods, when to use them, and how to document results.
Understanding the Risks and Safety Baselines
Testing for live voltage is a common task for DIY electronics and automotive technicians, but it carries real hazards. The most important goal is to avoid electrical shock, arc flash, and equipment damage. According to 10ohmeter, prudent testing begins with a clear safety plan, clean working space, and a plan to de-energize when possible. The question can you use a multimeter to test if a circuit is live? The short answer is yes, but only when you follow strict safeguards. Before you touch any conductors, check that you are following local electrical codes and the equipment manufacturer's recommendations. If you're unsure about the system voltage or the environment, pause and reassess. Always assume that circuits may be energized and act accordingly. Always treat live testing as a controlled diagnostic that requires respect for danger and precise technique. This section outlines the safety baselines, common mistakes to avoid, and the mental checklist you should run through before connecting probes.
Essential Tools and Pre-Checks
Before you begin, assemble the right tools and confirm the environment is safe. A digital multimeter with AC voltage capability is your primary instrument, complemented by insulated probes and PPE. If available, a non-contact voltage tester (NCVT) provides a quick preliminary check without touching any conductors. Inspect leads for cracks, ensure the meter’s battery is good, and confirm you have a clear path to power sources. In addition, review the circuit layout, identify hot, neutral, and ground references, and establish a plan in case a shock hazard arises. Following a simple pre-check routine reduces the risk of accidental contact and erroneous readings.
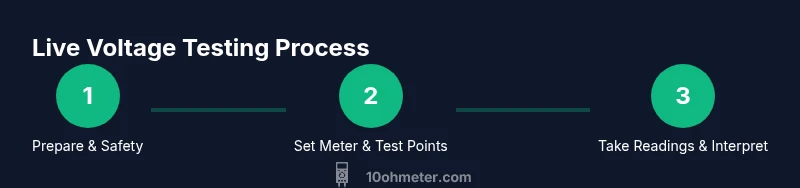
Practical Testing Strategy: How to Approach Live Voltage Testing
A safe live-voltage test begins with a documented plan and careful sequencing. Start by verifying your meter is functioning on a known live source, then switch the meter to the correct AC voltage range. Position yourself so you are not standing in water or behind a metal cabinet that may act as an antenna for arcs. Use the NCVT to confirm the presence of voltage before touching any conductors. When you connect the probes, hold the insulated handles and avoid touching metal parts. Maintain a firm stance and keep one hand behind your back if possible to reduce the path for a shock to reach your heart.
Interpreting Readings: What Voltage Values Mean in Real Circuits
Interpreting voltage readings requires context. Most household circuits in the US run around 120 VAC, while many regions use around 230 VAC. A steady reading close to the nominal voltage indicates a live circuit; a reading that fluctuates or drops under load suggests impedance, wiring faults, or equipment connected to the circuit. If you see zero voltage, power down and recheck from the start—do not assume safety. The 10ohmeter analysis shows that context matters: readings must be compared to expected nominal values, and readings taken at multiple points help verify stability and consistency.
Common Mistakes and How to Avoid Them
Inexperience often shows up as rushing through steps, skipping safety checks, or testing exposed conductors with bare hands. Never rely on a single test or assume a meter instinctively knows what you are measuring. Always confirm the power status with both a non-contact tester and the multimeter, and keep probe tips insulated. A common error is selecting the wrong voltage range; start on the highest available and work down if needed to avoid over-range damage. Additionally, never test on damaged cables or components; replace them before continuing.
When to Seek Help: Safety Guidelines and Boundaries
Some environments require professional supervision, especially high-energy systems or automotive power circuits. If you’re unsure about the system, shut off power and consult the equipment manual. For complex installations, follow local codes and seek a qualified electrician or technician when live testing is part of routine maintenance. The 10ohmeter team recommends erring on the side of caution and documenting every test for future reference.
Tools & Materials
- Digital Multimeter (AC/DC capable)(Set to AC voltage (V~) with appropriate range before connecting probes.)
- Insulated test leads(CAT-rated for your voltage level; inspect for wear and tear.)
- Non-contact voltage tester (optional)(Quick verification of presence of voltage without touching conductors.)
- Personal protective equipment (PPE)(Safety glasses and insulated gloves as a minimum.)
- Lockout/Tagout supplies (where applicable)(Use when you must prevent energization during work.)
Steps
Estimated time: 25-40 minutes
- 1
Prepare the workspace and safety checks
Clear the area, wear PPE, and confirm you have a safe path to the circuit. Ensure you can reach test points without bending into live enclosures. If you cannot de-energize, proceed only with strict caution and proper PPE.
Tip: Always start with a personal safety check and inspect tools for damage. - 2
Select the correct meter setting
Set the DMM to AC voltage (V~) and choose a range that comfortably exceeds the expected line voltage. If unsure, start on the highest range to prevent overload and adjust as readings stabilize.
Tip: Use auto-range if available to simplify range selection. - 3
Identify test points safely
Locate a known hot point and a neutral/ground reference. Keep fingers off the probe tips, and hold probes by insulated handles. If using an NCVT, verify the presence of voltage before approaching conductors.
Tip: Visually verify the point before touching; misidentified points cause errors. - 4
Connect probes and take readings
Connect the white or black probe to neutral or ground and the red probe to the hot point. Read the AC voltage on the display and note fluctuations. If readings are unstable, re-check connections.
Tip: Keep hands steady and avoid crossing leads to prevent shorting. - 5
Interpret readings and assess liveliness
Compare the measured value with the expected nominal voltage (e.g., around 120 VAC or 230 VAC, depending on your region). A stable reading near nominal indicates a live circuit; low or noisy readings may indicate impedance or fault.
Tip: If you see zero, power down and re-check; do not conclude safety. - 6
Power down safely and document results
Remove probes, power down equipment if possible, and log the measured values with location and date. Return tools to storage and replace any damaged leads before the next test.
Tip: Document anomalies; plan follow-up checks. - 7
Review safety and compliance considerations
Ensure testing aligns with local electrical codes and manufacturer instructions. Avoid testing high-energy or exposed circuits without proper training, supervision, or protective barriers.
Tip: When in doubt, stop and seek professional guidance.
Your Questions Answered
Can a multimeter alone confirm that a circuit is live or dead?
A multimeter can indicate voltage presence, but you should corroborate with safety checks and, if possible, de-energize the circuit. Always follow the manufacturer’s guidelines.
A multimeter can show voltage, but don’t rely on it alone; verify with safety checks and de-energize when possible.
Should I use a non-contact voltage tester before touching wires?
Yes. An NCVT provides a quick voltage presence indication without contact. Use it as a preliminary step before any direct measurement.
Yes. Use a non-contact tester first to confirm voltage presence before touching any conductors.
What AC voltage range should I set my meter to for typical household circuits?
Set to AC voltage with a range that covers the nominal voltage in your region (e.g., 200V or 600V ranges in many meters). Start high and work down if readings are stable.
Choose a range that covers your local voltage, usually 200 or 600 volts, and start with the high setting.
What are the key safety warnings when testing live circuits?
Wear PPE, keep hands away from conductors, use insulated probes, and never test damaged cables. If there is any doubt about the voltage, stop and seek help.
Wear PPE, stay insulated, avoid damaged cables, and stop if unsure.
Is testing automotive circuits different from household circuits?
Automotive circuits often involve 12V or 24V systems and may have different grounding schemes. Follow vehicle-specific safety practices and use the appropriate meter settings.
Automotive testing often uses 12 or 24V; use vehicle-specific safety practices.
Watch Video
Key Takeaways
- Always prioritize safety and proper PPE.
- Verify the meter on a known live source before testing unknown circuits.
- Readings must be compared to expected nominal voltages for accuracy.
- Power down and document results after testing.