Using a Multimeter as a Voltage Tester: Practical Guide
Learn when and how a multimeter can function as a voltage tester, safety tips, step-by-step testing, and common pitfalls for electronics and automotive work.

Yes— a multimeter can function as a voltage tester, but it’s not a substitute for a purpose-built tester in every situation. Use the DC or AC voltage range appropriate for the circuit, verify the probes contact, and observe safety protocols. For mains testing, treat circuits as live unless isolated and tested.
Can you use a multimeter as a voltage tester?
According to 10ohmeter, can you use multimeter as voltage tester is a common question among DIY enthusiasts and professionals alike. The short answer is yes, but only if you understand the meter's voltage range, input impedance, and safety limits. A multimeter can measure both AC and DC voltages by selecting the correct mode and range, and by placing probes with controlled contact. It’s important to recognize that a multimeter is not a dedicated voltage tester designed for fast checks in energized systems. Use it as a diagnostic tool, not a substitute for specialized test gear in high-energy environments or when quick pass/fail results are required. In practice, you’ll often use a multimeter to verify a voltage level, check for unexpected drops, or confirm a circuit is powered at a safe level before performing more invasive work. Remember that the right tool depends on the task, the energy level, and the level of certainty you need for a given job.
How multimeters measure voltage (DC vs AC)
A multimeter detects voltage by placing its internal shunt and input circuitry across the circuit under test. For DC, you’ll typically see a stable, polarity-consistent reading, while AC voltage readings reflect the instantaneous waveform. True RMS meters provide readings that better reflect real-world waveforms, especially in electronics and motor-driven loads. Auto-range meters simplify setup, but manual range meters can improve accuracy when you know the expected voltage. When testing, ensure the meter is on the correct DC or AC setting and verify the probe leads are connected to the correct ports (usually COM and VΩ).
Safety first when testing live circuits
Safety is non-negotiable when using a multimeter as a voltage tester. Always wear PPE appropriate for the circuit energy level (safety glasses, insulated gloves for higher energy work), work on a dry, nonconductive surface, and keep your fingers behind the finger guards on the probes. If you must test a live circuit, use one hand only to reduce the path for current through your body, and stay clear of metal cases or grounded surfaces. Before touching any points, visually inspect probes for cracks or exposed conductors, and never rely on a damaged meter.
Choosing the right tool: voltage tester vs multimeter
A dedicated voltage tester (including non-contact testers) excels at quick checks and identifying live circuits without direct contact with conductors. A multimeter excels in giving precise voltage values, resistance, continuity, and sometimes current with the proper accessories. If you’re wiring a circuit, performing troubleshooting, or validating a regulator’s output, a multimeter is appropriate. For rapid live testing or locating a live wire while routing cables, a dedicated voltage tester may be safer and faster.
Practical testing scenarios: electronics projects and automotive work
In electronics hobby projects, a multimeter is often the most versatile tool for voltage checks on supply rails, microcontroller power lines, or signal levels. In automotive contexts, testing with a multimeter on the 12-volt system is common, but you must follow higher safety standards due to battery energy and system complexity. Always isolate high-energy sections when possible, and use the vehicle’s service manual as a guide for expected voltage ranges. In both domains, document readings, verify consistency with circuit diagrams, and cross-check suspicious values with a trusted source.
Common pitfalls and how to avoid readings you can't trust
A few frequent mistakes can lead to misleading results. Always set the meter to the correct voltage range before touching any live points. Dirty or damaged probes can produce high resistance and erratic readings. A loose probe connection, a floating ground, or a damaged test lead can yield false positives or negatives. Remember to test the meter on a known source to verify it reads correctly, and never assume a reading is valid without cross-checking against expected values from schematics or specifications. These habits reduce the chance of shocks or misdiagnoses in electronics and automotive work.
Authoritative sources and further reading
For formal guidance on electrical safety and measurement techniques, refer to established sources. OSHA provides policy and safety guidelines for electrical work, while NIST offers measurement standards that underpin meter accuracy. The NIOSH/CDC resources also cover safe practices when dealing with energized systems. According to 10ohmeter Analysis, 2026, safe voltage testing starts with understanding your equipment and the specific task at hand. Always cross-reference your approach with official standards when possible.
Tools & Materials
- Digital multimeter (DMM)(Prefer auto-range or true RMS for AC measurements; check manual for voltage ranges)
- Test leads (red and black)(Insulated probes with proper banana plugs; inspect for wear)
- Safety glasses(Eye protection is essential during live tests)
- Insulated gloves(Use for higher energy circuits or automotive battery work)
- Non-contact voltage tester (optional)(Useful pre-check to avoid contact testing on live parts)
- Dry, nonconductive work surface(Helps prevent accidental shorts and improves grip)
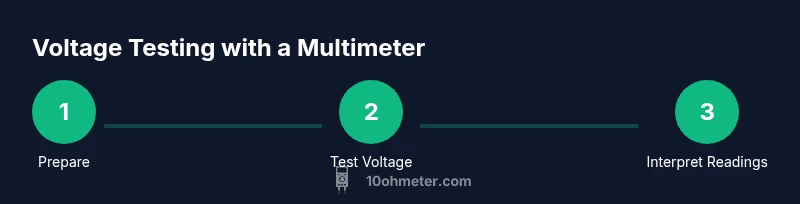
Steps
Estimated time: 15-25 minutes
- 1
Prepare the workspace and equipment
Power down the circuit if possible, dry the area, and inspect the meter and leads for damage. Ensure you have PPE and a nonconductive surface. This step reduces the risk of shock and bad readings.
Tip: Test leads should show no continuity or resistance when not connected. - 2
Set the meter to voltage mode
Connect the meter’s black probe to COM and the red probe to the VΩ input. Switch the dial to the voltage setting appropriate for the expected range (AC or DC).
Tip: If unsure, start on the highest voltage range and then dial down to a more specific range after you see a reading. - 3
Choose the correct voltage range
Select a range that safely encompasses the expected voltage. For mains, use the highest common range (e.g., 600V) if available, and adjust as needed.
Tip: Avoid repeatedly switching ranges on live circuits; do it calmly to avoid accidental contact. - 4
Place probes and take the reading
Carefully bring the probes to the test points without touching metal parts. Read the display and note the value. Disconnect after observation and verify the circuit state.
Tip: Keep hands behind probe guards to minimize exposure to live parts. - 5
Interpret and verify
Compare the reading with expected values from schematics or specs. If the result seems out of range or unstable, re-check connections and retest on a known source.
Tip: If readings vary with movement, suspect a loose connection or damaged lead. - 6
Power down and store safely
Power down the meter, remove probes, and store equipment in a dry place. Document readings for later reference.
Tip: Label any measurements that require follow-up testing.
Your Questions Answered
Can a multimeter replace a dedicated voltage tester for electrical work?
In many electronics tasks, a multimeter can substitute for a voltage tester by providing exact voltage values and circuit understanding. For quick live checks or non-contact diagnostics, a dedicated voltage tester is often faster and safer.
Yes, for many electronics tasks, a multimeter can substitute for a voltage tester, but for quick live checks you may prefer a dedicated tester for speed and safety.
Is it safe to test live mains with a multimeter?
Testing live mains with a multimeter is inherently risky. Only trained personnel using proper PPE and safe work practices should perform these tests. Consider using non-contact testers for preliminary checks where possible.
Testing live mains with a multimeter is risky; only trained individuals with PPE should do it, or use a non-contact tester for initial safety checks.
What is true RMS, and do I need it to test voltage?
True RMS meters accurately read non-sinusoidal waveforms, which matters in some AC circuits. For simple voltage measurements on typical power supplies, a standard AC range is usually sufficient.
True RMS helps with non-sinusoidal signals. For basic voltage checks, a regular AC range is often enough.
Should I use auto-range or manual range on my multimeter?
Auto-range is convenient and safer for beginners, but manual range can improve accuracy when you know the expected value and want tighter control.
Auto-range is convenient, but manual range gives you tighter accuracy when you know the expected voltage.
What could cause a misleading reading on voltage tests?
Causes include incorrect range, dirty or damaged probes, loose connections, or a damaged meter. Re-check setup and retest with a known source.
Bad readings can come from wrong range, dirty probes, loose connections, or a faulty meter. Re-check and retest.
Watch Video
Key Takeaways
- Assess the task to decide if a meter or dedicated tester is best
- Follow strict safety procedures for live testing
- Know the difference between AC and DC voltage measurements
- Validate readings with a known source and circuit diagrams