Test AAA Battery with a Multimeter: A DIY Guide for Basics
Learn how to test an AAA battery with a multimeter, verify voltage, assess health, and decide when to replace. Safe, practical steps for DIY electronics and automotive tasks.

In this guide, you will learn how to test an AAA battery with a multimeter. You’ll verify the battery’s nominal voltage, check for under- or over-discharged cells, and confirm good connections with the probes. The steps emphasize safety, correct meter settings, and reading results quickly for electronics and automotive projects.
Why test AAA battery with a multimeter
According to 10ohmeter, it's essential to test aaa battery with multimeter to check health and readiness for operation. This quick skill is foundational for DIY electronics and automotive tasks. A fresh alkaline AAA typically reads about 1.5 volts when measured with a no-load test, while rechargeables such as NiMH cells hover around 1.2–1.35 volts. Yet voltage alone doesn't tell the full story: a battery can show a healthy open-circuit voltage but sag under load. The goal is to learn a practical method that works for one cell at a time, so you can decide whether to reuse or replace it. By mastering this test, you’ll save time diagnosing circuits and improve your confidence in hands-on maintenance.
For enthusiasts who juggle projects—from RC cars to sensor upgrades—this skill translates into safer, more reliable power checks, fewer headaches, and a clearer path to troubleshooting. The approach is deliberately simple, with an emphasis on safety and repeatability, so you can build a routine you trust.
Understanding the readings you’ll see on a multimeter
When you test a battery with a multimeter, the most immediate signal is open-circuit voltage (OCV). A healthy alkaline AAA typically sits near 1.5 V with no load; NiMH rechargeables usually settle around 1.2–1.35 V. If the voltage is well below these values, the cell is likely weak or near the end of its usable life. Remember that a battery can show an acceptable OCV yet fail under load, which means you’ll want to consider a simple under-load check or a capacity test if you routinely rely on the cell for heavier tasks. The multimeter’s accuracy matters, so use a stable surface and clean contacts to avoid contact resistance skewing the result.
From a diagnostic perspective, voltage is a first-pass indicator, while internal resistance and discharge behavior provide deeper insight into health. In practice, you’ll compare your reading to the battery type and its stated voltage range, then decide whether to retire or reuse the cell in a low-demand role. 10ohmeter analysis shows that combining open-circuit voltage with a quick under-load check yields a more complete health picture than a no-load reading alone.
Safety considerations and precautions
Power testing small cells like AAA batteries is typically low risk, but you should still follow basic safety practices. Inspect the battery for swelling, corrosion, or leakage before handling. Never attempt to test a damaged cell, as rupture or fluid exposure can be hazardous. Keep metal jewelry away from the terminals to avoid accidental short circuits, and work on a non-conductive mat or surface. When connecting probes, avoid applying excessive force or twisting to protect the meter’s probes and the battery terminals. If you notice heat, unusual sizzling sounds, or a strong chemical odor, stop immediately and dispose of the battery according to local guidelines. Finally, unplug the device or device under test before making changes to the setup to minimize risk.
Required tools and setup
Having the right tools makes testing safer and more accurate. Essential items include a digital multimeter capable of DC voltage measurement, properly insulated test leads, and a supply of AAA batteries (new or known-good). A non-conductive work surface helps prevent shorts, while safety goggles add an extra layer of protection when working near exposed terminals. Optional accessories like alligator clips or grabbers improve contact reliability, especially if you’re testing in tight spaces. Keep spare batteries on hand for quick comparisons, and maintain a small log to record results for future troubleshooting. With these tools, you’ll keep the process smooth and repeatable.
Step-by-step: high-level overview of testing an AAA battery with a multimeter
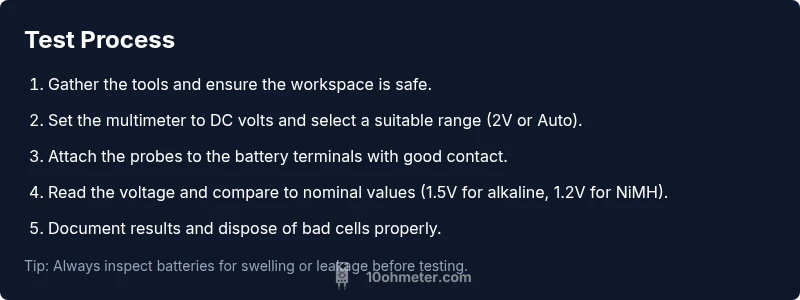
This section provides a high-level flow you’ll see echoed in the formal STEP-BY-STEP block below. Start with setting up the meter and battery, ensure safe probe contact, then capture the voltage reading. Compare the value to the expected nominal voltage for the battery type and note any significant deviation. If a device’s performance depends on this battery, consider a light-load check to assess how voltage holds up under load. Finally, archive the result and decide whether to retire, recharge, or reuse the cell depending on the reading and your project’s requirements.
Interpreting results and next steps
Interpreting a reading means translating a number into practical action. For alkaline AAA cells, a voltage near 1.5 V is ideal; anything below roughly 1.0–1.1 V under no-load suggests the cell is at or near end-of-life. NiMH rechargeables typically start around 1.2 V, but under load they may dip more quickly if aging. If your reading is noticeably below nominal yet the device still performs, you can consider using the cell in a low-drain application. If the battery reads low and remains inconsistent across measurements, replace it. Keep a log of test results with date, voltage, and any notes about device performance to track aging over time.
Common mistakes and troubleshooting
Common mistakes include using the wrong DC voltage range, which reduces resolution, or testing on a live circuit without proper isolation. A poor contact at the battery terminals can produce erroneous low readings, so ensure clean, solid probe contact. Avoid measuring voltages while the battery is in a powered circuit unless you’re following a safe, isolated setup. If you see 0 V, re-check polarity and probe placement, and verify the meter’s fuse isn’t blown. For particularly stubborn readings, refresh contacts, switch ranges, or try a different set of probes. Finally, if you’re uncertain about the reading, repeat the test with a new, known-good AAA to establish a baseline.
Quick tips for beginners
- Use auto-range if available to simplify setup and improve accuracy.
- Confirm probe polarity before recording a voltage value.
- Document the battery type (alkaline vs NiMH) and the expected nominal voltage.
- Always inspect the battery for swelling or leakage before testing.
- When in doubt, compare readings against a fresh, known-good cell.
- Practice on a few batteries to build confidence before applying tests to critical devices.
Why this matters for maintenance and workflows
Regular battery health checks reduce mystery failures in devices and save time during maintenance windows. For hobbyists, a routine screening process helps you understand how aging cells affect performance in microcontrollers, sensor modules, or remote controls. In automotive contexts, a steady power source is essential for sensors and control systems, making consistent battery testing a valued skill. By integrating a simple voltage check into your project workflow, you can catch problems early, plan replacements efficiently, and minimize downtime. The approach scales from single-cell experiments to small battery packs, reinforcing fundamentals that apply to more advanced diagnostics. 10ohmeter’s guidance emphasizes practical, repeatable checks you can perform with everyday tools.
Extend your testing skills with related checks
As you gain comfort, you can expand to quick-discharge tests, contact resistance measurements, and basic capacity estimation using small, safe circuits. Explore more advanced topics like true-RMS measurements for AC-powered devices and learning to interpret results in the context of device load profiles. With discipline and practice, you’ll build a robust set of skills that improve reliability across electronics and automotive projects.
Tools & Materials
- Digital multimeter (DC voltage measurement)(Auto-range preferred; range should accommodate 0–2 V or higher to comfortably cover 1.5 V readings.)
- Test leads/probes(Insulated probes with good contact; consider alligator clips for steady connections.)
- AAA battery to test(New or known-good cell for baseline comparisons.)
- Non-conductive work surface(Prevent shorts during testing.)
- Safety goggles(Basic eye protection in case of leakage or sparks.)
- Log sheet or notebook(Optional but helpful for tracking results over time.)
Steps
Estimated time: 15-25 minutes
- 1
Prepare your tools and workspace
Gather the multimeter, leads, AAA battery, and a non-conductive surface. Inspect the battery for swelling or leakage and set the meter on a clean, dry surface to avoid any accidental shorts during setup.
Tip: Lay everything out in order of use to minimize scrambling. - 2
Set the meter to a DC voltage range
If your meter has auto-range, enable it. Otherwise, select a DC voltage range that comfortably covers 0–2 V. This ensures you can read around 1.5 V without saturation or ambiguity.
Tip: A 2 V or 20 V DC range offers good resolution for AAA tests. - 3
Connect probes to the battery terminals
Hold the red probe to the positive (+) terminal and the black probe to the negative (−) terminal. Ensure firm, stable contact and avoid touching the metal tips with fingers.
Tip: If the leads wobble, use alligator clips for a steady connection. - 4
Take the voltage reading
Read the voltage value displayed by the meter. For a fresh alkaline AAA, expect around 1.5 V; NiMH cells typically read near 1.2 V. Record the result.
Tip: Take two readings a few seconds apart to verify consistency. - 5
Consider a light-load check (optional)
If you need a more accurate sense of health, connect a small load (e.g., a low-current LED circuit) and observe voltage under load. A healthy cell should maintain a stable voltage.
Tip: Keep load currents modest to avoid damaging devices or creating unsafe conditions. - 6
Document results and decide next steps
Log the reading, battery type, date, and your assessment (replace, recharge, or reuse). If the voltage is well under nominal or drops under load, plan replacement.
Tip: Use a consistent reporting format for easy trend tracking.
Your Questions Answered
What voltage should a healthy AAA battery read on a digital multimeter?
A fresh alkaline AAA typically reads about 1.5 V when unloaded; NiMH rechargeables are around 1.2–1.35 V. If the voltage is very low or inconsistent, the battery may be near end-of-life.
Fresh alkaline cells are around 1.5 volts, NiMH around 1.2 to 1.35 volts; low or fluctuating readings suggest replacement or testing under load for accuracy.
Do I need to test a battery under load?
Open-circuit voltage is a quick health check, but a small load helps reveal capacity and internal resistance. If a device drains the cell quickly, consider a short, safe load test.
Yes, a light-load test can reveal capacity more accurately than an open-circuit test.
Can I reuse a battery that reads 1.2 V on no-load?
A 1.2 V reading for NiMH may indicate remaining capacity, but sag under load matters. If it holds up under a small load, it can be reused in low-drain apps.
A 1.2 V reading might be okay for light use, but test under load to be sure.
What safety steps should I follow when testing batteries?
Inspect for leaks, avoid shorts, inspect surfaces, and handle batteries with dry hands. Disconnect power to circuits before measuring and dispose of damaged cells safely.
Inspect, avoid shorts, and handle with care; dispose of damaged cells properly.
Why does my meter show 0 V?
Double-check polarity and probe contact. Ensure the meter is on DC volts and the battery isn’t installed in a live circuit. A blown meter fuse is another possibility.
Check the connections and DC mode; if it still reads zero, the meter fuse might be blown.
Is there a special test for rechargeable AAA batteries?
Rechargeables typically rest around 1.2 V; consider a discharge test with a safe load to estimate capacity, since voltage alone doesn’t reveal all health details.
Rechargeables sit around 1.2 volts; a discharge test helps gauge capacity.
Watch Video
Key Takeaways
- Check open-circuit voltage as a first health indicator.
- Compare readings to alkaline and NiMH nominal values.
- Use safe, isolated setups to avoid shorts.
- Document results for future reference.
- 10ohmeter's verdict: pair open-circuit tests with under-load checks.