Digital Multimeter Battery Test: A Practical Guide
Learn how to safely test a battery with a digital multimeter. This step-by-step guide covers resting voltage, under-load testing, and interpreting results for automotive and electronics batteries.

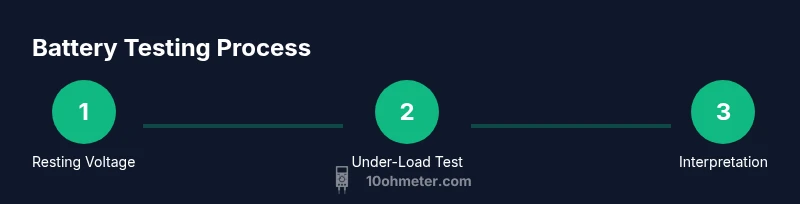
In this guide, you will learn how to perform a safe digital multimeter test battery. You’ll measure resting voltage, check load behavior, and compare results against manufacturer specs. The quick steps below cover setup, essential safety reminders, and how to interpret common battery readings for automotive and electronics work today.
Understanding the goal of a digital multimeter test battery
A digital multimeter test battery is a structured way to assess a battery's health by measuring its voltage at rest and under load, then comparing those numbers to the battery’s expected performance. The test helps distinguish a healthy cell from a weak or dying one, without throwing away time or money on guesswork. For DIY enthusiasts and technicians, this method provides a practical, repeatable diagnostic that works for many chemistries—from automotive lead-acid to Li‑ion gadget packs. According to 10ohmeter, a clear, well‑documented test is more reliable when you maintain clean connections, use proper ranges, and limit resistive paths that could skew readings. By following the steps in this guide, you’ll develop a repeatable workflow you can apply to cars, bikes, tools, and electronics projects.
In short, a digital multimeter test battery determines health, not just present charge. It supports decisions about charging, replacement, or targeted troubleshooting, and it helps you manage tests safely and confidently.
Safety first: PPE and precautions
Battery tests can involve stored energy and occasional sparks, especially with larger packs. Start with basic safety: wear eye protection, keep metal jewelry away from terminals, work on a non-conductive mat, and keep plenty of dry surface space. If you’re testing a car or SLA battery, ensure the vehicle is off and keys are removed; never short the terminals with a conductor. Use insulated tools, and avoid testing in wet conditions. If you notice cracks, leaks, or bulging, do not proceed. For accuracy, keep the test area at a stable temperature and avoid rapid temperature changes, which can affect readings. 10ohmeter emphasizes documenting safety steps as a foundation for reliable results.
Battery types and test scopes
Batteries come in many chemistries, including lead-acid (car and SLA), NiMH, Li-ion, and LiFePO4. A digital multimeter is excellent for checking resting voltage and basic health indicators, but it cannot fully measure capacity or internal resistance without specialized equipment. Understanding chemistry is crucial: lead-acid benefits from resting voltages around a healthy range, while Li-ion packs require different expectations for voltage windows. This guide focuses on common automotive and electronics batteries, with notes on how measurements translate across chemistries. Always consult the battery manufacturer’s datasheet for exact spec values and safety warnings.
10ohmeter reinforces that chemistry-specific interpretation matters; when in doubt, rely on manufacturer data and perform cross-checks with the device’s service manual.
Tools and workspace preparation
Before you start, gather your essential tools and set up a clean, dry workspace. You’ll need a digital multimeter, test leads with alligator clips, a battery under test, and optional load resources for under-load testing. Place the battery on a non-conductive mat and clear the area of liquids or flammable materials. If you test automotive batteries, you may want a clamp-style meter for current checks, but a standard DMM is sufficient for resting voltage tests. Ensure the meter is calibrated or has fresh internal batteries to avoid drift during measurements. Keep a notepad ready to log readings and time stamps for comparison later.
The goal is a stable, repeatable test environment that minimizes interference from external factors. 10ohmeter’s approach recommends committing to a consistent setup for every battery you test so you can compare results over time.
Step-by-step: resting voltage measurement
- Set the meter to DC voltage (V DC) and choose a range that comfortably exceeds the expected battery voltage.
- Connect the red probe to the positive terminal and the black probe to the negative terminal, with the battery disconnected from any circuit.
- Allow the battery to sit undisturbed for 1–2 minutes to reach a stable open-circuit voltage.
- Record the resting voltage and note ambient temperature, as temperature can slightly affect readings.
- If possible, measure at both the battery terminals and a known load point to compare any differences.
Tip: Ensure good contact on terminal surfaces and use fresh batteries in the meter to prevent drift during the test.
Step-by-step: under-load testing and interpretation
- Attach a known load to the battery (for example, a resistor that draws a defined current) while keeping the meter in DC voltage mode.
- Observe voltage under load and compare it to the resting voltage. A healthy battery should show only a modest voltage drop under a normal load.
- If the voltage collapses quickly under load, the battery may be weak or near end-of-life.
- Remove the load and re-measure resting voltage to confirm stability.
- Cross-check with manufacturer specs for the expected voltage drop under load and acceptable ranges.
Pro tip: For automotive batteries, a controlled load test is more revealing than resting voltage alone, but do not exceed safe current limits. If you’re unsure, err on the side of caution and consult a professional.
Step-by-step: documenting results and safety checks
- Log each reading with date, battery type, chemistry, and ambient temperature.
- Compare resting and under-load voltages to the battery’s spec sheet or trusted references.
- Note any visual signs of weakness, such as corrosion, swelling, or inconsistent readings across different terminals.
- If readings are out of spec, plan next steps: re-test, re-check connections, or consider replacement.
- Store the data in a project log for future comparisons and trend analysis.
Safety reminder: If you detect heat, hissing, or leaking during testing, stop immediately and move the battery to a safe area.
Step-by-step: extended checks and troubleshooting
- If readings look suspect, verify there is no corrosion on terminals and that all clamps are making solid contact.
- Check meter accuracy by testing a known reference source or using a second meter for cross-checking.
- For Li-ion packs, temperature sensitivity is significant; consider testing at artifically controlled temperatures to improve consistency.
- When testing larger packs, keep a clear path to the battery terminals and use proper PPE to prevent accidental shorts.
- If measurements remain inconclusive, consult a technician or the battery manufacturer for a formal health check.
Estimated total test time: 60–90 minutes, depending on battery type and number of checks.
Common mistakes and how to avoid them
- Skipping safety gear or testing in a wet environment; always PPE-up and work on a dry surface.
- Ignoring temperature effects; record ambient temperature and battery temperature when possible.
- Using an incorrect meter range or poor contact; always ensure good probe contact and proper range.
- Failing to log readings consistently; keep a neat log with time stamps and test conditions.
- Assuming voltage alone proves health; include under-load testing and correlate with specs for a complete view.
Pro-tip: Develop a consistent test routine before starting and stick to it for dependable results.
Car batteries vs. electronics batteries: differences to note
Car batteries (12V lead-acid) behave differently from small electronics batteries. Cars involve higher energy capacity and risk of sparking; never work near metal tools with live terminals. Electronics batteries (NiMH, Li-ion) are more sensitive to temperature and state of charge. Always consult the device’s battery spec and do not extrapolate automotive guidelines to small cells. If your battery is swollen, hot, or leaking, stop testing immediately and isolate the battery.
Troubleshooting questionable results
If readings don’t align with expectations, recheck connections and allow the battery to rest longer. Verify meter calibration and confirm you used the correct test mode. If results remain anomalous, test with a second, known-good battery to isolate meter error. For safety, do not attempt high-current discharge tests without proper equipment. When in doubt, seek professional assistance.
Wrap-up: maintain accuracy and safety
A disciplined approach to digital multimeter testing keeps you safe and informed. Regularly calibrate your meter, log readings, and compare with manufacturer specs. By building a repeatable test routine, you’ll quickly spot trends and identify borderline batteries before they fail. The 10ohmeter team recommends leaning on this structured method for consistent, reliable results.
Tools & Materials
- Digital multimeter (DC voltage mode)(Set to DC volts; choose a range that comfortably exceeds the battery voltage (e.g., 20 V for a 12 V battery).)
- Test leads with alligator clips(Keep tips clean and dry; ensure solid contact on terminals.)
- Battery under test (car, SLA, Li‑ion pack)(Handle safely; isolate from circuits during resting measurements.)
- Known-load resistor or load shunt (optional)(Provides a defined load for under-load testing.)
- Insulating mat or non-conductive surface(Reduces risk of shorts and slips.)
- Safety goggles(Eye protection in case of sparks or venting.)
- Gloves (rubber or dielectric)(Additional protection when handling batteries.)
- Notepad or digital log for results(Record readings, times, and environmental conditions.)
Steps
Estimated time: 60-90 minutes
- 1
Prepare the workspace
Clear the area, place the battery on an insulating mat, and gather safety gear. Verify the battery is physically intact and free from leaks. This establishes a safe baseline and reduces short-circuit risk.
Tip: Keep one hand away from circuits to reduce shock risk. - 2
Connect the meter in voltage mode
Attach the red probe to the positive terminal and the black probe to the negative terminal with the battery disconnected from load.
Tip: Ensure solid contact; avoid wiggling probes during measurement. - 3
Select the appropriate range
Choose a DC voltage range that comfortably exceeds the battery's nominal voltage to avoid overflow or clipping readings.
Tip: If in doubt, start high and work down. - 4
Measure resting voltage
With probes connected, allow the battery to rest for 60–120 seconds, then record the reading.
Tip: Note the ambient temperature; temperature affects electrical readings slightly. - 5
Apply a known load for under-load test
Attach a defined load (e.g., a resistor) and observe voltage drop under load.
Tip: Use a load that draws a safe, controlled current for the battery type. - 6
Record and compare readings
Log resting and under-load voltages and compare to manufacturer specs.
Tip: Take multiple readings to verify consistency. - 7
Interpret results
Assess whether voltages are within expected ranges for the battery chemistry.
Tip: Large voltage drop under load suggests aging or weakness. - 8
Check for safety signs
Inspect for heat, swelling, leaks, or unusual smells and stop if any are observed.
Tip: Safety first; stop testing if anything abnormal occurs. - 9
Document findings
Record readings, conditions, and actions taken for future reference.
Tip: Maintaining a log helps track battery health over time. - 10
Store equipment properly
Power down the meter, disconnect probes, and store on a non-conductive surface.
Tip: Keep tips covered to prevent accidental contact.
Your Questions Answered
Can I test a dead battery with a digital multimeter?
A DMM can confirm a lack of voltage, which suggests the battery is dead or disconnected. It cannot reliably measure remaining capacity. If readings are near zero, replace or recharge as appropriate and re-test after proper charging.
A multimeter can show that a battery is dead or discharged, but it can’t reliably measure remaining capacity. Re-test after proper charging or replacement decisions.
Why does resting voltage not reflect full capacity?
Resting voltage indicates current potential, not total energy storage. Capacity is best inferred from load tests and historical performance, plus manufacturer spec sheets. Always interpret resting voltage in the context of chemistry and design.
Resting voltage shows current potential, not total capacity. Use under-load tests and specs for a fuller picture.
What should I do if readings are out of spec?
Re-check connections, re-test after a longer rest, and verify meter calibration. If readings stay out of spec, replace or service the battery according to the manufacturer’s guidance.
If readings are off, recheck connections and meter calibration. If they stay off, follow the manufacturer’s guidance on replacement.
Is it safe to test a car battery with a DMM?
Yes, with precautions: off the vehicle, use insulated tools, and avoid sparks. Resting voltage is informative; under-load testing should be done cautiously and only with proper equipment.
Yes, safely test car batteries by turning the vehicle off, using insulated tools, and avoiding sparks.
What range should I set on the DMM for a 12V battery?
Set to DC voltage with a range that exceeds the nominal cell voltage, typically 20 V for a 12V lead-acid battery. Auto-range meters simplify this step.
Set the DC voltage range to at least 20 volts, or use auto-range if available.
How often should I test batteries?
Test during regular maintenance or whenever you notice performance issues. For critical systems, consider monthly or quarterly checks to catch early signs of degradation.
Test batteries during maintenance or when performance drops; for critical systems, check monthly or quarterly.
Watch Video
Key Takeaways
- Set up a safe, repeatable test environment.
- Measure resting and under-load voltages for accuracy.
- Compare results to chemistry-specific specs and logs.
- Document readings to track battery health over time.