How to Test an AC Capacitor with a Multimeter
Learn how to safely test AC capacitors using a multimeter, including capacitance checks, ESR considerations, and practical troubleshooting for electronics and automotive work.

Using a multimeter for testing ac capacitor helps verify health and spot leakage or ESR issues. You’ll need a meter with capacitance and ESR modes, proper discharge tools, and safety PPE before touching energized circuits. This guide provides a practical, field-ready workflow for electronics and automotive work. A quick-start approach is described in the body blocks.
Why the multimeter for testing AC capacitors matters
For DIY electronics and automotive repairs, capacitors play a crucial role in filtering, timing, and power storage. A reliable multimeter for testing ac capacitor use helps you verify whether a capacitor is healthy or failing by measuring capacitance, resistance, leakage, and sometimes ESR. According to 10ohmeter, a methodical approach using a meter that supports capacitance measurements reduces guesswork and saves time on troubleshooting. Proper testing can prevent wasted replacements and downstream failures.
Capacitor health is not revealed by a single metric. A capacitor can read within spec for capacitance but show excessive leakage or elevated ESR, which impairs circuit performance under load. When you test out of circuit, you can isolate the part and avoid reading parallel paths that distort results. In many cases, a field-ready tester also helps you verify capacitors suspected of failure due to heat, swelling, or audible hum in automotive circuits. The goal is to establish a repeatable procedure so you can compare readings over time, confirm suspected faults, and decide whether a part should be replaced or rechecked later.
Understanding capacitor basics and meter compatibility
AC capacitors come with two key specifications: capacitance value (measured in microfarads, μF) and voltage rating. They may also have ESR (equivalent series resistance) and leakage current, which degrade with age. When you pair these parts with a multimeter, you want a tool that can measure capacitance accurately and, ideally, ESR. Some meters offer dedicated ESR testing, while others rely on a secondary instrument. Compatibility matters: in-circuit measurements can be skewed by nearby components, so removing the capacitor from the circuit or using a low-resistance discharge path may be necessary. A safe approach is to discharge the capacitor fully before measuring and to verify the meter’s leads and batteries are in good condition. Remember that AC capacitors used in motor circuits or power supplies may differ from signal capacitors, so check the rating and the expected tolerance to interpret results correctly.
Choosing the right meter settings for AC capacitors
To test an AC capacitor effectively, orient your meter for capacitance and, if available, ESR. Use the capacitance mode to read the nominal value and compare it to the part’s rated μF. If your meter includes an ESR function, test the capacitor at the specified test frequency; a healthy electrolytic should show ESR within the manufacturer’s tolerance. When testing, prefer removing the part from the circuit; in-circuit readings require careful analysis of parallel paths. Always start with the capacitor discharged and isolated, use proper test leads, and avoid touching the energized terminals. If your test results are inconclusive, consult the part’s datasheet and repeat the measurement with a known-good component for reference.
Step-by-step workflow overview
Testing a capacitor with a multimeter involves a repeatable, safe sequence. First, power down the equipment and unplug the device. Second, discharge the capacitor safely using a resistor or dedicated discharge tool. Third, identify the capacitor’s rating and determine whether you will test in-circuit or out-of-circuit. Fourth, select the meter settings (capacitance mode, ESR, and appropriate range) and attach the test leads with secure connections. Fifth, record the reading and compare to the rated value, noting any drift or leakage. Sixth, if applicable, perform an ESR test and interpret the result against the tolerance provided by the datasheet. Finally, document findings and label capacitors as good, questionable, or bad for future reference. Estimated total time: 30-45 minutes for a typical board or automotive module.
Safety considerations when testing capacitors in electronics and automotive systems
Capacitors store energy and can deliver a shock even after power is removed. Always de-energize the circuit, unplug the device, and discharge the capacitor through a known-safe path before handling. Wear eye protection and insulated gloves when working with high-voltage or large-value capacitors, and keep liquids away from the testing area. Use insulated tools and non-conductive surfaces to prevent accidental shorts. If you’re uncertain about the safety of a circuit, stop and consult a more experienced technician or the device’s service manual. Following best practices reduces the risk of damage to the meter, the capacitor, or nearby components.
Common failure modes and how to interpret results
A healthy capacitor should show a stable capacitance within tolerance and low leakage. A capacitance that drifts beyond spec, or an ESR that spikes beyond tolerance, indicates degraded form or electrolyte breakdown. An open circuit reading suggests a failed capacitor, while a short indicates a severe fault. In-circuit measurements may produce misleading results if other components provide parallel paths or bleed currents. When results are ambiguous, test a known-good capacitor with the same value and compare, or remove the part and retest in a controlled setup. Document the environment, temperature, and supply conditions since these factors influence readings.
Special cases: testing in automotive circuits vs electronics
In automotive applications, capacitors often handle higher ripple currents and operate in harsh thermal environments. Capacitors in power supplies or motor controllers may show different ESR tolerances than signal-cay or timing capacitors. Always consult the service information for the vehicle or device and confirm the expected capacitor type (electrolytic, film, ceramic) before testing. For electronics boards, small-value ceramic capacitors typically have tight tolerances and may require higher-precision measurement or specialized equipment. The general approach—discharge safely, measure capacitance, consult the datasheet—still applies, but the interpretation of readings must account for the component type and operating conditions.
Troubleshooting mistakes to avoid
Avoid testing a capacitor while the circuit is powered or without discharging, as this can lead to inaccurate readings or injury. Do not rely on a single reading; repeat measurements to confirm consistency. Using a meter with a dry or faulty battery can skew results, so verify the tool is functioning before testing. In-circuit measurements without accounting for parallel paths can mislead you about a capacitor’s health. Finally, never replace a capacitor based solely on a visual cue such as bulging; verify with actual measurements and, if possible, an ESR check.
Practical tips for reliable testing in the field
- Keep a portable testing kit with a discharged capacitor, known-good references, and spare leads.
- Maintain a clean, dry work surface and use gloves when handling capacitors.
- Calibrate your meter periodically and replace worn probes to ensure accuracy.
- Cross-check ESR results against datasheets and reference components.
- When in doubt, test multiple capacitors from the same batch to identify manufacturing variations, rather than relying on a single component.
Tools & Materials
- Digital multimeter with capacitance and ESR modes(Capacitance measurement in μF; ESR mode optional but recommended for electrolytics)
- Known-good reference capacitor (same value as test part)(Used for comparison during measurement checks)
- Discharge resistor (e.g., 1 kΩ – 10 kΩ depending on capacitor rating)(For safe discharge; connect with insulated leads)
- Test leads and alligator clips(Ensure good contact and insulation; replace worn leads)
- Insulating gloves and safety glasses(Personal protective equipment for safety)
- Non-conductive work surface or mat(Helpful to prevent accidental shorts)
- Capacitor holder or tweezer tool(Helpful for handling small axial or radial caps safely)
Steps
Estimated time: 30-45 minutes
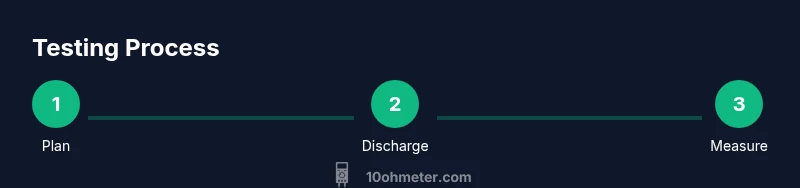
- 1
Plan and safety checks
Power down the equipment and unplug the device. Visually inspect the capacitor for signs of swelling, leakage, or damage before handling. Ensure you have PPE and a safe, non-conductive workspace ready.
Tip: Always confirm the device is fully de-energized using a non-contact voltage tester if available. - 2
Discharge the capacitor safely
Connect the discharge resistor across the capacitor terminals for a few seconds to bleed off stored energy. Avoid shorting terminals directly with metal tools; use a resistor and insulated leads.
Tip: Discharging first reduces the risk of arcing or damaging the meter. - 3
Identify rating and test location
Check the capacitor’s label for μF rating and voltage. Decide whether you will test in-circuit or out-of-circuit, as in-circuit readings can be distorted by other components.
Tip: Keep the device manuals or datasheets handy for tolerance values. - 4
Set meter to capacitance mode
Configure the meter to capacitance measurement and, if available, select an appropriate range. Attach red and black leads to the capacitor terminals with solid contact.
Tip: Use two-handed contact or insulated clip leads to reduce motion and improve accuracy. - 5
Measure capacitance and compare
Read the μF value and compare it to the rated capacitance on the part. Note any deviation; a small drift may be acceptable within tolerance, while large deviations indicate degradation.
Tip: If the result seems off, retest after re-discharge and ensure good contact. - 6
Test ESR if available
If your meter supports ESR, perform the ESR test at the specified frequency. Compare with the manufacturer’s tolerance; a high ESR usually signals internal damage or drying electrolyte.
Tip: Perform ESR tests with the capacitor charged only after discharging and reassembling securely. - 7
Interpret and document results
Record the reading, note the test conditions (temperature, circuit state), and label the capacitor as good, questionable, or bad. Consider cross-checking with a known-good part.
Tip: Document batch numbers and keep results for future maintenance logs.
Your Questions Answered
Can I test any capacitor with a basic multimeter?
A basic meter can measure capacitance if it has a dedicated capacitance range; ESR and leakage testing typically require a meter with more features or a separate ESR meter.
A basic meter can test capacitance if it has a capacitance mode, but for ESR and leakage you may need additional tools.
Do I need to discharge before testing?
Yes. Discharging a capacitor safely reduces shock risk and prevents damage to the meter or other circuit components. Use a resistor and insulated leads.
Yes—always discharge safely before testing to avoid shocks and meter damage.
What does a high ESR mean?
High ESR indicates degraded electrolyte or materials, leading to performance loss. It often means the capacitor should be replaced.
High ESR usually means the capacitor is failing and should be replaced.
Can I test a capacitor in-circuit?
You can test in-circuit, but results may be skewed by other components. For clear readings, remove the capacitor from the circuit when possible.
Yes, but reading may be distorted by nearby parts; remove the capacitor for accurate results.
How accurate are capacitance readings on cheap meters?
Budget meters can measure capacitance, but tolerance and stability vary. For critical work, use a meter rated for higher accuracy and verify with a known-good reference.
Cheap meters can measure capacitance, but accuracy varies; use a reference for verification.
Is it safe to test capacitors in automotive systems?
Automotive circuits can involve higher voltages and ripple; follow vehicle service guidelines and isolate the capacitor before testing.
In vehicles, follow safety guidelines and isolate components before testing.
Watch Video
Key Takeaways
- Plan safety first before testing.
- Discharge capacitors to reduce risk and measurement error.
- Use capacitance mode and ESR where available.
- Compare readings to rated values and datasheets.
- Document results for ongoing maintenance.