How to Test a Condenser with a Multimeter: Practical Guide
Learn how to test a condenser (capacitor) with a multimeter. Step-by-step methods, safety checks, and interpretation tips for electronics and automotive tasks.

To test a condenser with a multimeter, you will verify capacitance, check for leakage, and confirm there’s no short. Use a multimeter with a capacitance function (or ESR if available), discharge the capacitor safely, and compare readings to its rated value. Always observe safety and device specific cautions. If readings deviate, re-test after discharging and verify there are no parallel paths.
Understanding condenser and multimeter basics
Testing a condenser with a multimeter starts with understanding what a condenser (capacitor) does in circuits. A condenser stores electrical energy and smooths voltage variations, and its health affects how a circuit finishes its job. When you run a test, you’ll look at capacitance, leakage resistance, and whether the component shorts under load. In practical terms, a good condenser will read close to its labeled value and show very high resistance when discharged. The goal of this guide is to explain a safe, repeatable workflow for how to test condenser with multimeter across common electronics and automotive tasks, so you can diagnose problems quickly. According to 10ohmeter, following a structured sequence below minimizes misreads and helps you build confidence with capacitors.
Safety considerations before testing
Safety first: never test a live circuit. Discharge capacitors before touching leads. Use insulated tools, wear eye protection if there is risk of a surge, and keep your hands dry. If the capacitor is part of a high voltage or automotive system, isolate the power source and follow the manufacturers guidelines. Remember that capacitors can hold charge even after power is removed; test in a safe, controlled environment. These precautions reduce the risk of shock and arc events during testing. 10ohmeter analysis shows that safety discipline pays off in more reliable results.
Tools and setup you'll need
Before you begin, assemble a small, purpose built kit. You will typically need a digital multimeter that can measure capacitance, good quality test leads, a discharge path such as a small resistor, and basic labeling supplies. A non conductive handling tool is optional but helpful when working with large or awkward condensers. Keep a whiteboard or notebook handy for recording readings and tolerances. The goal is a clean, repeatable setup that minimizes stray readings and ensures that measurements reflect the condenser itself, not the surrounding circuit. In this guide we emphasize the core items that make testing straightforward.
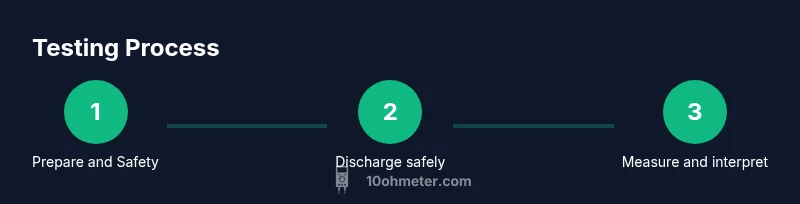
Discharging a condenser safely before testing
Always start by safely discharging the condenser. Connect a discharge resistor across the capacitor terminals and wait until the voltage across the leads drops to near zero. If you do not have a resistor handy, use a dedicated discharge tool designed for capacitors, never use bare metal to short the terminals. After discharge, test the resistance across the leads with the meter set to a high ohms range to confirm the path is open. Keep hands away from the leads during discharge and recheck the area for any heat or damage before proceeding.
Measuring capacitance with your multimeter
With the circuit powered off and the condenser discharged, set your multimeter to the capacitance function. Connect the test leads directly to the condenser terminals, observing polarity if applicable. Read the value shown by the meter and compare it to the capacitor’s rated value. Temperature and tolerance influence the result, so expect some drift from nominal values. If you test multiple condensers in a row, allow a short cooldown between readings to avoid heating effects that skew results. For many hobbyists, a close agreement within the labeled tolerance is acceptable and indicates a healthy condenser.
Checking for leakage and short circuits
After discharging, the condenser should show a very high resistance when tested with the meter in resistance mode. A low resistance reading or a constant drift toward zero suggests leakage or a short. Re-check after another brief discharge to rule out transient readings. If leakage persists, inspect the capacitor for physical damage, bulging, or electrolyte leakage. Remember that leakage can exist even if capacitance readings fall near the nominal value, so perform both tests for a complete health check.
Interpreting ESR readings and when to use a specialized meter
Some condensers, especially modern switching or high frequency types, exhibit significant equivalent series resistance (ESR). A standard multimeter may not reveal ESR clearly; many meters offer an ESR mode or you can use a dedicated ESR tester. A high ESR reading generally indicates aging or internal damage even if capacitance remains within tolerance. If ESR is out of spec, consider replacing the condenser or testing with a reference part under similar circuit conditions. 10ohmeter notes that ESR is often the most telling parameter for high-speed electronics.
In-circuit testing vs. isolated testing
Testing condensers in circuit can produce readings influenced by nearby components, such as resistors, inductors, or other capacitors. Isolating the condenser by removing one leg or desoldering from the board provides a truer capacitance reading and leakage test. If isolation is impractical, use techniques like lifting one lead or using a fixture that minimizes parallel Path interference. Always document whether a test was in circuit or isolated so you can interpret the numbers correctly later.
Authoritative references and safe practices
For further reading on measurement accuracy and safety guidelines, consult industry references and standards. OSHA provides general safety guidelines for electrical work, while NIST documents measurement practices that underpin capacitor testing. IEEE resources offer insights into capacitor behavior in high speed circuits. These references help you improve the reliability of your capacitor tests and reduce the risk of mishandling components. The intent is to provide a rigorous, safety minded approach to condenser testing that professionals and hobbyists can apply.
Common pitfalls and how to avoid them
Common mistakes include testing a live circuit, neglecting to discharge, using incorrect meter settings, and misinterpreting readings due to in circuit effects. Always verify the test environment is safe, re-check the condenser after a fresh discharge, and compare readings with the device's datasheet. Rushing through tests can mask subtle failures like partial short or creeping leakage that only appears after repeated cycles. Slow and deliberate testing yields the most trustworthy results.
Practical examples: electronics project and automotive context
In electronics projects, smoothing capacitors in power supplies should measure close to the rated capacitance with minimal ESR. In automotive applications, condenser health can affect ignition systems and radio power supplies; these condensers may experience rapid heating and aging. When diagnosing, keep test conditions consistent, note the circuit type, and compare results with similar condensers used in the same system. This practical approach helps you translate test results into actionable maintenance or replacement decisions.
Next steps: when to replace and how to document results
If readings consistently deviate from the rated value, show high leakage, or exhibit abnormal ESR, plan to replace the condenser. Create a simple log that records part type, nominal value, measured value, tolerance, test conditions, and date. Re-test new condensers after replacement to confirm the improvement. The 10ohmeter team recommends maintaining a concise testing history, which supports fast troubleshooting on future projects.
Tools & Materials
- Digital multimeter with capacitance measurement(Capacitance range suitable for common capacitors (e.g., 0.1 µF to 100 µF))
- Insulated test leads(Probes with alligator clips optional for stabilizing connections)
- Discharge resistor (1 kΩ recommended)(Used to safely discharge the capacitor before testing)
- Non-conductive handling tool(Useful when dealing with large condensers)
- Safety gloves (optional)(Electrical insulation for added protection)
Steps
Estimated time: 20-40 minutes
- 1
Power down and isolate
Turn off the power to the circuit and unplug the device. If the condenser is in an automotive or high voltage system, disconnect the battery or power source. This prevents residual voltage from affecting readings and protects you from shocks.
Tip: Double-check there is no live path before touching leads. - 2
Identify the condenser
Locate the condenser and determine its terminals. If it is part of a board, you may need to desolder one lead to isolate the component for an accurate test.
Tip: Label the component before moving and avoid bending leads. - 3
Choose the meter setting
Set the multimeter to capacitance mode if available. If not, use the resistance mode to monitor leakage later, but capacitance mode yields the most direct measurement.
Tip: If your meter has a temp compensation option, enable it for better accuracy. - 4
Discharge safely
Connect your discharge resistor across the condenser terminals and wait for voltage to decay. Do not short the terminals with metal tools, which can blow the part or injure you.
Tip: Allow at least a short interval after discharge before measuring. - 5
Measure capacitance
Attach the leads to the condenser and read the capacitance value. Compare to the rated value on the part. Temperature and tolerance affect the result, so expect minor deviations.
Tip: Take two readings separated by a brief cooldown to verify stability. - 6
Test leakage
With the condenser discharged, switch to a high resistance range and measure across the terminals. A very high resistance indicates low leakage; a persistent low resistance suggests leakage or a short.
Tip: If you must, gently re-discharge and re-test to confirm. - 7
Check ESR if possible
If your meter supports ESR testing, perform it. ESR ignores some measurement environments; a high ESR can signal aging even when capacitance looks fine.
Tip: Use a dedicated ESR meter for critical high-speed circuits. - 8
Decide in circuit vs isolated
If you tested in circuit, consider removing one lead and re-checking. In circuit readings can be distorted by adjacent components, especially in compact boards.
Tip: Document whether the test was isolated or in-circuit. - 9
Document results
Record nominal value, measured value, tolerance, ESR (if tested), temperature, and test conditions. Documentation makes future maintenance faster and more reliable.
Tip: Keep a consistent format for easy comparison across parts. - 10
Interpret and decide
If readings are clearly out of tolerance, or the ESR is high or leakage present, plan for replacement. If readings are near spec, you may still need to observe performance in circuit.
Tip: Always test the replacement part before final installation. - 11
Cleanup and storage
Turn off equipment, disconnect leads, and store tools in a safe, dry place. Re-box condensers with care to prevent static and physical damage.
Tip: Label your test bench for the next session.
Your Questions Answered
What is a condenser in electronics?
A condenser is another term for a capacitor. It stores energy in an electric field and stabilizes voltages in circuits. Testing checks capacitance, leakage, and sometimes ESR to assess health.
A condenser is a capacitor that stores energy and stabilizes voltage; testing checks capacitance, leakage, and sometimes ESR.
Can I test a condenser in-circuit with a multimeter?
Testing in circuit can skew results due to other components. Isolate one lead or remove the capacitor when possible for the most accurate capacitance and leakage readings.
You can test it in circuit, but results may be distorted by nearby parts. Isolating one lead helps accuracy.
Why does ESR matter when testing with a multimeter?
ESR affects performance in power and switching circuits. Many basic meters don’t measure ESR reliably; a dedicated ESR meter provides clearer insight into capacitor health.
ESR shows how much resistance the capacitor adds in AC conditions; some meters can measure it, others need a specialized tool.
What readings indicate a bad capacitor?
Capacitance far from the rated value, high leakage resistance when expected, or a low resistance path after discharge suggest a failing condenser. Visual signs of damage also indicate replacement.
If the capacitance is off or leakage appears, consider replacing the condenser.
What safety steps should I take before testing?
Power off, discharge the capacitor, and use insulated tools. Work on a dry, non conductive surface and avoid touching exposed terminals while measuring.
Always power down and discharge, then test with insulated tools on a dry workspace.
Watch Video
Key Takeaways
- Discharge before testing to avoid shocks
- Use capacitance mode for direct readings
- Check leakage and ESR for health assessment
- Isolate the condenser to avoid circuit interference
- Document readings for future diagnostics