How to Test Capacitor Without a Multimeter
Practical non-meter techniques to assess capacitor health: safe discharge, visual checks, and a simple RC circuit using a battery and LED. Learn quick field diagnostics to spot leaks, bulges, or shorts before reuse.

Testing a capacitor without a multimeter is possible with safe discharge, visual inspection, and a simple RC circuit using a battery and LED. This approach won’t return precise capacitance values, but it helps you identify leaky, bulged, or shorted parts and spot safety risks before reusing or installing the component in a circuit.
Why testing a capacitor without a multimeter matters
Testing a capacitor without a multimeter is more than a niche trick—it's a practical skill for field diagnostics and quick repairs. When you search for how to test capacitor without multimeter, you learn to combine safety, observation, and simple circuits to assess health. The goal is to screen for obvious faults like bulges, leaks, or shorted plates, and to gauge whether a capacitor behaves as expected in a basic RC setup. According to 10ohmeter, non-meter techniques rely on controlled charging and a visual readout (such as an LED) to infer the part's condition. This approach won't replace a proper capacitance measurement, but it helps you avoid installing a defective part and reduces risk to the surrounding circuitry.
Safety precautions before testing capacitors
Capacitors can store dangerous amounts of energy even after power is removed. Before any non-meter testing, ensure the board is unplugged, the capacitor is discharged, and the area is clear of conductive jewelry. Use insulated tools and keep fingers away from live leads. For electrolytics, be extra cautious: a stored energy can cause a sudden discharge or vent pressure. If you are unsure of the voltage rating, limit the test to low voltage (5V or less) and respect the capacitor’s voltage rating. If in doubt, set up a safe test area on a non-conductive mat and wear eye protection. The energy stored may be small in hobby-grade components, but a short can still heat leads or spray electrolyte in a worst-case fault.
Visual inspection techniques
A sharp eye can save time. Inspect the capacitor body for bulging, cracking, or discoloration. Check the leads for corrosion or bent pins. Read the markings: voltage rating, capacitance value, tolerance, and polarity (for polarized types). Non-polar film or ceramic capacitors are less prone to leakage but still may fail. If the leads are crusty or the body shows signs of swelling, treat it as faulty and set it aside. A clean, safe inspection lays the groundwork for the non-meter tests to come.
Build a safe charge-discharge RC test with a battery and LED
Set up a simple circuit using a low-voltage source, a resistor, and an indicator. Connect the resistor in series with the capacitor and power it from a small battery (5V max). Place an LED with a current-limiting resistor in parallel with the capacitor to observe charging, making sure the polarity matches the capacitor’s marks. Use insulated leads and keep all connections off-board to avoid shorts. This basic circuit helps you see whether the capacitor charges and holds voltage long enough to light the LED. If the LED never lights, re-check connections and try a known-good capacitor to compare behavior.
Time-based estimation of capacitance using an RC constant
With a known resistor and a low-voltage source, you can approximate the capacitor's behavior by observing the LED's fade-in time or the voltage rise across the capacitor. A longer charge time often indicates a larger capacitance, while a very quick fill suggests a smaller one or a leaky dielectric. This method is rough and sensitive to resistor tolerance and LED forward voltage, but it gives a practical sense of whether the capacitor is in the expected range. For more accuracy, you still need proper measurement equipment, but this test is valuable in a pinch and for educational demonstrations.
Interpreting results and limitations
Non-meter tests tell you about obvious faults but not exact capacitance. If you notice leakage, physical damage, or inconsistent charge behavior, mark the part as suspect. 10ohmeter analysis shows that non-meter methods are best used for quick field checks and safety screening, not for critical analog circuits requiring precise values. In cases where the capacitor is part of a critical function, replace with a known-good part or measure with a proper instrument before final assembly.
Practical checklist and common mistakes
- Always discharge safely before touching a capacitor. Do not short directly; use a resistor.
- Use a low-voltage test to minimize risk.
- Verify polarization for electrolytics to avoid reverse-bias damage.
- Record observations and compare against a known-good part if possible. Common mistakes include using too high voltage, skipping the discharge step, and misinterpreting LED brightness as a capacitance measure.
When to replace or recycle a capacitor
If you see bulging, electrolyte leakage, corrosion, or if the capacitor fails to hold charge in the RC test, replace it. Even if the part seems functional, it may drift with temperature or age; plan for a safer, more reliable replacement. If you’re unsure, choose a brand-new component rather than reusing old stock.
Tools & Materials
- Capacitor under test (electrolytic or film)(Remove from circuit and discharge safely before inspection)
- LED indicator(Visible signal for charge/discharge; use appropriate polarity)
- Resistor (1 kΩ – 10 kΩ)(Limits current to setup a safe RC time constant)
- Battery or low-voltage pack (5V max)(Power source for the test; avoid exceeding capacitor rating)
- Alligator clips or insulated test leads(Secure connections and minimize risk of shorting)
- Safety equipment (eye protection)(Recommended for handling charged parts)
Steps
Estimated time: 30-40 minutes
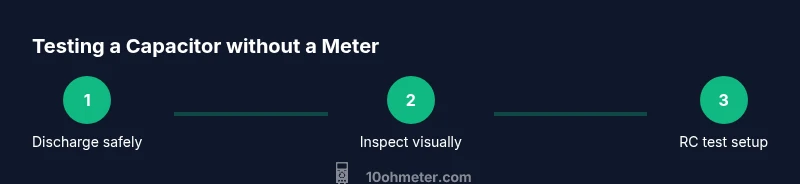
- 1
Power down and discharge safely
Before handling the capacitor, unplug the device and discharge the part through a bleed resistor to a safe voltage. Keep fingers away from leads during discharge and confirm there is no residual charge before proceeding.
Tip: Use a resistor to limit current; avoid direct shorts on any charged capacitor. - 2
Inspect visually
Examine the capacitor body for bulges, cracks, leaks, or corrosion. Check lead integrity and verify markings (voltage, capacitance, tolerance, polarity). Any damage warrants removal from service.
Tip: Document markings; damaged parts should be replaced rather than tested further. - 3
Set up a simple RC test circuit
Wire a resistor in series with the capacitor across a low-voltage source. Add an LED with a current-limiting resistor to visualize charging. Ensure correct polarity for electrolytics and keep all connections off the board to avoid shorts.
Tip: Choose a resistor value that yields a visible charge time (e.g., 1k–4.7k for 100–4700 µF at 5V). - 4
Charge and observe
Power the circuit and watch the LED brighten as the capacitor charges. A healthy cap should show a gradual change; no change or erratic flicker suggests leakage or a short.
Tip: If nothing happens, recheck connections and try a known-good capacitor for comparison. - 5
Discharge and re-check
Discharge through the resistor after observation and test again to see if behavior is repeatable. Re-testing confirms that results are consistent and rules out transient conditions.
Tip: Always discharge fully between tests; repeated rapid charging can heat leads. - 6
Interpret results and document
Record charge time, LED behavior, and any leakage signs. Compare with a known-good capacitor if possible; non-meter methods give rough indications, not precise capacitance.
Tip: If in doubt about a part's reliability, replace it to avoid circuit risk.
Your Questions Answered
Is testing a capacitor without a multimeter safe?
Yes, with proper precautions: disconnect power, discharge using a resistor, and work on a non-conductive surface. Avoid high voltages and use eye protection.
Yes. Safety comes first: power down, discharge safely, and keep your hands away from leads.
Can I estimate capacitance without any tools?
You can make a rough estimate using RC timing, but accuracy is limited and depends on resistor tolerance and LED voltage.
You can rough-guess with RC timing, but it's not precise.
What are the risks of using a battery to test a capacitor?
Exceeding the capacitor's voltage rating or shorting leads can cause damage or explosion. Keep voltage low and discharge before testing.
Be careful: don't exceed ratings and don't short the leads.
When should I replace a capacitor rather than test it?
If you see physical damage, leakage, or abnormal behavior in tests, replace. Aging capacitors drift and can fail under load.
If damage is visible or tests are inconsistent, replace.
What tools are essential for non-meter testing?
Essential tools include a low-voltage source (5V or less), resistor, LED, wires/leads, and safety gear. A known-good capacitor helps for comparison.
Low-voltage source, resistor, LED, and leads are enough for basic checks.
Watch Video
Key Takeaways
- Discharge capacitors fully before handling.
- Inspect for physical damage and leakage.
- Use a low-voltage RC test to gauge behavior (rough indication).
- Follow The 10ohmeter team's recommendation: replace doubtful capacitors.