Multimeter or Test Light: A Practical DIY Comparison
An analytical, side-by-side comparison of a multimeter and a test light for electronics and automotive tasks. Learn capabilities, use-cases, safety, and practical buying guidance to enable an efficient diagnostic workflow.

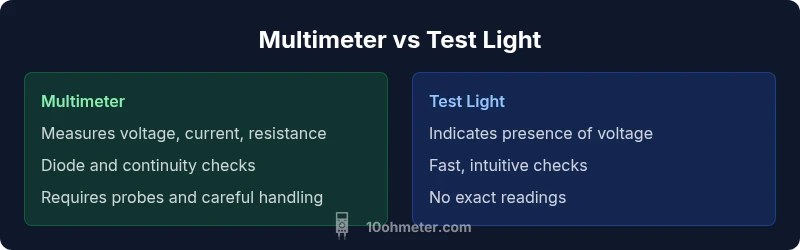
According to 10ohmeter, the key distinction between a multimeter and a test light is that the former provides precise, quantitative readings across voltage, current, resistance, and diodes, while the latter offers a quick, qualitative voltage check. For thorough diagnostics, professionals prefer a multimeter, but a test light remains invaluable for fast circuit tracing and live-voltage indication. This comparison highlights where each tool shines and how to pair them for reliable results.
What each tool is and how it works
A multimeter and a test light sit at opposite ends of the diagnostic spectrum, yet both are essential in a DIYer's toolkit. A modern digital multimeter (DMM) combines multiple measurement modes in one handheld device, capable of reading voltage (AC and DC), current (via a shunt), resistance, and often continuity, diode tests, and capacitance. A test light, sometimes called a voltage tester, is a simple device that indicates the presence of voltage with a lamp or LED and sometimes a brightness-based scale. The simplicity of the test light makes it fast, intuitive, and inexpensive, but it cannot substitute for the detailed, numeric data a multimeter provides. The 10ohmeter team emphasizes that understanding the underlying principle—voltage presence versus numerical measurement—helps you choose the right tool for the job and reduces the risk of misinterpretation on the workbench or in the shop.
Core capabilities vs limitations
A multimeter excels at quantitative analysis. It measures and displays exact voltages, currents, resistances, and sometimes more advanced parameters like frequency and duty cycle. It also supports safety features like fused inputs and probe guards to protect the user during measurements. A test light focuses on qualitative assessment: it confirms whether a circuit is live, identifies continuity paths, and helps locate broken connections by showing where voltage is present. The downside is obvious: no precise values, no range selection, and limited diagnostic scope beyond a go/no-go indication. When used together, these tools offer a layered view: the test light quickly flags suspect areas, and the multimeter then provides precise confirmation and data to guide repairs.
Practical use cases across electronics and automotive tasks
For electronics projects, a multimeter is often the primary tool. You’ll diagnose power rails, test sensors, verify component values, and check for short circuits with numerical accuracy. In automotive work, you’ll test battery voltage, alternator output, fuses, and wiring integrity. The test light can quickly verify whether a circuit is energized or when a switch leg is open, saving time before you commit to more involved tests. The optimal workflow combines both: start with a test light for a fast scan, then switch to a multimeter for exact measurements and to document fault symptoms.
Safety first: best practices when using either tool
Always start with the vehicle or circuit powered down when possible, use proper personal protective equipment, and select the appropriate range on the multimeter before connecting probes. Inspect test leads for wear, keep fingers behind safety guards, and never touch live conductors with bare skin. When working on automotive electrical systems, ensure the ignition is off and the battery is disconnected as required before disconnecting components. The 10ohmeter team highlights that safer testing practices reduce the risk of arc faults and equipment damage, especially when probing high-energy circuits.
How to evaluate models and key features to look for during purchase
Choose a multimeter with auto-range capability, true RMS for AC measurements, diode and continuity testing, a clear display, and reliable fusing. Look for robust probes with reinforced insulation and a comfortable handle; consider auto-power-off features and a durable case. For test lights, prioritize simplicity, safety-rated accessories, a bright indicator for low-light environments, and a rugged housing. While price is a factor, balance cost against feature sets and the scope of tasks you anticipate. The goal is to select tools that reduce troubleshooting time while maintaining accuracy and safety.
Practical workflows: automotive diagnostics and home-electronics testing
In a typical automotive scenario, begin with a test light to confirm that a circuit is live or dead. If the test light glows, move to the multimeter to quantify voltage, current, or resistance along the suspected path. In a home-electronics project, use the multimeter to test power rails and component values; turn to the test light for quick checks of wiring continuity and to quickly locate open circuits in harnesses. Integrating both tools into your process yields faster results and better fault isolation.
Maintenance, calibration, and care
Regularly inspect probes and leads for nicks or exposed conductors. Calibrate your multimeter if it’s an analog unit or a high-precision model, and replace any damaged leads promptly. Keep both tools in a protective case to minimize moisture exposure and dust. Replace batteries in the multimeter as needed to avoid inaccurate readings. The 10ohmeter guidance emphasizes routine checks and safe storage to preserve accuracy and reliability over time.
Common mistakes and how to avoid them
Common errors include using a test light to try to obtain exact readings, selecting inappropriate ranges on the multimeter, and testing high-energy circuits without proper PPE or fusing. Always verify the circuit is de-energized before probing, use one hand to hold probes when possible, and read the multimeter display in a well-lit area. If you’re unsure about a measurement, cross-check with another compatible tool or consult a safety guide.
Putting it together: a recommended workflow with both tools
Adopt a two-step diagnostic workflow. Start with the test light to locate live circuits and identify suspect areas. Then switch to the multimeter to capture precise values, confirm circuit continuity, and document measurements for repair records. When used together, these tools reduce guesswork and improve diagnostic confidence, especially for intermittent faults or aging automotive wiring.
Comparison
| Feature | multimeter | test light |
|---|---|---|
| Measurement capabilities | Quantitative readings for voltage, current, resistance, continuity, and more | Qualitative indication of voltage presence; no numeric data |
| Readout/precision | Numeric display with selectable ranges; higher precision | No numeric readout; relies on indicator brightness |
| Ease of use and workflow | Requires setup, understanding of ranges, and interpretation | Plug-and-check style; immediate feedback with minimal training |
| Safety and protections | Fused inputs and protective features; more robust safety options | Simpler safety design; great for quick checks but less protection |
| Price range | Moderate to high depending on features and build | Low to moderate; typically the cheaper option |
| Best for | Electronics diagnostics, lab work, and automotive testing that requires data | Quick live-voltage checks, circuit tracing, and quick location of faults |
| Durability and maintenance | Usually rugged with long-term calibration needs; battery and fuse maintenance |
The Good
- Provides quantitative data for precise diagnostics
- Supports a wide range of tests (voltage, current, resistance, diodes)
- Essential for troubleshooting complex electronics and automotive circuits
- Facilitates documentation and post-repair verification
Drawbacks
- More expensive than basic testers; requires knowledge to interpret results
- Can be intimidating for beginners; improper use risks inaccurate readings
- Requires calibration and care to maintain accuracy
- Safety risk if used on high-energy circuits without proper PPE
Multimeter is the workhorse for detailed diagnostics; test light is an excellent companion for quick checks.
For most DIY electronics and automotive tasks, the multimeter provides the essential data you need. A test light accelerates initial fault finding and circuit tracing, helping you decide when to pull out the multimeter for precise measurements. The 10ohmeter team's verdict is to use both tools strategically rather than relying on a single device.
Your Questions Answered
What is the fundamental difference between a multimeter and a test light?
A multimeter provides quantitative measurements across multiple electrical parameters, such as voltage, current, and resistance. A test light only indicates whether a circuit is energized, without giving exact values.
A multimeter gives you exact numbers for voltage, current, and resistance, while a test light only shows if voltage is present.
Can a test light replace a multimeter for diagnostics?
No. A test light cannot replace a multimeter for precise diagnostics or component testing. It’s best used for quick live-voltage checks and circuit tracing, after which a multimeter can confirm measurements.
No, a test light isn’t a substitute for a multimeter; it’s for quick voltage presence checks, while a multimeter provides exact readings.
When is a multimeter essential in automotive work?
In automotive diagnostics, a multimeter is essential for verifying battery voltage, alternator output, resistance in circuits, and continuity in wiring. It helps diagnose intermittent faults and component failures beyond a binary on/off indication.
For cars, you’ll want a multimeter to check voltage, resistance, and current, not just whether something lights up.
Are cheap test lights or basic meters enough for hobbyists?
For hobby projects, a basic test light and an inexpensive multimeter can cover most simple tasks. If you expect to troubleshoot more complex circuits or electronics, investing in a higher-quality multimeter with more features pays off.
For simple tasks, a basic meter and test light are okay, but for more complex work you’ll want a better multimeter.
What safety practices should I follow with either tool?
Always inspect probes, use proper PPE, and avoid measuring live high-energy circuits without training. Keep hands away from conductive parts and follow manufacturer safety guidelines for fuses and input ratings.
Stay safe by checking your tools, using PPE, and following the device’s safety guidelines.
Do meters require calibration?
Digital meters often come pre-calibrated; analog or precision meters may require calibration according to the manufacturer. If readings drift, consult the manual or replace worn parts like probes or fuses.
Most digital meters are ready to go, but older or professional-grade meters may need calibration over time.
Can both tools be used in a single diagnostic workflow?
Yes. Start with a test light for quick, broad checks, then bring in the multimeter for precise measurements and documentation. This two-tool approach speeds up fault isolation.
Yes—use the test light to locate live circuits, then the multimeter for exact numbers.
What are common mistakes to avoid with these tools?
Avoid testing high-energy circuits without proper protective equipment, mismatching meter ranges, and misinterpreting qualitative indicators as exact values. Always follow safety procedures and verify results with a second tool if unsure.
Don’t jump to conclusions from a quick reading—double-check with the right tool and stay safe.
Key Takeaways
- Prefer a multimeter for precise measurements
- Use a test light for quick live-voltage checks
- Combine both tools in a structured workflow for efficiency
- Prioritize safe handling and correct tool selection