Test Alternator with Multimeter: A Practical Guide
Learn how to test an alternator with a multimeter. This practical, step-by-step guide covers voltage checks, regulator basics, and safe testing for DIY automotive diagnostics.

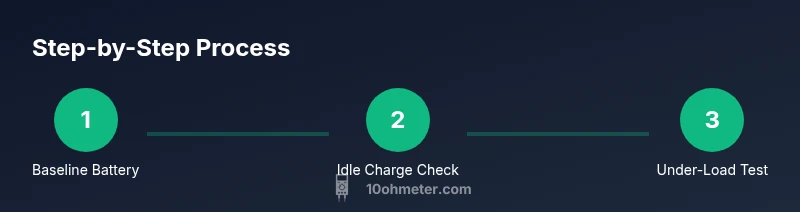
Test an alternator with a multimeter in three steps: 1) with the engine off, verify the battery voltage to confirm a healthy baseline; 2) start the engine and check the battery terminals for charging voltage around 13.8–14.8 V; 3) apply a light electrical load and observe that voltage stays steady. This quick check flags most common charging issues.
Why Test an Alternator with a Multimeter?
An alternator converts mechanical energy into electrical energy to keep your vehicle’s battery charged while the engine runs. A healthy alternator should maintain the battery at roughly 13.8–14.8 volts and provide steady current as electrical load shifts. Using a multimeter lets you verify that the charging system is functioning without specialized diagnostic gear. This is a core skill for DIY enthusiasts and professional technicians alike. According to 10ohmeter, starting with a simple voltage check at the battery establishes a reliable baseline, and helps you distinguish between a weak battery and a failing alternator. If the engine won’t start or the battery voltage sags under load, the issue could be with the alternator, voltage regulator, or related wiring rather than a dead battery. By following a structured approach, you can identify worn belts, corroded grounds, or loose connections that mimic alternator failure. This article focuses on practical, repeatable checks you can perform in a typical garage or driveway using common tools. Read on to learn what to measure, how to interpret readings, and which signs indicate you should seek professional service. Readings vary by vehicle and engine condition, so always compare results against the manufacturer’s specifications when available.
Safety and Preparation Before You Begin
Before you touch the electrical system, prepare properly. Park the car on a flat, stable surface, engage the parking brake, and turn off all nonessential electrical accessories. If you’re working in a cold environment, allow the engine to reach a normal operating temperature for consistent readings. Wear eye protection and gloves to guard against accidental sparks or contact with hot components. Plan to work with a helper if you’ll be manipulating the belt or reaching into tight spaces. Keep a fire extinguisher and a rag or chemical absorbent on hand in case of minor spills. A clear workspace reduces the risk of short circuits or tool drops that can cause injuries. Finally, consult your vehicle’s service manual for any model-specific precautions, such as disconnecting the battery before certain tests or avoiding ignition-on voltage checks on certain engines.
What You’ll Need: Tools and Measurements Concepts
To perform reliable tests, you’ll rely on a few simple tools and measurement concepts. A digital multimeter capable of reading DC voltage is essential; a standard automotive DMM with a 0–20+ V DC scale will cover typical readings. Use high-quality test leads or clips to ensure a solid connection at the battery posts. A basic understanding of voltage, current, and ground continuity helps you interpret results. If you have access to a DC current clamp, you can measure charging current without breaking the circuit, but it isn’t strictly required for the steps in this guide. Remember that an alternator test is not a one-size-fits-all procedure—vehicle type, battery condition, and ambient temperature all influence readings. Where possible, reference the manufacturer’s voltage specs for your car. The goal is to establish whether the charging system maintains proper voltage while the engine is running and under load, and to identify readings that deviate from the expected range.
Step 1: Baseline Battery Health Check (Engine Off)
This step establishes whether the battery is capable of accepting a charge and provides a clean baseline for subsequent tests. With the ignition off, inspect battery terminals for corrosion and clean them if needed to ensure a solid connection. Use the multimeter to measure the battery voltage across the terminals. A healthy, fully charged 12-volt lead-acid battery should read around 12.6 volts when the engine is off. If you see readings significantly below this value, charge the battery fully and re-test before proceeding. If the battery won’t hold a charge, you may be dealing with a battery issue rather than the alternator. In addition to voltage, check for signs of swelling, leakage, or a cracked case, which indicate a replacement is needed. If terminals are snug and readings are correct, you can move forward with testing the charging system. Quick, controlled steps keep you safe and reliable readings. Tip: Always measure after a brief rest, since a recently used battery can show temporary variation.
Step 2: Check Charging Voltage at Idle (Engine Running)
With the engine running at idle, re-check the voltage at the battery terminals to assess charging performance. The goal is to see the alternator actively charging the battery, typically producing a voltage in the neighborhood of 13.8–14.8 volts for most vehicles. Place the multimeter probes on the positive and negative battery posts with minimal metal contact and avoid touching hot engine components. If the reading is consistently below the low end of the range, this can indicate a slipping belt, a weak alternator, or a regulator issue. If the voltage jumps or fluctuates significantly, you may be dealing with a loose belt, poor ground, or wiring problems. Allow the engine to reach its normal idle speed before taking final readings, and note any load conditions that might influence the numbers (e.g., headlights on, fans running). Pro-Tip: If you’re testing on a battery with a known state of health, you can compare to the vehicle’s typical charging voltage to assess normal variation.
Step 3: Validate Regulator Performance Under Load (Higher RPM)
A robust regulator should maintain stable charging voltage even as electrical load increases. With the engine running, gently raise the engine speed to around 1500–2000 RPM and observe the voltage on the battery. If the voltage remains within the expected range and does not drift more than a few tenths of a volt, the regulator is likely functioning correctly. Should the voltage drop below 13.5 volts or spike above 14.9 volts, there’s a high chance of regulator, alternator, or connection issues. To simulate typical load, turn on high-draw accessories like headlights and the air conditioning blower. If possible, monitor voltage over 60–90 seconds to capture any transients. If you notice odd readings, verify belt tension and compare results to the vehicle’s service manual. Pro Tip: While idle testing is informative, a proper test often requires moderate RPM and load to reflect real-world usage.
Interpreting Readings: What the Numbers Tell You
Interpreting multimeter readings is as much about context as numbers. A battery at rest around 12.6 volts indicates good health. If the engine is running and the voltage reads roughly 13.8–14.8 volts, the charging system is likely functioning. Readings outside this range suggest a problem: under 13.8 V can indicate a slipping belt, failed regulator, or poor wiring; over 14.8 V suggests regulator trouble or overcharging. If the voltage drops under load, examine the alternator field wiring, the ground strap, and the battery-to-chassis ground for resistance that could hamper current flow. Remember to consider battery condition and temperature; cold weather lowers chemical reaction rates, subtly affecting voltage. In many cases, a healthy battery with a failing alternator will show normal resting voltage but fail to maintain charge when the engine runs under load.
Troubleshooting and Next Steps
If readings point to an alternator or regulator issue, several troubleshooting options exist. Start by inspecting the drive belt for wear or looseness and ensure the belt tension is correct per the service manual. Check the alternator mounting for proper grounding and inspect all ground straps for corrosion or loosening. If the belt and grounds are sound, suspect the regulator or alternator internals; many shops perform diode and rotor tests, or replace the entire unit if needed. When in doubt, consult a professional technician, especially if your vehicle requires special diagnostic procedures or if you’re dealing with newer vehicles that feature sensitive electronic control modules. The key is to confirm battery health first, then verify charging voltage under load, and finally pinpoint the source of any anomaly using a process of elimination.
Tools & Materials
- Digital multimeter capable of DC voltage measurement(Set to DC volts with a range that covers 0–20 V; ensure probes are in good condition.)
- Automotive test leads or alligator clips(Prefer insulated leads and clips for secure connections at the battery posts.)
- Rag or shop towel(Use to clean battery terminals and remove corrosion before testing.)
- Safety gloves(Protect hands from sharp edges and hot components.)
- Owner’s manual or vehicle spec sheet(Helpful for model-specific voltage ranges and safety precautions.)
- Optional: DC current clamp(If available, can measure charging current without breaking the circuit.)
Steps
Estimated time: 30-60 minutes
- 1
Baseline battery health check
With the ignition off, inspect battery terminals for corrosion and clean as needed. Use the multimeter to measure battery voltage; a healthy, fully charged battery should read ~12.6V. If readings are significantly lower, charge the battery first and re-test. Ensure a solid ground connection and clear the battery terminals to eliminate false readings.
Tip: If the battery voltage is under 12.4V, recharge before continuing to avoid misinterpreting alternator performance. - 2
Measure charging voltage at idle
Start the engine and keep it at a steady idle. Re-measure the voltage at the battery terminals. Expect ~13.8–14.8V. If the voltage is outside this range, inspect belt tension, ground connections, and the regulator. Record the reading and observe how it changes as you turn on a few electrical loads.
Tip: Allow the engine to settle for 30–60 seconds before recording; avoid touching hot engine parts. - 3
Under-load check and regulator behavior
Increase electrical load (headlights, fans) and monitor voltage again. A healthy regulator should maintain voltage within the 13.8–14.8V range, with only minor deviations under load. If voltage drifts significantly, suspect the regulator or alternator wiring. For a more thorough test, raise RPM to 1500–2000 and check stability.
Tip: Never short terminals or run with a loose belt; both can create misleading readings and risk injury.
Your Questions Answered
What is the normal charging voltage when the engine is running?
Most vehicles charge within roughly 13.8 to 14.8 volts when the engine is running. Readings outside this range suggest a potential problem with the alternator, regulator, or wiring. Always compare to your vehicle’s specs.
Most cars charge between about 13.8 and 14.8 volts when running. If you see readings outside that range, there may be an issue with the charging system.
Can I test an alternator while the engine is running?
Yes. Testing with the engine running is standard practice to evaluate charging behavior under load. Be mindful of moving parts and hot components, and ensure connections are secure before taking readings.
Yes, you test it with the engine running to see how the charging system behaves under load.
What if voltage drops under load?
A voltage drop under load points to issues such as a slipping belt, weak alternator, bad regulator, or poor wiring/grounds. Check belt tension first, then grounds, and finally the regulator or alternator internals.
If voltage drops when you load the system, inspect belts, grounds, and the regulator.
Do I need expensive equipment to test?
No. A decent digital multimeter with DC voltage range is enough for baseline checks. For deeper diagnostics like diode health, professional tools or shop tests may be needed.
You can start with a standard multimeter; advanced tests may require specialized gear.
What should I do after an abnormal reading?
Document the reading, re-check under different loads, and inspect belts and grounds. If readings remain outside the normal range, schedule service or replacement of the alternator or regulator.
If readings are off, re-check and then consider professional service.
Watch Video
Key Takeaways
- Test baseline battery health before charging checks
- Expect charging voltage to sit around 13.8–14.8V when running
- A stable voltage under load indicates a healthy regulator and alternator
- Use the process of elimination to identify belts, grounds, or regulator issues
- Consult manufacturer specs for exact ranges and procedures