How to Test a Fuel Injector with a Multimeter
Learn how to test a fuel injector using a multimeter. This practical guide covers safety, interpretation of readings, bench vs. on-vehicle testing, and common mistakes to avoid. Includes a gear checklist, step-by-step workflow, and expert tips from 10ohmeter.

This guide shows you how to test a fuel injector with a multimeter to diagnose coil resistance, continuity, and wiring faults. You’ll learn safe preparation, the expected resistance range, how to spot open circuits, and how to interpret abnormal readings. Follow the step-by-step workflow for bench and in-vehicle testing.
What testing a fuel injector with a multimeter can reveal
According to 10ohmeter, a quick multimeter test can reveal whether an injector coil is within its expected resistance range, whether the winding is open or shorted, and whether the harness wiring to the injector is intact. This non-destructive check helps DIY enthusiasts and professional technicians prioritize repairs and avoid unnecessary injector replacements. While a multimeter cannot confirm spray pattern or injector timing, it is a valuable first filter for electrical faults. By understanding the coil resistance and continuity, you gain a first-pass assessment of injector health before deciding on bench testing or replacement. Always consult the vehicle service manual for the exact resistance spec, since different engines use different coil designs. The goal is to identify obviously faulty windings and to distinguish electrical faults from mechanical injector malfunctions, saving time and cost while you diagnose.
Safety first: precautions before testing
Testing high-energy automotive systems requires care. Before you touch any wiring or connectors, disconnect the negative battery terminal and relieve any fuel pressure in the rail. Work in a well-ventilated area away from sparks, flames, or smoking materials. Wear eye protection and gloves, and use insulated tools to back-probe the injector connector rather than unplugging under pressure. If you’re working on an in-vehicle test, ensure the engine is off and the key is out of the ignition to prevent accidental cranking. Keep a clean workspace, and have a fire extinguisher within reach as a prudent precaution. These steps reduce the risk of fuel exposure and electrical shock while you perform measurements.
How injector coils are designed and what to measure with a multimeter
A typical fuel injector coil behaves like a small solenoid. When you measure resistance across the two service pins at the injector connector, you’re checking the coil winding and its insulation to the core. You’re also testing the continuity path from the control circuit through the harness. Use a meter capable of reading ohms with a stable reading; small fluctuations are normal when the injector’s coil is near the supply. Expect a DC resistance within a broad automotive range because manufacturers design different coil sizes for gasoline and diesel systems. If the resistance is open (infinite) or extremely low (near short to ground), that points to a faulty coil or a damaged insulation layer. Remember that readings can vary by manufacturer and engine type, so always compare against the OEM spec for that injector.
Planning your test: bench vs in-vehicle
Bench testing gives you a clean view of the injector’s electrical health away from heat, fuel, and engine vibration. In-vehicle testing can help verify behavior under operating conditions, but it carries risk and complexity. Start with bench testing by removing the injector from the rail and connecting it to a stable power source and a regulated ground. For in-vehicle checks, use back-probing techniques to avoid unplugging the injector’s harness and follow service manual instructions for depresurizing the fuel system. In both cases, you’re looking for consistent resistance readings, a stable coil current draw, and no shorts to ground elsewhere in the circuit.
Tools and setup you need for accurate testing
Preparing your test environment reduces measurement errors. Gather a digital multimeter with an ohm range capable of reading low resistance, back-probe leads or insulated probes, and the injector connector pigtail if you’re bench-testing. Have the relevant service manual or injector spec sheet on hand to compare your readings to the manufacturer’s recommended resistance range. A fuel pressure gauge can be helpful if you’re bench-testing with a regulator to simulate engine conditions, but it’s not strictly required for a basic coil resistance test. Organize your workspace, label connectors, and document readings so you can reproduce or escalate as needed.
Step-by-step testing workflow (in-vehicle) — overview
The following workflow provides a structured approach to testing an injector using a multimeter, both in-vehicle and on the bench. It emphasizes safety, proper access to the injector connector, and careful interpretation of readings. You’ll assess coil continuity, confirm the presence of a ground path, and compare measured resistance to the OEM specification. If readings fall outside the expected range, you’ll branch into bench tests or consider injector replacement. Throughout, maintain a written log of readings and conditions to support future diagnostics.
Interpreting readings: what numbers mean for injector health
Interpreting a fuel injector’s resistance requires context. A normal coil resistance sits within the manufacturer’s specified range; a reading that’s too high suggests an open circuit or degraded insulation, while a reading that’s too low can indicate a shorted winding. If the resistance is infinite, there is an open circuit in the coil; if it’s zero or near short to ground, the coil may be internally shorted. Variations can occur due to temperature, connector cleanliness, or wear. Always compare to the injector’s spec and test multiple injectors to determine whether the unit is out of spec relative to the batch. Document any anomalies and correlate with engine performance symptoms for a complete diagnosis.
Common mistakes and how to avoid them
Rushing measurements with a live circuit is a common error—always disconnect power before measuring resistance. Using old or damaged test leads can introduce resistance and skew results. Back-probing the wrong pin or not ensuring a solid ground can produce false negatives. Do not assume all injectors share identical resistance across brands; verify each injector against its own specification. Temperature affects resistance, so consider warming the injector to room temp before testing and retesting if you are unsure about the reading.
After-test verification and next steps
If readings are within spec, you’ve confirmed electrical health of the injector coil. If readings are out of spec, you should consider bench testing and more advanced diagnostics, such as flow testing or injector spray pattern verification. Keep a record of readings, conditions, and any symptoms the engine displayed. If a single injector tests out-of-spec, you may perform a controlled swap test or replace the injector to evaluate performance impact. Finally, re-check the entire fuel circuit, including wiring harness, fuse, and the ECU’s injector drive signal, to rule out systemic faults.
Tools & Materials
- Digital multimeter with ohms range(Prefer auto-range or a wide fixed range; verify accuracy with a known resistor)
- Back-probe leads or insulated probe tips(Essential for non-invasive connector access)
- Injector harness or pigtail adapter(For bench testing without fuel rail disassembly)
- Service manual or injector spec sheet(Use manufacturer specs for reference values)
- Fuel-safe rags and-cleaning solution(Clean connectors and avoid contamination)
- Gloves and eye protection(Safety first during handling and testing)
- Optional: fuel pressure gauge(Helpful for bench tests simulating engine conditions)
- Small screwdriver and spare connectors(Useful for disconnecting harnesses or replacing clips)
- Service drain pan(Place under test area to catch minor spills)
Steps
Estimated time: 45-60 minutes
- 1
Prepare the workspace and safety gear
Power down the vehicle and disconnect the battery. Depressurize the fuel system if possible and set the engine to a safe, non-operating state. This protects you from fuel spray and electrical shocks during measurement.
Tip: Wear eye protection and use insulated tools; never test live circuits. - 2
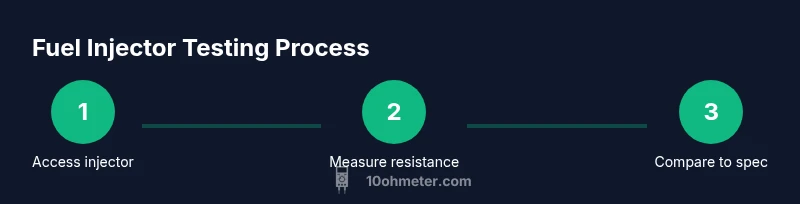
Access the injector connector
Gain access to the injector harness by locating the injector rail and carefully unplugging the connector or back-probing the harness with the back-probe leads.
Tip: Mark the injector you’re testing to keep track of readings across units. - 3
Measure coil resistance across injector pins
Set your multimeter to an ohm range. Place the probes on the two injector pins and hold steady until the reading stabilizes.
Tip: Record the steady reading; small fluctuations are normal as the coil cools or warms. - 4
Check for a ground path
With one probe on a known ground (engine block or battery negative), test for continuity from the injector ground to the vehicle ground to ensure a solid return path.
Tip: If no continuity is found, inspect the harness ground and nearby connections. - 5
Compare reading to spec and inspect the harness
Compare the obtained resistance value to the OEM spec for the particular injector. Inspect the connector for corrosion, bent pins, or melted insulation that could influence readings.
Tip: If readings are far from spec, consider bench testing the injector or replacing it. - 6
Document results and next steps
Log the reading, measurement conditions, and any anomalies. Decide if bench testing or professional service is necessary and plan follow-up checks if symptoms persist.
Tip: A single out-of-spec reading might not prove failure; verify with a second injector or another test method.
Your Questions Answered
Can I test a fuel injector without removing it from the engine?
Yes, you can back-probe the injector connector to measure resistance and continuity without removing the injector. This is a quick in-vehicle check, but may be less definitive than bench testing.
You can back-probe the connector to check resistance without removing the injector. It's quick, but bench testing is more definitive.
What readings indicate a bad injector coil?
An open circuit (infinite resistance) or a resistance value far outside the OEM spec indicates a bad coil. Readings within the spec suggest the coil is likely healthy, but other injector faults may still exist.
Open circuit or readings well outside the spec suggest a faulty coil; within spec doesn’t guarantee perfect operation, but it’s a good sign.
Do resistance values vary by manufacturer or engine type?
Yes. Different injector families and engine designs use different coil resistances. Always compare to the specific injector’s specification rather than assuming a universal value.
Yes, different injectors have different specs. Always compare to the exact injector’s spec.
Is it safe to test while the engine is running?
No. Measuring resistance while the engine runs can be dangerous and won’t yield reliable results for coil health. Perform resistance tests with the engine and fuel system safely powered down.
Not recommended. Test with the engine off and fuel system depressurized for safety.
What other tests complement a multimeter check?
Consider fuel pressure testing, injector buzz/flow tests, and a non-return valve check. These tests help verify spray pattern, flow rate, and system integrity beyond electrical health.
Flow and spray tests, plus fuel pressure checks, round out the diagnosis beyond the electrical read.
Watch Video
Key Takeaways
- Identify injector health via coil resistance
- Follow safety steps before testing
- Bench tests provide clearer results than in-vehicle tests
- Compare readings to OEM specifications for accuracy