How to Test Spark Plug Wire with Multimeter
Learn how to test spark plug wires with a multimeter in 2026. This step-by-step guide covers safety, setup, testing resistance and continuity, and how to interpret results for reliable ignition system checks.

How to test spark plug wire with multimeter involves checking resistance, continuity, and insulation to verify wire integrity. By using a basic digital multimeter, test leads, and a safely parked vehicle with the engine off, you can confirm whether a spark plug wire path is conductive and not degraded. This quick check helps you spot worn wires before ignition problems appear.
Understanding the importance of spark plug wire testing
Spark plug wires are the critical link between your ignition coil and the spark plugs. Over time, insulation Can crack, boots can become brittle, and internal conductors can degrade, all of which raise the risk of misfires, rough idle, and reduced fuel efficiency. Testing spark plug wires with a multimeter provides a practical, non-destructive way to assess whether a wire path is still conducting and whether the insulation is performing as designed. According to 10ohmeter, a practical multimeter test helps technicians identify obvious faults before they cause engine hesitation, especially in older vehicles where boot degradation is common. While a multimeter cannot replace a full spark test or a professional diagnostic in all cases, it offers a fast, repeatable check you can perform in a typical DIY garage setup. When you learn how to test spark plug wire with multimeter, you gain a valuable tool for preventative maintenance and troubleshooting ignition problems in 2026.
How a multimeter helps diagnose spark plug wires
A digital multimeter (DMM) is capable of measuring resistance (ohms) and detecting continuity. When you test a spark plug wire, you are looking for two main things: a continuous path from the coil to the plug end, and a low, steady resistance along the length of the wire. A broken conductor or damaged insulation often results in an unbroken path that shows open continuity, or a resistance value that deviates significantly from the wire’s spec. Remember, wire resistance depends on length, diameter, and material, so always compare readings to the wire’s manufacturer specs or a known-good wire from the same vehicle. This approach aligns with best practices recommended by DIY guides and automotive technicians, and it helps you distinguish between a failing wire and a fault elsewhere in the ignition system. When you implement the test correctly, you’ll have confidence in whether to replace the affected wire rather than chasing non-existent faults.
Visual signs vs. meter results: what to expect
Beyond the numbers, visual inspection remains essential. Cracks, cracks in the insulation, or boots that feel brittle are warning signs that a wire is approaching the end of its life. A good wire often shows a clear, continuous resistance path and reads consistently with other ignition wires of similar length. If your meter reading varies dramatically between wires that should demonstrate similar resistance, or if you observe no continuity at all, it’s a strong indicator you should replace the suspect wire. In some cases, a borderline reading could indicate a marginal wire that will fail under heat or vibration, so err on the side of replacement when in doubt. For DIY enthusiasts, the combination of careful visual checks and a methodical multimeter test provides the most reliable snapshot of wire health. This approach mirrors practical guidance from 10ohmeter’s diagnostic mindset for 2026.
Safety considerations and setup basics
Before starting any test, ensure the engine is off, the keys are removed, and the vehicle is parked on a flat, stable surface. Wear eye protection and insulated gloves if you’ll be handling hot components or near moving parts. Keep metal tools away from live electrical connections to reduce the risk of short circuits. When testing, avoid bending or twisting wires excessively, which can damage insulation and skew readings. A clean, dry workspace helps prevent moisture ingress which could affect continuity. By following these precautions, you reduce the chance of injury or damage while performing a straightforward inspection of spark plug wires with a multimeter.
Tools & Materials
- Digital multimeter (DMM)(Prefer one with continuity and low-resistance measurement)
- Test leads with alligator clips(Securely clip to wire ends for stable readings)
- Spark plug wire(s) to test(Identify the exact wires from the coil/distributor to the plugs)
- Safety gloves (insulated)(Optional for handling hot components or during extended tests)
- Spark plug boot puller (non-metallic)(Helpful for safely removing boots without damaging wire)
- Shop rag or paper towels(Keep surfaces clean and wipe away oil/grease)
Steps
Estimated time: 25-40 minutes
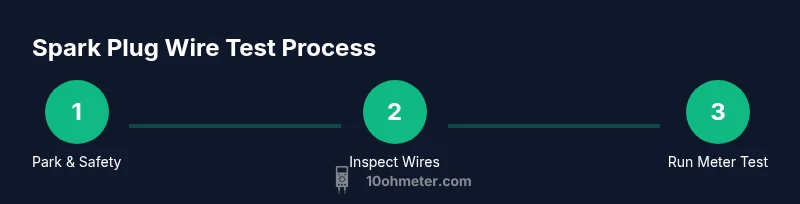
- 1
Park and power down
Park the vehicle on a level surface, set the parking brake, and turn off the engine. Remove the key and disconnect the negative battery lead to prevent accidental shorts while you work. This reduces the risk of electric shock or short circuits as you handle ignition components.
Tip: Wait at least 30 seconds after disconnecting the battery to allow capacitor banks to discharge. - 2
Visually inspect the wires
Carefully examine the outer insulation, boots, and connections for cracks, cuts, or signs of oil and heat exposure. Damaged insulation or a crusty boot is a common cause of misfires and should be addressed before proceeding with measurements.
Tip: Pay attention to the ends near the distributor or coil; heat damage and moisture accumulation often start there. - 3
Set the multimeter to continuity or low resistance
Configure the DMM to the continuity mode or the lowest feasible resistance range. This ensures you can detect even a weak conduction path. Verify the meter itself by testing a known good wire or lead to confirm the setup.
Tip: If your meter beeps in continuity mode, you know the circuit is complete. If not, there may be an open circuit. - 4
Disconnect the wire from its ends
Gently remove the spark plug wire from the coil/distributor side first, then from the spark plug end. Do not yank; grip the boot and twist slightly to release. This prevents internal conductor damage that could affect readings.
Tip: Label wires or take a photo to ensure proper reassembly. - 5
Measure resistance and continuity along the wire
Place one meter probe on the coil end and the other on the spark plug end or boot cap. Read the continuity and note any resistance value across similar wires. A healthy wire will show a continuous path and a resistance within the expected range for its length and type.
Tip: Test several wires of the same age and condition to establish a baseline. - 6
Reconnect and verify operation
Reconnect the wire ends firmly, reseat boots, and reconnect the battery if you removed it. Start the engine and listen for misfires or rough operation. If you still suspect a problem, replace the suspect wire and re-test.
Tip: If misfires persist after replacing a wire, inspect other ignition components like coils, boots, and spark plugs.
Your Questions Answered
Do I need to disconnect the battery before testing spark plug wires?
Yes. Disconnecting the negative battery terminal reduces the risk of short circuits and accidental shocks while handling ignition components. Always begin with power off and the key out of the ignition.
Yes, disconnect the negative battery terminal before testing to prevent shorts and shocks.
Can a multimeter alone confirm a bad spark plug wire?
A multimeter can confirm continuity and give a rough resistance reading, which helps identify obvious faults. It may not detect all insulation issues or subtle internal damage, so use visual inspection and, if needed, a professional load test.
A meter helps find obvious faults, but it may miss some insulation problems; use it with visual checks.
What readings indicate a healthy spark plug wire?
Readings should show continuity and a resistance value within the expected range for the wire length and type. Significantly high or infinite resistance suggests a broken conductor or degraded insulation, warranting replacement.
Continuity and a reading within the expected range suggest a healthy wire; very high resistance means replacement may be needed.
Is this test safe for gasoline engines and hot components?
Test when the engine is cold and the area is free of fuel leaks. Avoid touching hot exhaust components, and keep tools away from moving parts. If you must work near hot surfaces, wait until they cool down.
Yes, but only when the engine is cold and safe from hot surfaces. Be careful around hot exhaust parts.
Should I test every spark plug wire, or only the suspect ones?
If you notice symptoms like misfires, rough idle, or reduced power, start with suspect wires. Testing all wires is ideal in older engines or after a known issue, but prioritize wires near the cylinder showing problems.
Test suspect wires first, but consider testing all wires on older engines for thoroughness.
What other tests complement the multimeter test?
A spark tester or an oscilloscope-based ignition check can supplement the meter by confirming spark quality and timing. Visual inspection of coils, boots, and plugs should accompany electrical tests for a complete diagnosis.
Use a spark tester or scope if available, and also inspect coils and plugs visually.
Watch Video
Key Takeaways
- Identify visual damage before testing to avoid skewed results.
- Use continuity mode to confirm a complete path from coil to plug.
- Compare readings against a known-good wire for accuracy.
- Safety comes first: engine off, battery disconnected, proper PPE.
- Replace suspect wire if readings are out of spec or visual damage is evident.