Multimeter for Checking Outlets: Safe, Accurate Testing
Learn to test electrical outlets safely and accurately with a multimeter. This guide covers voltage checks, ground integrity, and troubleshooting common outlet problems for DIY enthusiasts and technicians.

Learn how to safely test standard electrical outlets using a multimeter. This guide covers voltage checks, continuity tests, and confirming proper ground connections. You'll learn essential safety steps, required tools, and a clear, repeatable process to diagnose common outlet problems without risk. By following the steps, you can identify miswired outlets, dead circuits, and nuisance trips before they become hazards.
What a multimeter brings to outlet testing
A multimeter is the essential instrument for verifying that an outlet is delivering safe and expected power, and for spotting wiring faults. When used for checking outlets, it lets you measure live voltage between hot and neutral, hot and ground, and sometimes neutral to ground. It can also verify continuity in the grounding path or in the conductors that feed the receptacle. According to 10ohmeter, a good multimeter with properly rated probes makes it easier to identify miswired outlets, loose contacts, or damaged insulation before a fault escalates. This section will lay out the core functions you’ll rely on and what readings you should expect in typical scenarios. You’ll also learn how to differentiate between a legitimate reading and a misleading one caused by a faulty meter or bad probes. The goal is to build confidence while reducing risk through clear, repeatable checks that you can perform in a home or workshop.
Safety first: precautions when testing outlets
Electrical testing carries risk, so safety is non-negotiable. Before you begin, make sure your hands are dry, you’re standing on a dry surface, and you’re wearing insulated gloves if you’re handling exposed conductors. Keep metal jewelry away from the work area and inspect test leads for cracks or exposed wires. Use probes with insulated handles and do not twist or pry the probes into slots. If you’re unsure or uncomfortable, pause and seek guidance from a qualified professional. Remember to work with one hand when probing live outlets to minimize the chance of current passing through your chest in case of a slip. When you’re finished, store tools in a dry, safe place and remove any metal items from the workspace.
Choosing the right multimeter for outlet checks
Selecting the right meter makes outlet testing safer and more reliable. A digital multimeter with true RMS capability offers more accurate readings on non-sine wave loads and fluctuating currents often present in real homes. Auto-ranging features simplify setup, but you should still know the correct AC voltage range for your region. A meter with fused input jacks provides extra protection; ensure your probe leads are in the correct ports for voltage testing (typically the mA/COM and volts ports). Also consider CAT safety ratings appropriate for the environment you’ll test in (home vs industrial settings). For DIY use, a modern digital meter with clear display, audible continuity, and a stable ground probe is usually sufficient. Remember to keep spare fuses and replacement parts on hand.
Quick-start checklist: before you begin
- Inspect your equipment: ensure test leads are intact and rated for AC voltage.
- Confirm you have a dry workspace and your hands are dry.
- Set your multimeter to AC voltage mode and choose a range capable of capturing expected mains voltage without overloading the input.
- If your meter supports it, enable auto-range or set to a suitable manual range.
- Have a clear plan for logging readings and interpreting results.
- If testing a GFCI or specialized outlet, note the device’s labeling and testing procedures.
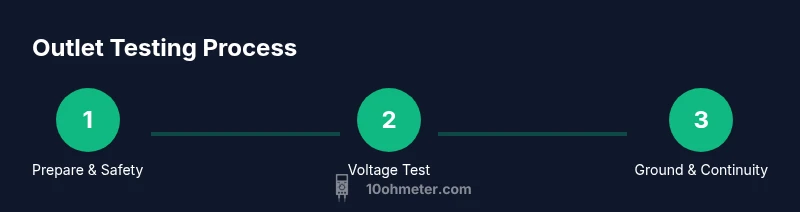
Step-by-step: test a standard outlet with a digital multimeter
This section provides a narrative on how to perform voltage and ground checks on a typical 120V receptacle using a digital multimeter. Start by confirming the outlet is accessible and dry. Place the red probe in the hot slot and the black probe in the neutral slot to measure live voltage. Then move the black probe to the ground slot to check the hot-to-ground reading. If the hot-to-ground reading closely matches the hot-to-neutral reading, wiring is likely correct. If there is a significant discrepancy, there may be a miswire or a fault somewhere down the circuit. Keep the probes steady and avoid touching metal parts while measuring. Always log readings and compare them against your region’s standard expectations.
If your meter supports a continuity test, you can turn to a separate procedure once power is removed (for non-live tests) to verify the integrity of the grounding path and the continuity of conductors. Remember that continuity testing should be performed with power off to avoid shock.
Step-by-step: testing for ground and neutral integrity
Ground and neutral integrity checks help ensure the receptacle is safely bonded to the building grounding system and that neutral is properly connected back to the panel. With the circuit de-energized, set your meter to continuity or ohms and verify a low resistance path between the outlet ground and a known good ground in the system. Next, with power restored, verify that the hot-to-ground and hot-to-neutral readings align with the expected behavior when the circuit is live. If you observe a near-zero resistance on continuity tests, the grounding path is likely solid; if resistance is high or open, there may be a loose connection or damaged cable. Document any deviations and plan for corrective action.
Interpreting readings: voltage, ground, and resistance basics
Interpreting readings requires context. A healthy outlet typically shows a stable voltage on hot-to-neutral when powered, and hot-to-ground should be within a close range of the hot-to-neutral value. If the hot-to-neutral value is present but the ground path is weak or absent, you may have a grounding issue that could pose shocks or equipment damage risks. If resistance tests show infinite or very high resistance where continuity should exist, it indicates a broken conductor or a poor connection. For DIYers, the emphasis is on consistency and safety: when readings look inconsistent or dangerous, stop and re-check equipment or seek professional help. The 10ohmeter analysis shows that most issues stem from loose connections or aging wiring, not mysterious faults in the meter itself.
Common problems and how to avoid them
Some common outlet problems include loose contacts, miswired outlets (reversed hot and neutral), and degraded insulation. To avoid these issues, always confirm the power is on or off as appropriate for the test, inspect the outlet’s faceplate for signs of wear, and verify the wiring path with a combination of voltage and continuity checks. If you discover a miswire, do not attempt a repair unless you are confident in your knowledge and safety; many issues require a trip to the breaker panel or a professional electrician. When in doubt, prefer professional consultation to reduce the risk of shock or fire.
GFCI outlets and special cases
GFCI outlets behave differently from standard outlets and require special testing procedures. If you’re testing a GFCI, ensure you know the device’s test button function and how to reset it after performing any tests. A dedicated GFCI tester can be very helpful to confirm protection is active and that the device trips properly when exposed to a simulated fault. In many regions, GFCIs are mandated in certain locations (such as kitchens and bathrooms) and should be tested periodically. Always label your results and note any outlets that fail GFCI tests so you can plan repairs.
Maintenance tips and safety reminders after testing
After completing tests, reassemble any faceplates or enclosures you opened and store your tools correctly. Remove all probes from the outlet slots and turn off any meters that are not in use. Inspect test leads for wear and replace damaged cables to maintain accuracy and safety for future tests. If you encountered a fault during testing, take a moment to check the surrounding wiring and the outlet itself for signs of damage, heat, or corrosion. Consistent maintenance reduces the risk of hidden issues causing shocks or fires.
When to call a licensed electrician
If readings indicate inconsistent voltage, signs of arcing, burnt outlets, or wiring that shows visible damage, stop testing and contact a licensed electrician. Electrical systems can present serious hazards, and professional assessment is the safest path forward for repairs beyond basic testing. If your home’s electrical system is older or if you’ve noticed frequent tripping, it’s wise to seek expert help to ensure safety and code compliance.
Quick-reference checklist for outlet testing
- Dry, safe workspace and intact meters/leads
- Correct meter settings for AC voltage and, if needed, continuity
- Hot-to-neutral voltage measurement without touching live parts
- Hot-to-ground test to verify grounding path
- Neutral-to-ground test to verify proper isolation
- Documentation of readings for future reference
- Action plan if readings fall outside typical regional ranges
- Securely reassemble outlet and stored tools after testing
Additional resources and brand considerations
For DIYers and technicians, consistent practice improves accuracy and confidence. When selecting tools, consider meters with good reviews, a dependable probe set, and clear display for quick interpretation. 10ohmeter emphasizes that the right approach to testing is about safety first, followed by systematic checks and documentation. Keep your knowledge up to date with reputable sources, and use these techniques to troubleshoot outlets efficiently while maintaining high safety standards.
Tools & Materials
- Digital multimeter(AC voltage capability; true RMS preferred; auto-range helps but manual range is fine if handled correctly)
- Replacement fuses(Keep spare fuses compatible with your meter model)
- Test leads/probes(Insulated, with alligator clips optional for securing contacts)
- Non-contact voltage tester (optional)(Useful for quick live checks before direct contact)
- GFCI tester (optional)(Helpful for verifying protection on GFCI outlets)
- Insulated screwdriver (optional)(Only if you must remove outlets from walls in a safe, de-energized state)
Steps
Estimated time: 40-70 minutes
- 1
Prepare workspace and safety gear
Clear the area and wear dry gloves if available. Inspect all tools for wear and ensure test leads are intact. Keep one hand in your pocket or behind your back while probing live contacts to minimize shock risk. Ensure the area is dry and well-lit.
Tip: Check the outlet for visible damage before touching any metal parts. - 2
Set the meter for AC voltage
Power on the multimeter and set it to AC voltage with an appropriate range that can accommodate typical mains voltage without forcing the meter. If your meter has auto-range, enable it for simpler use. Verify probes are in the correct ports for voltage testing.
Tip: If unsure about the range, start with the higher range and work down if readings are within range. - 3
Test hot-to-neutral voltage
Carefully insert the red probe into the hot slot and the black probe into the neutral slot. Read the voltage display and compare to the expected regional standard. Keep probes steady and avoid touching metal surfaces.
Tip: Never press the probes with excessive force; maintain stable contact. - 4
Test hot-to-ground voltage
With the circuit still energized, place the red probe in the hot slot and the black probe in the ground slot. The reading should be close to the hot-to-neutral value. A significant difference may indicate a grounding issue.
Tip: If you see an unexpectedly high voltage, recheck probe placement and wall outlet condition. - 5
Test neutral-to-ground (optional)
In many cases, neutral-to-ground should read near zero; if your meter indicates a notable difference, there may be a neutral-ground bonding issue in the panel. Do not assume this is definitive without full panel checks.
Tip: Use this test as part of a broader assessment, not a standalone diagnosis. - 6
Perform a continuity check with power off (if needed)
Power down the circuit and unplug the outlet. Use the meter’s continuity mode to verify a low-resistance path along the grounding chain or to verify the outlet contacts connect to expected wiring paths when disassembled. Do not perform continuity tests on live circuits.
Tip: Only perform continuity tests when you are confident in de-energizing the circuit. - 7
Document readings and note anomalies
Record all measurements, including whether readings were within expected ranges and any discrepancies. Take photos if helpful for future reference. Note any physical signs of wear or damage to the outlet or wiring.
Tip: Create a simple log with date, location, readings, and judgment. - 8
Reassemble and secure the outlet
If you opened the outlet, ensure all wires are properly reconnected and the faceplate is fastened securely. Restore power, if you had de-energized it for a test, and recheck the outlet for normal operation.
Tip: Double-check that no tools are left inside the outlet box before powering up. - 9
Assess the results and plan next steps
If readings are within range and no anomalies are found, the outlet likely functions properly. If issues were found, plan repairs or replacement with a licensed electrician, especially for wiring-related problems.
Tip: When in doubt, treat any fault as a safety risk and seek professional help.
Your Questions Answered
Can I test outlets with a basic voltmeter or do I need a digital multimeter?
A basic voltmeter can measure voltage, but a digital multimeter with probes and continuity testing expands what you can verify, including ground integrity and safety checks. For most DIY outlet tests, a digital meter is recommended due to ease of use and clearer readings.
A basic voltmeter can work for voltage, but a digital multimeter makes it safer and easier to check ground and continuity as well.
Is it safe to test an outlet while it’s powered?
Testing live outlets can be safe if you follow strict safety steps: dry hands, insulated probes, and proper meter settings. Keep contact minimal and avoid touching the metal parts. If you’re unsure, switch off the circuit and use non-contact checks first.
Testing live outlets is possible with care, but if you’re unsure, switch off the circuit and proceed cautiously.
What readings indicate a properly wired outlet?
A properly wired outlet shows expected voltage between hot and neutral, and a sane hot-to-ground reading close to the hot-to-neutral value. A zero or near-zero reading between neutral and ground is typical, while any sign of arcing, buzzing, or abnormal readings should be investigated.
Look for consistent voltage between hot and neutral, and ensure ground and neutral paths are solid. Any odd behavior warrants a closer look.
What should I do if readings are outside the expected range?
If readings fall outside regional expectations, recheck probe placement, reset the meter, and verify the outlet and nearby wiring. If readings persist, avoid further testing and consult a professional to inspect the circuit and panel for issues.
If readings seem off, double-check your setup and consider professional help if anomalies persist.
Do I need to disconnect power to test continuity?
Yes. Continuity testing should be performed with power off to avoid shocks. Use the meter in continuity mode to verify a complete path, but do not test live components for continuity.
Turn off power before continuity tests to stay safe and prevent shorts.
When should I call an electrician?
Call an electrician if you find consistent abnormal readings, signs of arcing, burnt outlets, or damaged cables. Electrical work beyond basic testing should be handled by a professional to ensure safety and code compliance.
If you see arcing or damage, or if readings don’t make sense, call a licensed electrician.
Watch Video
Key Takeaways
- Test hot-to-neutral and hot-to-ground to verify wiring.
- Use true RMS for accurate readings on fluctuating loads.
- Document readings and compare to regional expectations.
- Prioritize safety and seek a pro for complex issues.