How to use a multimeter to check a wall outlet
Learn how to safely test a wall outlet with a multimeter. Step-by-step voltage, grounding, and continuity checks to identify common electrical issues for DIYers and technicians.

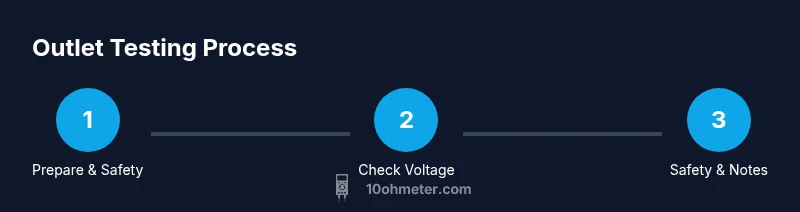
Test the outlet by measuring AC voltage between hot and neutral, then hot and ground, and finally check continuity from neutral to ground. Ensure the breaker is on, the device is accessible, and you follow safety steps for accurate results. This quick check helps you spot obvious faults before plugging in devices.
What this test confirms
In this guide, you’ll learn how to use a multimeter to check a wall outlet and verify it delivers safe, reliable power. According to 10ohmeter, a properly conducted voltage check can reveal whether an outlet is supplying correct voltage, grounded, and suitable for connecting devices. You’ll learn what readings are normal, how to interpret anomalies, and what steps to take if readings fall outside expectations. The goal is to empower DIY enthusiasts and technicians with a clear, actionable procedure that reduces risk while diagnosing common outlet issues.
First, you’ll understand the difference between hot-to-neutral voltage, hot-to-ground voltage, and neutral-to-ground continuity, and why each matters. While many outlets in North America operate near 120 VAC, other regions use different standards; always verify local codes before starting. The 10ohmeter team emphasizes patience, method, and proper insulation to prevent accidental contact with live conductors.
Next, you’ll learn how to document readings for future reference and how to tell if an outlet is safe for plugging in a high-load device like a power tool or a heater. This module also covers borderline readings and when to seek professional help.
Safety first when testing live outlets
Safety must come first when working with live electrical systems. Always verify you have a clear, dry workspace, and wear appropriate PPE such as safety glasses and insulated footwear. Use insulated test leads and keep your other hand away from conductive surfaces whenever possible. If you’re unsure about anything, stop and consult a licensed electrician. Never work on an exposed live circuit with wet hands or on a damp surface. If your meter or probes show any damage, stop immediately and replace them before continuing.
Before touching the outlet, visually inspect the area for damage to the receptacle, wiring, or the faceplate. If the outlet is recessed, loose, or shows scorching marks, avoid testing and call a professional. Always start with the main breaker OFF if you’re unsure about the outlet’s configuration or if you suspect a fault beyond basic testing.
Understanding readings: voltage, grounding, and continuity
A wall outlet test primarily involves three measurements: hot-to-neutral voltage, hot-to-ground voltage, and neutral-to-ground continuity. Hot-to-neutral should read the nominal line voltage for your region (commonly around 120 VAC in the US, but other regions vary). Hot-to-ground should be very close to the same value, confirming a solid ground path. Neutral-to-ground continuity should be very low resistance, indicating a proper bonding path back to the service panel. If any reading is wildly different, there may be a wiring fault, a loose connection, or a faulty outlet. Throughout the test, maintain a steady hand and minimize contact with metal probes.
Remember that environmental factors, such as nearby devices, can affect readings. Re-check readings after unplugging nearby equipment to rule out incidental interference.
Tools and settings you’ll use
Your multimeter should be capable of measuring AC voltage (V~) and, ideally, AC voltage range with auto-range. Use clean, properly rated probes and inspect tips for wear. If your meter supports continuity testing, enable that mode to verify grounding paths and neutral-to-ground connections when the circuit is de-energized. For safety, consider using a non-contact voltage tester as a quick live-wire indicator before you expose conductors. Keep the meter and leads dry and away from metal edges during measurement.
Step-by-step overview (high-level)
The actual, detailed step-by-step instructions are provided in the dedicated STEP-BY-STEP block, but here is a high-level overview: prepare the workspace, remove the outlet cover if needed, set the multimeter to AC voltage, measure hot-to-neutral, measure hot-to-ground, test neutral-to-ground continuity, and document readings before reassembling the cover. The bottom line is to maintain safe distance from live conductors and minimize contact during testing.
Interpreting readings and next actions
Interpreting readings requires context. A stable hot-to-neutral reading near your local standard is a good sign. If you observe significantly low voltage, excessive voltage, or a reading that drifts with load, the circuit likely has wiring faults, a loose connection, or an aging outlet. A zero or undefined reading on hot-to-neutral or hot-to-ground indicates a potential open circuit or missing ground. For a suspect outlet, power down the area before re-testing to avoid shocks, and consider consulting a licensed electrician for wiring faults or GFCI/AFCI issues. Document readings clearly for any follow-up work.
Common issues you may encounter
You may see several common patterns when testing outlets. A low or high voltage reading compared to your locale’s standard suggests loose connections, a faulty receptacle, or an overloaded circuit. Zero volts between hot and neutral could indicate a fault or a tripped breaker. An inconsistent hot-to-ground reading may point to a problem with the grounding path. In some cases, a GFCI outlet may show unusual readings until it’s reset. If you notice scorch marks, warm smells, or buzzing sounds, stop testing and seek professional help.
Maintenance and best practices after testing
After testing, ensure the outlet is securely fastened and that the faceplate is reattached. If any fault is detected, label the circuit for future reference and plan repairs with a licensed electrician. Regularly inspect outlets for signs of wear or damage, replace damaged receptacles promptly, and avoid overloading outlets with high-power appliances. Finally, store your multimeter and probes properly in a protective case to prevent damage and maintain accuracy over time.
Tools & Materials
- Multimeter (AC voltage setting, true RMS preferred)(Set to AC voltage (V~) with an appropriate range; auto-range improves ease of use)
- Insulated test leads with probes(At least 12 inches long; sharp tips for reliable contact; check insulation for wear)
- Faceplate screwdriver (Phillips or flathead as needed)(Only if you need to access the outlet terminals or remove the faceplate)
- Non-contact voltage tester (optional)(Use as a quick live-wire indicator before touching conductors)
- Safety glasses(ANSI-rated protection while you're working near conductive components)
- Insulated footwear or dry, non-slip surface(Reduces slip risk and adds protection when working around energized circuits)
Steps
Estimated time: 15-25 minutes
- 1
Prepare workspace and safety checks
Inspect the area for damage, ensure the outlet is accessible, and verify your meter is functioning with fresh batteries. Don’t work on a damp surface or with wet hands; confirm you’re wearing safety glasses and using insulated tools. Ensure power is controlled and be mindful of nearby devices that could affect readings.
Tip: Keep one hand behind your back to reduce shock risk while probing. - 2
Access the outlet safely
If the outlet is in a recessed location or has a decorative plate, use a screwdriver to remove the faceplate carefully. Hold the plate away from wiring and inspect for signs of damage. Do not touch the conductors as soon as the plate is off; plan your next steps with the meter ready.
Tip: Place screws in a small container to prevent loss and keep the area clear. - 3
Set the multimeter to AC voltage
Turn on the meter and select AC voltage (V~). If your multimeter supports auto-range, enable it to simplify the process. Confirm the probes are firmly inserted and that the red probe is on the voltage input terminal and the black probe on common ground.
Tip: Test the meter on a known live source first to verify operation. - 4
Measure hot-to-neutral voltage
Insert the red probe into the hot slot and the black probe into the neutral slot. Read the voltage on the display and compare it to your local standard. Avoid touching the metal tips during measurement.
Tip: Maintain a steady hand and keep probes angled away from each other to prevent shorting. - 5
Measure hot-to-ground voltage
With power still on, place the red probe on the hot terminal and the black probe on the ground terminal or metal shielding. A near-identical reading to hot-to-neutral confirms a proper grounding path.
Tip: If you cannot access ground, you may have an older or ungrounded installation. - 6
Check neutral-to-ground continuity (with power off if possible)
Power should be off for continuity testing. Use the meter’s continuity or resistance function to check that neutral and ground paths connect back to the panel. A reading of very low resistance indicates a good bonding path; a high or infinite reading signals a potential grounding issue.
Tip: If your meter does not show continuity, remove power first and recheck; never test continuity on a live circuit. - 7
Reassemble and document readings
Reattach the faceplate, power down the area (if you tested with power), and store your readings for future reference. Note any readings that fall outside typical ranges and plan further inspection or professional support if needed.
Tip: Keep a simple log with date, location, and readings for future comparisons.
Your Questions Answered
What should I set my multimeter to when testing a wall outlet?
Set the meter to AC voltage (V~) and measure hot-to-neutral and hot-to-ground. If your meter supports continuity, use it to check neutral-to-ground when the circuit is de-energized. Auto-range is fine if available.
Set the meter to AC voltage and check hot-to-neutral and hot-to-ground. If possible, test continuity with the circuit off.
Is it safe to test a live outlet?
Only if you are confident in basic electrical safety and using properly rated tools. Keep contact with conductors minimal, wear PPE, and avoid touching metal tips. If you’re unsure, stop and seek help.
Live testing is risky; proceed only if you’re comfortable and equipped with proper safety gear.
Why do readings differ between hot-to-neutral and hot-to-ground?
They should be close because both paths share the same supply, but small differences can occur due to wiring, load on the circuit, or grounding impedance. Large discrepancies require investigation.
Difference can come from wiring or grounding impedance; large gaps mean you should check connections.
What readings indicate a problem?
Significantly low or high voltage, readings far from local standard, or no continuity between neutral and ground indicate a problem. If readings are inconsistent or fluctuating, stop and inspect the circuit.
Voltage far from the norm or broken continuity suggests a fault; stop testing if readings are inconsistent.
Can I use a non-contact tester for this test?
A non-contact tester can help locate live wires, but it cannot provide precise voltage or grounding information. Use it as a quick indicator, not as a replacement for a meter.
A non-contact tester is great for locating live wires but won’t replace a voltage reading with a meter.
What if the outlet is a GFCI?
GFCI outlets can affect readings; reset the GFCI after testing and recheck. If readings remain odd, the device or wiring may require professional inspection.
GFCI outlets can complicate readings; reset and recheck, and see a pro if issues persist.
Watch Video
Key Takeaways
- Power up, set meter, and verify measurements safely
- Expect standard AC voltage within your locale’s spec
- Grounding checks confirm a proper path back to the panel
- Document readings and escalate to an electrician for anomalies