What Setting on Multimeter to Test Outlet
Learn the exact setting on a multimeter to test electrical outlets safely. This step-by-step guide covers VAC ranges, readings, and common mistakes for DIY enthusiasts and technicians.

To test an outlet with a multimeter, set the meter to AC voltage (VAC) and use the appropriate range for your region. Measure hot-to-neutral and hot-to-ground readings, expecting about 120V in North America or ~230V elsewhere. Neutral-to-ground should be close to zero. Follow safety steps, and verify the outlet is powered before testing.
Understanding What You're Measuring: AC Voltage, Neutral, and Ground
When you ask what setting on multimeter to test outlet, you’re really choosing the right tool mode and learning how to interpret three electrical conductors. An electrical outlet provides power through the hot live slot, while the neutral returns current, and the ground is a safety path. Your multimeter can verify that the outlet is delivering voltage and that the wiring is correctly referenced. In North America, most standard outlets are designed for about 120V AC with a frequency around 60 Hz; in many other regions, outlets operate around 230V AC with 50 Hz. This section explains what you measure, why it matters, and how readings reflect the condition of the circuit. According to 10ohmeter analysis 2026, understanding these basics reduces risk and improves accuracy for DIY troubleshooters.
Safety First: Prepare and Protect Yourself
Electric testing should be performed with care. Before you touch any outlets, visually inspect for damage signs of heat or moisture. Wear safety glasses and keep your hands dry; remove rings or bracelets that could accidentally contact conductors. If you must test a powered outlet, use one hand only when possible and keep the other away from metal surfaces to reduce the chance of a current path through your body. Stand on a dry surface and use insulated, properly rated probes. If you notice any signs of damage or warmth, stop and call a licensed electrician. These precautions aren’t optional; they are essential to reducing the risk of electric shock or arc flash.
Core Concepts: Voltage, Frequency, and Tolerances
Voltage is the potential difference that drives current. Frequency indicates how often the electrical sine wave completes a cycle per second. When you test outlets, you aren’t just looking for a single number—you’re validating relationships hot-to-neutral, hot-to-ground, and neutral-to-ground. A true RMS meter helps when the load is non-sinusoidal, giving a more accurate voltage reading under real-world conditions. In practice, you’ll compare your readings to nominal values: about 120 V AC in the US and Canada, and about 230 V AC in many other regions. If your meter shows significantly low or high values, suspect poor connections, a damaged receptacle, or an upstream problem in the circuit. The 10ohmeter Team notes that consistent measurement practices across different outlets builds confidence for more complex diagnostics.
Reading Scenarios: Standard U.S. Outlet vs. 240V Regions
Outlets come in several configurations. A typical North American duplex receptacle shows hot, neutral, and ground. In the UK and many parts of Europe, outlets are 230 V; in Asia, Australia, and elsewhere, 230 V is common with different plug shapes. The setting you choose on your multimeter should match the expected region voltage, and you should use the AC voltage range that safely covers the maximum reading. When you test hot-to-ground, you aim to see the live voltage, indicating the circuit is energized. Hot-to-neutral confirms proper return path. Neutral-to-ground should be close to zero in a correctly wired system; a notable reading here often indicates a wiring error or a shared neutral issue.
Reading Hot-to-Ground, Hot-to-Neutral, and Neutral-to-Ground
Hot-to-ground reading verifies that the receptacle is energized and that the ground path is connected. Hot-to-neutral reveals the nominal supply voltage and helps confirm that the neutral path is intact. Neutral-to-ground readings are used to check for potential leakage or miswiring; in a normal, correctly wired system, this value should be very close to zero, though small residuals can occur due to load or measurement technique. When recording results, note the meter model, the range used, and the ambient conditions; this context helps you interpret slight deviations. Remember that differences between outlets in the same circuit may occur due to wiring length, local loads, or shared neutrals.
Common Pitfalls and How to Avoid Them
One of the most common mistakes is mis-selecting the VAC range, which can overload the meter or produce unreliable readings. Another pitfall is poor probe contact; aim for firm contact in the center of the slot with the probe tip, and avoid touching the metal portion of the probe with your finger. Do not perform tests on damaged outlets or in wet conditions. If the outlet is controlled by a switch, ensure you know whether the switch is on or off for the portion you’re testing. Thoroughly clean and dry the work area; moisture can create a path for current and give false readings. Finally, always stop if you are uncertain about the result; when in doubt, consult a licensed professional.
Testing Special Cases: GFCI, Smart Outlets, and Split-Phase Circuits
GFCI outlets may show different behavior during testing due to protection circuitry; a standard VAC reading between hot and neutral still applies, but you should not press the reset test on a live GFCI while measuring the voltages. Smart outlets with integrated electronics can display different readings under load, so consider performing tests with devices connected only after obtaining a safe baseline. For split-phase or 240 V outlets, use appropriate voltage ranges and verify the two hot legs supply the expected difference. In many regions this will be 240 V, in others around 208 V. In all cases, rely on your meter’s manual for specific range settings and safety steps.
Interpreting Live Readings in Real-World Context
To get the most reliable data, compare readings across outlets on the same circuit and at different times of day. If you observe a voltage reading that deviates more than about 5-10% from nominal, re-check contact quality re-seat the plug and test again. If the problem persists, look for a loose outlet damaged wiring or a shared neutral. Document each test with the outlet location voltage readings and any unusual conditions. This practice makes it easier to map circuit health and plan repairs or replacements as needed.
Next Steps: When to Seek a Pro
Knowing what setting on multimeter to test outlet is a valuable DIY skill, but some situations require professional input. If you encounter charred wiring warmth buzzing sounds or consistently erratic readings after retesting, stop and arrange a licensed electrician visit. For routine testing, maintain a log of outlet tests and verify your tool's calibration periodically. With careful technique and the right safety mindset, you can diagnose basic outlet problems and prevent more significant failures.
Tools & Materials
- Digital multimeter (true RMS preferred)(AC voltage measurement, 200V/600V ranges commonly available)
- Insulated test leads with sharp probes(Probe tips rated for the voltage you test (at least 600V))
- Non-contact voltage tester (optional)(Quick presence test before contact)
- Safety gear (safety glasses, insulated gloves)(Personal protection)
- Outlet tester (optional)(Helpful for cross-checking wiring)
- Notepad or device to log readings(Record values and conditions)
Steps
Estimated time: 5-15 minutes
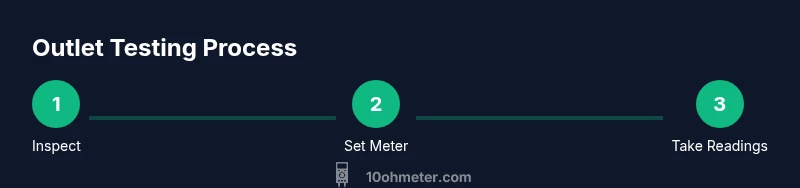
- 1
Inspect the outlet and workspace
Visually inspect the outlet for signs of damage heat or moisture. Ensure the area is dry and your hands are dry before touching probes. If anything looks unsafe, stop and reassess before proceeding.
Tip: Document any visible damage with a photo before continuing. - 2
Set the multimeter to AC voltage
Power on the meter and select AC voltage range. If your meter is auto range enable it; if not choose 200V or 600V depending on regional voltage. This ensures readings stay within range and the scale is accurate.
Tip: Verify the meter is functioning with a known reference before testing. - 3
Measure hot-to-ground
Insert the black probe into the ground slot and the red probe into the hot slot. Read the voltage; this confirms the circuit is energized and the ground path exists. Do not touch the probe tips with your hands during this step.
Tip: If the reading is zero, recheck contacts and outlet wiring. - 4
Measure hot-to-neutral
Keep one probe in hot and the other in neutral. Read the voltage and compare with regional nominal values. A healthy outlet should show a stable reading close to the expected supply voltage.
Tip: If the reading fluctuates, try a secondary outlet to verify consistency. - 5
Measure neutral-to-ground
Place one probe on neutral and the other on ground. Expect a reading near zero. A significant neutral-ground voltage can indicate a wiring issue or shared neutrals in the circuit.
Tip: Document any nonzero readings for electrician review. - 6
Document results and compare to standards
Record the outlet location, readings from hot-to-ground, hot-to-neutral, and neutral-to-ground, along with ambient conditions. Compare to regional standards and note any discrepancies for future checks or repairs.
Tip: Keep a running log to track improvements or recurring problems. - 7
Power down and remove probes safely
Turn off the meter, remove probes, and store equipment properly. Return the room to a safe state before leaving the work area.
Tip: Wash hands after testing and return tools to their storage area.
Your Questions Answered
What setting on multimeter to test outlet?
Use the AC voltage setting on your multimeter and select an appropriate range for your region. Measure hot-to-neutral, hot-to-ground, and neutral-to-ground readings for a complete check.
Set the meter to AC volts, pick the right range, and read hot to neutral and hot to ground for a full test.
Is it safe to test a live outlet?
Testing a live outlet is common when done with proper PPE and careful technique. If you feel unsure, stop and contact a licensed electrician.
Yes, but use PPE and follow safety steps. If unsure, call a pro.
Why might neutral-to-ground show voltage?
Neutral-to-ground voltage can occur due to wiring configurations, load imbalance, or phantom voltage from nearby conductors. It does not always indicate a fault, but it warrants closer inspection if readings are inconsistent.
Purposes vary; it can happen with shared neutrals or long runs. If persistent, get a pro to check.
What range should I use if my meter is not auto-ranging?
Start with the 200V range if you expect 120V or 230V readings, and switch to 600V if the reading approaches the upper limit. This helps avoid overloading the meter.
Begin with 200V, switch to 600V if needed.
What does OL or 1 mean on readings?
OL or a 1 indicates the voltage is beyond the current range or there is a poor contact. Recheck probe placement and switch to a higher range if necessary.
Out of range or bad contact; retry with proper range.
Can I rely on a non contact tester for precise readings?
Non contact testers can confirm the presence of voltage but cannot provide precise measurements. Use a multimeter for exact voltage values.
They confirm voltage presence but not exact numbers; use a meter for accuracy.
Watch Video
Key Takeaways
- Set meter to VAC for outlet tests
- Expect nominal voltages by region (120V NA, 230V elsewhere)
- Measure hot-to-ground, hot-to-neutral, and neutral-to-ground for wiring health
- Prioritize safety and PPE during all tests