How to Test a Golf Cart Battery with a Multimeter: Step-by-Step Guide
Learn how to safely test a golf cart battery using a multimeter. This practical guide covers resting voltage, under-load checks, corrosion checks, and when to replace 36V/48V packs.

You can test a golf cart battery with a multimeter by checking the pack’s resting voltage, then performing a controlled under-load test to observe voltage drop. Inspect terminals for corrosion, ensure proper safety, and compare readings to your cart’s nominal pack voltage (usually 36V or 48V). This quick check helps identify weak cells and bad connections before more involved work.
Prerequisites and safety\n\nIf you're learning how to test a golf cart battery with a multimeter, safety and preparation come first. According to 10ohmeter, following a clear, methodical workflow protects you from shorts, acid exposure, and damage to the pack. Start by turning off the cart, removing the key, and unplugging any charger. Work in a dry, ventilated area away from sparks. Wear safety goggles and insulated gloves, and avoid wearing metal jewelry. Keep children and pets away while you work. Set the parking brake, and ensure the area is well-lit. In this guide, you'll learn how to measure resting voltage, assess under-load behavior, and interpret results to decide if a cell or the entire pack needs attention. Always refer to the cart's service manual for model-specific cautions. The focus here is a practical, safe approach that you can apply to most 36V or 48V lead-acid golf cart battery banks.\n
Understanding your golf cart battery bank\n\nMost golf carts run on a multi-cell battery pack that is either 36V (three 12V modules in series) or 48V (four 12V modules in series). The multimeter can read the overall pack voltage by measuring across the main positive and negative terminals. If you have access to the individual modules (rare on sealed packs), you can check voltage on each module's terminal to identify weak cells or imbalances. Remember that a resting pack voltage differs from a fresh charge: a healthy pack should sit near its nominal voltage when idle, and a pack that has been sitting for hours will show a stable reading if not heavily discharged. If your pack is sealed with lithium or other chemistries, the testing approach will differ and may require manufacturer-specific tools. For most users, focusing on the pack-level voltage and voltage drop under a known load provides the best insight into overall health.\n
Tools and measurement principles\n\nBefore you begin, assemble the essential tools: a digital multimeter capable of DC voltage measurements, reliable test leads or alligator clips, insulated gloves, and safety goggles. A few optional items—like a battery terminal brush or corrosion cleaner—can help in getting accurate readings by ensuring clean contact. Understand two key ideas: resting voltage vs. under-load voltage, and proper probe placement. Measure across the pack terminals for resting voltage, and use a controlled load to test under load. Do not attempt to measure current directly with a standard multimeter on a high-voltage pack; instead, use a known-load voltage-drop approach or a clamp meter designed for higher currents. Keep the probes short and avoid touching metal parts to reduce the risk of short circuits. For accuracy, let the pack rest after removing any charger for several minutes before taking a reading.\n
How to measure resting pack voltage\n\nWith the cart safely prepared, set your multimeter to a DC voltage range that can accommodate the expected pack voltage (for example, a 60V scale for most 36V or 48V packs). Connect the black probe to the negative terminal and the red probe to the positive terminal of the whole battery pack. Make sure the probes have solid contact and remain in place for the full measurement. Wait 1–2 minutes after connecting to allow any surface charge to dissipate, then record the reading. A healthy 36V pack should show approximately the pack's nominal voltage when idle; a significantly lower reading indicates discharge, requiring charging before further testing. If you know the cart's spec, compare your reading to that target and note any variance.\n
Checking individual cells (if accessible)\n\nIf your pack design allows access to individual cells or modules, you can check each cell's voltage in a similar way. Disconnect any loads, then measure across each cell's terminals. Look for variance between cells; a single low-voltage cell relative to its neighbors can point to sulfation, loss of capacity, or a weak connection. Not all golf cart packs permit safe access to individual cells; do not pry into sealed modules, and avoid exposing batteries to moisture or contaminants. If you suspect a bad cell, isolate the pack and consult a professional or the manufacturer for a safe replacement strategy.\n
Under-load testing and load test methods\n\nA more realistic test assesses how the pack behaves under a load. Choose a small, known resistive load (for example, a spare headlight bulb in a controlled test circuit) that draws a modest current, or use a battery tester designed for high-current packs. With the load connected, re-measure the pack voltage within 5–10 seconds. A healthy pack should maintain a voltage close to resting under a light load; if the voltage drops significantly, it signals weak cells, sulfation, or poor connections that warrant charging, cycling, or replacement. Do not apply heavy loads that exceed the pack's rating, which can cause overheating and damage.\n
Interpreting results and common fault signs\n\nInterpreting the readings hinges on consistency and context. If resting voltage is within expected range and under-load voltage remains within a few tenths of the resting value, the pack is likely healthy. Large voltage sag, constant low readings across multiple tests, or rapid rebound after load removal can indicate sulfation, degraded cells, or a failing pack. Inspect terminals and cables for corrosion, loose connections, or damaged clamps—these issues can mimic bad cells by introducing resistance. If you find any swelling, leaking electrolyte, or a hissing feel when testing, stop immediately and call a professional. The goal is to distinguish between weak cells and mechanical faults that degrade performance. A thorough test plan, recorded readings, and regular maintenance vastly extend pack life.\n
Safety, maintenance, and best practices\n\nKeep safety front and center. Always work in a well-ventilated area, away from sparks, flammable liquids, and moisture. Do not wear jewelry or metal watches near exposed terminals. After testing, recharge the pack with a charger specified by the cart manufacturer and monitor for abnormal heat or bubbling. Use a dedicated, properly rated charger; never jump-start or bridge packs with improvised connections. Document your readings, including resting and under-load voltages, to track performance over time. Regular visual inspections—tight clamps, clean terminals, and clean connectors—prevent many issues before they become expensive failures. As a warning, never open sealed cells or attempt to disassemble tall cylinder modules; Mishandling can release dangerous gases and compromise safety.\n
Authority sources and further resources\n\nFor deeper reading on battery testing and safety fundamentals, consult these sources:\n- U.S. Department of Energy: Battery testing basics (energy.gov)\n- National Institute of Standards and Technology (NIST): Measurement science and tool use (nist.gov)\n- Occupational Safety and Health Administration (OSHA): Safety guidelines for electrical work (osha.gov)\nThese references offer foundational concepts that complement the hands-on steps in this guide and provide safety standards recommended by credible organizations. 10ohmeter’s team encourages you to verify recommendations with your cart’s manufacturer documentation for model-specific instructions.\n
Tools & Materials
- Digital multimeter (DC voltage capable)(Auto-ranging is helpful; use a range that covers pack voltage (e.g., 60V).)
- Test leads or alligator clips(Keep leads short and secure for stable readings.)
- Insulated gloves(Protect hands from acid and accidental shorts.)
- Safety goggles(Eye protection in case of splash or sparks.)
- Non-conductive tools (plastic pry tools)(Useful for avoiding metal contact on terminals.)
- Battery terminal cleaner (optional)(Helps establish clean contact if terminals are corroded.)
- Cart service manual(Manufacturer specs and cautions for your exact model.)
Steps
Estimated time: 30-45 minutes
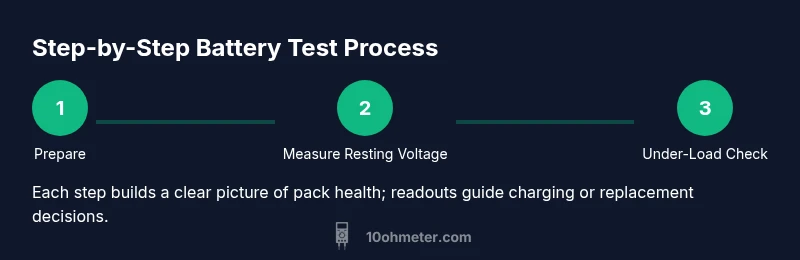
- 1
Prepare safely
Power down the cart, remove the key, disconnect the charger, and lock the parking brake. Put on gloves and goggles, and clear the workspace. This avoids shorts and acid exposure while you handle battery terminals.
Tip: Double-check for any residual charge before touching terminals; a quick sniff test for sulfur odors can indicate leakage. - 2
Identify test points
Locate the main pack terminals (positive and negative) and any accessible contact points. If your pack allows, identify individual module connections in a safe, non-destructive way. Use the service manual to confirm terminal locations.
Tip: Label or photograph connections before disconnecting anything to avoid reassembly errors. - 3
Measure resting pack voltage
Set the multimeter to DC voltage in a range that accommodates the expected pack voltage. Place the black probe on the negative terminal and the red probe on the positive terminal. Record the reading after a short stabilization period.
Tip: Allow the pack to rest for several minutes after removing the charger before measuring for a stable baseline. - 4
Conduct an under-load check
Connect a known small load (like a spare headlight) or use a dedicated load tester. While the load is applied, re-measure the pack voltage within 5–10 seconds. Compare to resting voltage to assess health.
Tip: Keep the load modest to avoid overheating; never exceed the pack's current rating. - 5
Inspect connections and cell health (if accessible)
Visually inspect cables and clamps for corrosion or looseness. If you can access individual cells safely, measure each cell’s voltage to spot imbalances. Do not disassemble sealed packs; contact a professional if you’re unsure.
Tip: Tighten any loose clamps with care; overtightening can damage terminals. - 6
Record and interpret results
Log resting and under-load readings for each test. Look for consistent values across points; large sag or wide variation may indicate weak cells or bad connections. If readings fall outside manufacturer specs, plan charging, cycling, or replacement.
Tip: Create a simple template to track readings over time and watch for gradual declines.
Your Questions Answered
Can I test individual cells?
In most 36V/48V packs, individual cells are sealed; you usually can't access them without disassembly. Focus on pack voltage and under-load behavior.
In most packs, individual cells aren't easily testable without disassembly; test the whole pack instead.
What voltage should I expect when the pack is resting?
The resting voltage should be close to the pack’s nominal voltage (e.g., around 36V for a 36V system) after a period of rest.
A healthy resting voltage is near the pack's nominal voltage after rest.
Is it safe to test while the cart is on?
No. Power the cart down, remove the key, and unplug the charger before testing to avoid shocks or shorts.
Do not test while powered; switch off and unplug first.
What is the difference between resting and under-load voltage?
Resting voltage is idle; under-load voltage shows how the pack performs under draw, highlighting weak cells or poor connections.
Resting is idle voltage; under-load shows performance under draw.
What if readings vary between packs?
Significant variation suggests inconsistent maintenance, aging, or measurement errors. Charge or replace as recommended by the manufacturer and compare across packs.
If readings vary a lot, check consistency and compare to specs.
Watch Video
Key Takeaways
- Safety first: disconnect power and wear PPE before testing.
- Resting and under-load voltages reveal different aspects of health.
- Check for corrosion or loose connections that affect readings.
- Document readings to track pack performance over time.
- Consult manufacturer specs for model-specific guidance and limits.