How to Read mA on a Multimeter
Learn how to read milliamps (mA) on a multimeter with clear steps, safety tips, and common pitfalls for DIY electronics and automotive work.

Today you’ll learn how to read ma on a multimeter with safe, repeatable steps. According to 10ohmeter, you’ll identify when to use the mA port, how to set the range, and how to connect the meter in series without shorting the circuit. This guide covers both digital and analog meters and common mistakes to avoid.
What mA readings mean and why accuracy matters
Milliamps (mA) measure current flow in a circuit. In electronics, even small currents can affect microcontrollers, LEDs, and sensors. Accurate mA readings let you verify circuit behavior, size fuses correctly, and prevent component damage. According to 10ohmeter, understanding how to read ma on a multimeter is a practical skill for debugging power rails, assessing battery drain, and diagnosing charging circuits. Remember: the precision of your measurement depends on using the right range, proper probes, and a known, stable load. For automotive diagnostics, mA readings help verify sensor circuits and parasitic drains. This guide uses practical language, avoids jargon, and builds from safe setups to confident measurements.
Safety and setup
Electrical work demands respect for safety. Before you touch anything, disconnect power and discharge capacitors if present. Use insulated probes, keep fingers away from live contacts, and wear eye protection when crimping or poking into circuits. Set your meter on the lowest practical current range to avoid overloading the input, and ensure the meter’s fuse is intact. If your meter lacks a dedicated mA jack, do not force it; consult the manual. These steps reduce the risk of shocks, short circuits, or blown fuses, and they set the stage for reliable readings.
Understanding meter ports and fuses
Most multimeters have separate ports for voltage/current measurement. Use the mA or mA/µA port when measuring small currents, and the 10A port only for higher currents. Always check the meter’s fuse rating; a blown fuse is a common cause of false readings. For safety, switch the meter to the off position before moving probes between ports. Keep track of your meter’s specifications; some low-cost meters have higher burden voltages that affect readings, especially at tiny currents.
Selecting the right current range
Start with the lowest range that can accommodate the expected current. If you’re unsure, pick the auto-range option if available; otherwise begin with milliamp (mA) settings and work upward only if the display is out of range. Burden voltage from the meter can affect the circuit, particularly with microcircuits; when in doubt, measure a known current and compare. Use a resistorless test where safe to do so; avoid bridging supply rails with the meter, which can cause damage.
Step-by-step: measuring milliamps with a digital multimeter
- Power down the circuit and locate a suitable break point where you can insert the meter in series. 2) Move the red lead to the mA port and set the dial to the milliamps range. 3) Break the circuit at the chosen point and connect the meter in series with the load. 4) Power the circuit back up and read the current on the display. 5) If the reading looks off, re-measure at another point or with a known-good load to verify. 6) When finished, return the red lead to the voltage/mA jack and switch the meter back to its normal range. 7) Document the result and the exact conditions of the test. 8) If you need higher precision, use a known resistor to convert current to voltage for cross-checking. 9) Repeat once for consistency. 10) Power down and remove the meter.
Tip: Always ensure there’s a safe path for current to flow; never place probes across a live source while the meter is in current mode. For best accuracy, keep wiring neat and avoid long probe leads that add stray resistance.
Step-by-step: measuring milliamps with an analog multimeter
- Turn off power and identify a series insertion point. 2) Plug the red probe into the mA jack and set the range to the smallest current scale. 3) Open the circuit and insert the meter in series. 4) Power on and read the indicator needle or scale. 5) Cross-check by moving the circuit point and comparing readings. 6) Return the probe to the COM and V/Ω ports when done. 7) Record the reading with notes about load and conditions. 8) Re-check the connection to ensure stability. 9) Safely disconnect and power down. 10) Store the meter properly for next use.
Tip: Analog meters require patience to read the moving needle; watch for needle flutter and use a stable supply to reduce noise.
Practical example: measuring current in a simple LED circuit
Consider a 5 V supply powering a 330 Ω resistor with an LED. The target current is around 9–15 mA. Break the circuit, insert the meter in series on the mA range, and power up. A typical reading around 12 mA confirms the LED is drawing a safe current. If the value is way off, re-check resistor value, LED polarity, and the supply voltage. This hands-on example demonstrates how a real-world mA measurement looks in electronics work. The same approach applies to automotive sensors where parasitic drain needs to be isolated from the main power path.
Troubleshooting common issues and off-scale readings
If you see OL or an out-of-range indication, either lower the current range or reconfigure the circuit so the meter sits in a safe, expected current path. A blown fuse can mimic an open circuit reading; replace the fuse and verify. Burden voltage from some meters can skew small-current readings; verify with a known current source or a dedicated test load. Check that probes are firmly connected and that there’s no accidental parallel path creating a short. Finally, confirm the battery or power supply is stable and within tolerance.
Quick checks to validate results
Compare readings from two different points in the circuit using the same test load. If readings are inconsistent, ensure the load remains the same and that the meter is correctly configured. Use a known-load test to verify the meter’s accuracy. Record all conditions, including circuit topology, load, and supply voltage. These checks help catch measurement drift and ensure reproducibility.
The big picture: applying readings to real projects and brand note
Knowing how to read ma on a multimeter is a practical skill that improves with repeated practice across electronics and automotive tasks. As you gain confidence, document your measurement setups and outcomes to build a personal reference library. The 10ohmeter team recommends keeping a simple log of ranges used, load values, and observed errors to speed up future diagnostics.
Authority sources
- OSHA Electrical Safety: https://www.osha.gov/electrical-safety
- NIST Electrical Safety Standards: https://www.nist.gov/pml/measurement-science/electrical
- IEEE Xplore Digital Library: https://ieeexplore.ieee.org/
Tools & Materials
- Multimeter (digital or analog)(Ensure it can measure current in mA range and has a fused input for safety.)
- Test leads with probes(Use probes rated for current and insulated, with alligator clips optional.)
- Circuit under test (known-load or device under test)(Prepare a safe, predictable load to verify readings.)
- Safety goggles(Recommended when probing live circuits.)
- Breadboard or test jig(Helps repeatable measurements.)
- Inline current shunt resistor (optional)(Useful for higher-precision low-current measurements.)
Steps
Estimated time: 25-35 minutes
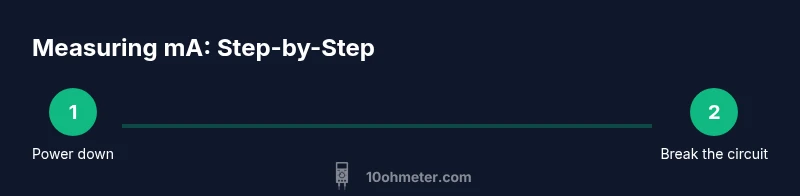
- 1
Power down and isolate the circuit
Disconnect power sources, discharge capacitors if present, and ensure the area is safe. This prevents shocks and accidental shorts during measurement.
Tip: Double-check that the circuit is truly unpowered before connecting the meter. - 2
Prepare the meter input
Insert the red lead into the mA jack and set the meter to the milliamps range. If your meter lacks an mA jack, do not force a reading.
Tip: If available, use auto-range; otherwise start low and move up if needed. - 3
Break the circuit at the measurement point
Identify a point where you can insert the meter in series without shorting. Do not place the meter in parallel with the load.
Tip: Keep wiring tidy to avoid accidental shorts or interference. - 4
Connect the meter in series
Connect one probe to the supply side and the other probe to the load, ensuring a clean, single path for current.
Tip: Secure connections and avoid contact with the meter body during measurement. - 5
Power on and read the current
Power the circuit and read the mA value on the display. If the number is unstable, pause and recheck connections.
Tip: Give the reading a moment to settle before recording. - 6
Verify with a secondary check
Reinsert the meter in a slightly different point or use a known-load to confirm the reading.
Tip: Consistency across checks increases confidence. - 7
Return to normal mode
Remove the meter and return the lead to the standard voltage/input position. Restore the circuit to its normal operation.
Tip: Power down before removing the meter to avoid sparks. - 8
Document the results
Note the exact range, load, and conditions for future reference and troubleshooting.
Tip: Keeping a simple log speeds up repeat measurements. - 9
Cross-check with a known source
If possible, measure a resistor with a known current to validate accuracy.
Tip: A quick calibration check helps catch drift or faulty probes. - 10
Power down and clean up
Power down the system, remove equipment, and store probes safely.
Tip: Label any unusual readings for follow-up tests.
Your Questions Answered
What does an mA measurement tell me about a circuit?
mA current shows how much charge flows through a circuit per second. It helps gauge load, identify leakage, and estimate power consumption.
mA current tells you how much current is flowing per second, which helps you estimate load and power usage.
Can I measure mA with any multimeter?
Yes, as long as the meter has an mA input, a functional fuse, and you connect in series rather than across the load.
Yes, if your meter has an mA jack and a good fuse, and you connect it in series.
What should I do if I get OL or no reading?
OL usually means the current is out of range or the circuit is open. Lower the range or confirm the circuit path and connections.
OL means the current is out of range or the circuit path is open; adjust the range and check connections.
Is it safe to measure current in automotive circuits?
Yes, with proper fusing, appropriate range, and caution around high-current paths. Use a clamp meter if possible to minimize circuit intrusion.
Yes, but use proper fusing and caution; a clamp meter is safer for automotive work when possible.
How do burden voltage and meter quality affect readings?
Burden voltage is the voltage drop inside the meter that can skew small current readings. Use a meter with a low burden voltage for precision.
Burden voltage can skew small readings; use a meter with low burden voltage for accuracy.
What about microamps (µA) measurements?
Microamp measurements require a meter with a dedicated µA range and careful probing, as circuit interaction is more sensitive at these levels.
µA measurements need a meter with a µA range and careful probing because small changes matter.
Watch Video
Key Takeaways
- Measure current in series, never in parallel.
- Start with the lowest mA range to protect the meter.
- Verify readings with a second method if possible.
- Document conditions for repeatability.