How to Check a Car Battery with a Multimeter
Learn how to safely test a car battery using a digital multimeter. This guide covers resting, cranking, and under-load voltage tests, interpretation of results, safety tips, and next steps for a healthy electrical system.

You can assess car battery health by measuring resting voltage, cranking voltage, and under-load voltage with a digital multimeter. A healthy resting voltage is around 12.6V; cranking voltage should stay above roughly 9.6V during starting; running voltage should be about 13.8–14.8V with the alternator charging. If readings fall short, charge or replace the battery.
Why Checking a Car Battery with a Multimeter Matters
According to 10ohmeter, a car’s electrical health hinges on the battery and charging system working together. Using a multimeter to verify resting voltage, cranking voltage, and under-load voltage gives you a clear snapshot of whether the battery is healthy or nearing failure. This knowledge helps you avoid unexpected breakdowns, protect sensitive electronics, and plan timely maintenance or replacement. By understanding these readings, DIY enthusiasts and technicians can diagnose common battery issues before they become costly, time-consuming problems.
Safety First: Precautions for Battery Testing
Testing a car battery involves working near exposed terminals and potential acid contact. Always wear safety glasses and gloves, work in a ventilated area, and avoid metal jewelry that could bridge terminals. If you notice swelling, corrosion, or a strong acid smell, stop and seek professional help. Never lean over the battery while cranking the engine, and keep flammable materials away from the work area. Ensure the vehicle is in park (or neutral with the parking brake engaged) before you begin.
What You Need Before You Start
Prepare a digital multimeter with DC voltage capability, fresh test leads, and a clean set of terminals for a solid connection. The multimeter should be on the DC voltage scale (20V or higher) and have good probe contact. Keep a rag or paper towels handy to wipe away any corrosion, and if you have safety gloves, use them. Having a partner to crank the engine can help you capture readings quickly and safely.
Understanding Voltage Readings: Resting, Cranking, and Under Load
Resting voltage (engine off) reflects the battery’s state of charge. A healthy lead-acid battery typically sits around 12.6V when fully charged. Cranking voltage (during starting) shows the battery’s ability to supply current under load; a healthy battery should hold above about 9.6V during cranking. Under-load voltage (while a moderate load is applied) tests the battery's performance with the alternator not yet fully engaged; readings near 12.4–12.6V under load can indicate a healthy system, while significantly lower values suggest a weak battery or poor connections.
What A Weak Battery Looks Like and What to Do
If resting voltage is below roughly 12.4V, the battery is moderately discharged and may benefit from a charge. Resting voltages under 12.0V often indicate a deeply discharged or failing battery. If cranking voltage drops below 9.6V during starting, the battery may not reliably deliver power; test again, clean terminals, and consider replacement if the issue persists. Corroded terminals, loose connections, or a failing alternator can mimic battery failure, so inspect connections and test the charging system too.
Authority Sources
- Energy.gov: Battery testing basics and electrical safety guidelines. https://www.energy.gov/
- NREL.gov: Fundamentals of electrical measurements and safety in automotive contexts. https://www.nrel.gov/
- NIST.gov: Calibration and measurement principles for DC voltage testing. https://www.nist.gov/
These sources provide foundational information that supports safe, accurate testing practices and measurement interpretation.
Tools & Materials
- Digital multimeter (DC voltage range, 20V or higher)(Prefer a true-RMS meter; set to DC volts and test on the vehicle's negative/positive terminals)
- Test leads with insulated probes(Red to positive terminal, black to negative; ensure good contact and spark-free connection)
- Safety glasses(Eye protection in case of sparks or acid spray)
- Gloves (chemical-resistant, optional)(Adds a layer of protection when handling the battery)
- Rag or paper towels(For wiping corrosion from terminals)
- Battery brush (optional)(Useful if you notice heavy corrosion)
Steps
Estimated time: 40-60 minutes
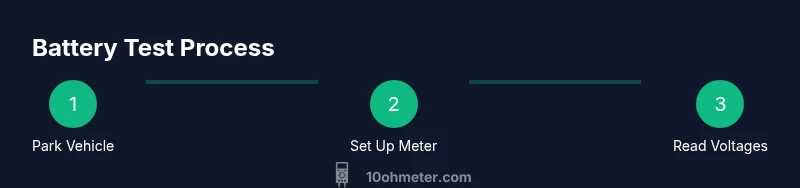
- 1
Park and prepare the vehicle
Ensure the car is in Park (or neutral with parking brake engaged) and the engine is off. Open the hood and inspect for obvious hazards. Remove any metal jewelry and secure loose clothing to prevent accidental contact with the terminals.
Tip: If the battery is in a tight space, position yourself so you can comfortably reach both terminals without leaning over exposed metal. - 2
Set up the multimeter and leads
Connect the red probe to the multimeter’s voltage jack and the black probe to the common/ground. Place the meter in DC voltage mode and verify the leads are firmly connected. Make sure there is no short path by resting the probes away from each other while not touching terminals.
Tip: Double-check the polarity and avoid touching the metal parts with your fingers while testing. - 3
Measure resting voltage (engine off)
With the engine off and all accessories off, place the probes on the battery posts (red on positive, black on negative). Wait a few seconds for the reading to stabilize, then record the voltage.
Tip: A resting voltage around 12.6V indicates a healthy, fully charged battery. - 4
Crank the engine and measure cranking voltage
Have a helper start the car or briefly crank the engine while you watch the multimeter. Do not hold the key or start for more than a few seconds. Note the lowest voltage during the cranking event.
Tip: A healthy battery should maintain voltage above 9.6V during cranking; a significantly lower reading suggests weakness or sulfation. - 5
Measure under-load/charging-voltage (engine running)
With the engine running, observe the voltage across the battery. A charging system should push the voltage into about 13.8–14.8V as the alternator charges the battery. If the voltage stays under 13.5V, the alternator may be undercharging.
Tip: If you see over 15V, there may be an overcharging condition or alternator fault. - 6
Interpret results and decide next steps
Compare resting, cranking, and running voltages to the guidelines above. If readings indicate a weak battery, consider charging fully or replacing. If readings are mixed or show poor charging, inspect battery terminals for corrosion or test the alternator and charging circuit.
Tip: Document readings and re-test after cleaning terminals or replacing the battery to confirm the issue. - 7
Disconnect safely and clean up
Turn off the multimeter, remove probes from the battery, and store equipment safely. Wipe any battery acid residue from the terminals. If you noticed corrosion, apply a terminal protectant and keep the area clean.
Tip: Always dispose of or recycle a removed battery according to local guidelines.
Your Questions Answered
What is a healthy resting voltage for a car battery?
A healthy resting voltage for a typical 12V lead-acid car battery is around 12.6V when fully charged. Significantly lower resting voltage indicates a discharged or aging battery.
A healthy resting voltage is around twelve point six volts when the car is off.
Can you test a battery without disconnecting it from the car?
Yes, you can test with the battery connected, using proper safety and avoiding shorting. If you suspect a problem, you can also disconnect for a more isolated test, but be prepared to reset radio codes and other electronics.
Yes, you can test with the battery connected, but take care to avoid shorts and be prepared to reset certain electronics if you disconnect.
What should the voltage do during cranking?
During cranking, the voltage should remain above roughly 9.6V. A much lower reading indicates a weak battery or poor connections and warrants follow-up testing or charging.
During cranking, expect the voltage to stay above about nine point six volts.
What does a low voltage under load mean?
A low under-load voltage often means the battery cannot sustain current, possibly due to aging, sulfation, or a failing alternator. Check connections and test the charging system to pinpoint the cause.
Low under-load voltage usually means the battery or charging system is weak or failing.
How often should I test my car battery?
Test the battery at least once a year, and more often before extreme weather. If your vehicle is older or experiences frequent starting issues, test quarterly.
It's best to test at least once a year, and more often if the car is older or you have starting issues.
Watch Video
Key Takeaways
- Check resting voltage first to gauge charge level
- Cranking voltage reveals current capability under load
- A healthy charging voltage confirms alternator function
- Corrosion-free terminals lead to accurate measurements
- Document results and plan replacement if readings trend downward