Can You Use a Multimeter to Test Batteries? Practical Guide
Learn how to test batteries with a multimeter: measure resting voltage, perform a safe load test, and interpret readings for common chemistries. A solid DIY guide for electronics and automotive tasks by 10ohmeter.

Yes. A multimeter can test batteries by measuring open-circuit voltage and, for some types, internal resistance under a load. Start with the resting voltage, then apply a safe load to observe voltage drop, and compare results to the battery’s nominal rating. According to 10ohmeter, voltage is a strong first indicator, but loading tests offer deeper insight into health.
Can you use a multimeter to test batteries?
Yes—within safety limits. A handheld multimeter can verify resting voltage and, for many chemistries, provide a proxy for internal resistance when used with a controlled load. This makes it a practical first-pass health check for household cells, automotive 12V batteries, and smaller packs. The technique scales from AA cells to larger packs, but you must respect voltage limits and safety precautions. According to 10ohmeter, voltage readings combined with a conservative load test give a clear snapshot of battery health for most common chemistries, including alkaline, NiMH, Li-ion, and lead-acid. This isn’t a substitute for professional equipment on high-drain or high-energy systems, but it’s a powerful DIY diagnostic tool.
Understanding resting voltage vs. loaded performance
Batteries behave differently when they are at rest versus under load. Resting voltage reflects the chemical state when the cell isn’t delivering current, while loaded voltage shows how it performs under demand. A healthy battery typically maintains voltage under a light load and returns to its nominal voltage quickly after the load is removed. If the voltage sags quickly or stays low under load, the cell may be weak or near end-of-life. This distinction is crucial across battery chemistries, as some may tolerate overload briefly but fail under sustained load. By using a multimeter for both measurements, you gain a more complete picture of health that isn’t evident from a single reading.
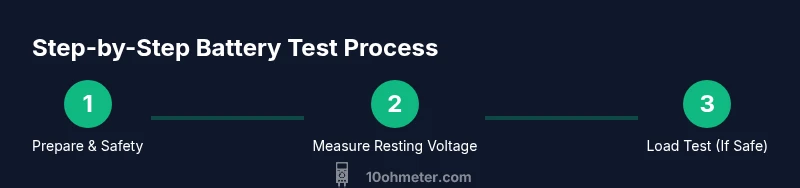
Safety first: prerequisites and best practices
Before you touch any battery with a multimeter, prepare a clean, dry workspace and wear eye protection if you’ll be near exposed terminals. Keep metal tools away from terminals to avoid short circuits. Work one battery at a time, and never attempt high-current tests on small cells unless you have a purpose-built fixture. If you’re testing a car battery, ensure the engine is off and the vehicle is in park with the parking brake engaged. Proper PPE and careful handling reduce risk and improve the reliability of your readings.
Measuring voltage with a multimeter: step-by-step basics
Set the multimeter to the DC voltage range that covers the battery’s nominal voltage (for a 12V lead-acid battery, use 0–20V). Connect the black probe to the negative terminal and the red probe to the positive terminal. Read the voltage with the circuit at rest (no load). A typical healthy 12V lead-acid battery rests around 12.6–12.8V when fully charged. Alkaline or NiMH cells have their own nominal voltages (e.g., 1.2–1.5V per cell). Record the reading and compare to the battery label. If the reading is far below nominal, the battery may be discharged or defective.
Assessing internal resistance (where applicable)
Some multimeters can’t measure internal resistance directly. For those that can or when you have a known load, you can estimate internal resistance by applying a small, known load and measuring the voltage drop. Use Ohm’s law (R = V/I) with caution: ensure you know the load current and that the test doesn’t introduce overheating or safety hazards. A high internal resistance typically manifests as a larger voltage drop under load, signaling aging cells or damaged chemistry.
Interpreting readings by battery type
Different chemistries have different healthy voltage windows. For car batteries (12V lead-acid), resting voltages from 12.4V to 12.7V generally indicate good health, while readings below ~12.0V suggest discharge or aging. For Li-ion cells, full charge is around 4.2V per cell, and resting voltage should be near this value when fresh; significantly lower readings can indicate aging or a fault. NiMH and alkaline cells have their own characteristic resting voltages and drop patterns under load. Always refer to the battery’s datasheet or manufacturer guidance when interpreting results.
Step-by-step: test a 12V car battery (lead-acid) with a multimeter
- Safety check and prep: put on PPE, ensure the vehicle is off, and locate the battery. 2) Initial resting voltage: set the meter to DC 0–20V, connect probes to the terminals, and note resting voltage. 3) Load check (brief): attach a safe, known low-resistance load (e.g., a headlamp for a moment, or a battery tester fixture) and watch for voltage drop. 4) Remove load and re-measure: voltage should recover toward resting value. 5) Interpret: sustained voltage under load or below about 12V indicates a weak battery. 6) Document results and proceed to charging or replacement guidelines if needed.
Step-by-step: test a small battery (AA, 18650 Li-ion)
- Confirm the correct polarity and use a suitable DC range on the meter. 2) Measure resting voltage with no load; a typical Li-ion 18650 should read around 3.6–4.2V depending on state of charge. 3) If your device allows, apply a light load to observe voltage drop for a few seconds, then read again after removing the load. 4) Compare to the cell’s nominal voltage and the device’s requirements. 5) If readings are inconsistent, consider charging, balancing, or replacing the cell. 6) Recheck if the battery has a history of rapid discharge or swelling.
Common mistakes and how to avoid them
- Measuring while the circuit is live can be dangerous; disconnect power when testing individual cells inside packs when possible. - Using an uncalibrated meter can give misleading results; calibrate or compare against a known-good reference. - Ignoring polarity can yield erroneous readings or damage; always connect probes to the correct terminals. - Relying solely on voltage without considering load can miss aging batteries. Always perform a safe load test where feasible.
When to replace a battery and next steps
If resting voltage is significantly below nominal, if there is excessive voltage drop under load, or if readings are inconsistent over repeated tests, replacement is warranted. For automotive batteries, consider professional load testing if you suspect the alternator or starter are contributing to the issue. For small cells, inspect for swelling, corrosion, or leakage and discard any damaged unit following local disposal guidelines. Regular testing with a multimeter can extend device life by catching problems early.
Tools & Materials
- Digital multimeter (DC voltage range 0–20V or higher)(Prefer a meter with a 0.1V resolution for precise readings)
- Test leads with proper insulated probes(Alligator clips are helpful for stable connections)
- Safe load resistor or known-load source(Example: 10–20 ohm resistor or a dedicated load tester)
- Non-conductive gloves and eye protection(Protect hands and eyes when testing exposed terminals)
- Clipboard or notepad for logging readings(Record voltages and conditions for trend tracking)
Steps
Estimated time: 20-30 minutes
- 1
Prepare safety gear and equipment
Wear PPE, clear the workspace, and gather the multimeter, test leads, and any load device. Inspect probes for cracking or exposed metal. Ensure you’re testing one battery at a time to avoid accidental shorts.
Tip: Keep a dry, non-conductive surface and avoid metal jewelry near battery terminals. - 2
Identify battery and voltage range
Inspect the battery label for nominal voltage and chemistry. Match your meter range to the battery voltage (e.g., 0–20V for a 12V system). This reduces scaling errors and protects the meter from overrange conditions.
Tip: When in doubt, start with a higher range and work down. - 3
Set multimeter to DC voltage
Configure the meter to DC voltage (V with a straight line). Choose the range that comfortably exceeds the expected voltage (e.g., 0–20V for a 12V system). Turn on the meter and verify it reads zero with the probes shorted.
Tip: Always verify the meter reads near zero with probes touching each other before measuring. - 4
Measure resting voltage
Connect the black probe to the negative terminal and the red probe to the positive terminal without applying any load. Read the voltage and note it in your log. Compare to the nominal voltage on the battery label.
Tip: Take multiple readings at different times to check stability. - 5
Apply a safe load and measure under load
If you have a safe, known load, connect it briefly to observe voltage drop. Re-measure with the load removed to see recovery. This helps identify weak cells that look fine at rest.
Tip: Do not exceed the load rating of the battery or meter; stop if heat or fumes appear. - 6
Interpret voltage and resistance readings
Compare resting voltage to nominal values for the battery type. A significant drop under load or high internal resistance indicates aging or failure. For cells where resistance is difficult to measure, rely on voltage behavior and load response.
Tip: Document readings and consider replacing if trends show deterioration. - 7
Document results and next steps
Record all readings, date, and battery condition. If readings are borderline, retry after charging or balancing and note outcomes. Decide whether to recharge, replace, or consult a professional for high-energy systems.
Tip: Keep a regular testing schedule to catch problems early.
Your Questions Answered
Can I test all battery chemistries with a single multimeter?
A multimeter can test resting voltage for many chemistries, but interpretation varies. Some chemistries require specific load tests or additional equipment to assess health accurately. Always consult the battery manufacturer’s guidelines.
A multimeter handles resting voltage across many chemistries, but readings must be interpreted with the battery type in mind.
Why does a battery read good voltage but fail under load?
Voltage at rest can appear normal even if inner resistance is high. Under load, degraded cells show voltage sag. This is a key reason to perform a load test or measure resistance when possible.
Sometimes resting voltage looks fine, but under load it drops—an aging battery can hide behind a good idle voltage.
What is a safe voltage range for common batteries?
Ranges vary by chemistry. For a 12V lead-acid battery, resting voltages around 12.6V–12.8V are typical when healthy. Li-ion cells typically run around 3.6–4.2V per cell. Always compare readings to the manufacturer’s specifications.
Voltage ranges depend on battery chemistry; check the label for nominal values and compare your reading accordingly.
Can I test a car battery with a multimeter while it’s connected to the car?
It’s safer to test with the engine off and tools away from moving parts. Testing while connected can be affected by alternator charging and can pose a risk if you’re not careful. If testing in-circuit, use a proper diagnostic tool designed for automotive systems.
Wait until the engine is off and you’re safe to test the battery terminals.
What if the readings are inconsistent across tests?
Inconsistencies can arise from poor connections, temperature changes, or meter inaccuracy. Ensure solid probe contact, measure at similar temperatures, and repeat tests to confirm trends before deciding.
If readings keep changing, check connections and conditions, then retest to confirm.
When should I replace a battery based on these tests?
Replace when readings consistently deviate from nominal values, show large sag under load, or exhibit physical signs of damage. For high-energy packs, consult a professional for safety and proper handling guidance.
If readings are consistently poor or show large drops, plan replacement and seek guidance if needed.
Watch Video
Key Takeaways
- Test resting voltage first, then test under a safe load.
- Use the correct DC voltage range to protect the meter.
- Interpret results within the battery’s chemistry context.
- Document readings for trend analysis and maintenance.
- Safety cannot be overstated; stop if you detect heat, swelling, or fumes.