How to Use a Multimeter on a Battery: A Practical Guide
Learn how to safely test any battery with a digital multimeter. This 10ohmeter guide covers preparation, measurement, interpretation, and troubleshooting for automotive and household batteries, with step-by-step instructions and safety tips.

Goal: You’ll learn how to use a multimeter on a battery to quickly confirm voltage and health. Start by selecting the DC voltage range on your meter, connect probes safely to the battery terminals, and measure with the engine off. You’ll interpret readings for automotive and home batteries and determine when a replacement or charging is needed.
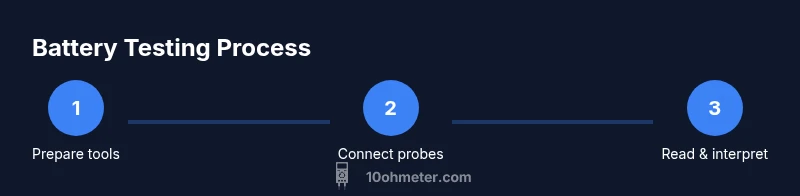
Understanding the battery and multimeter basics
A battery stores chemical energy and provides DC power to start engines, light electronics, and power handheld tools. A digital multimeter (DMM) is a versatile tool that can measure voltage, current, and resistance, which helps you assess a battery’s health without disassembly. When you test a battery, you’re primarily looking at its voltage under no-load conditions and, if possible, its voltage under a mild load to simulate real use. In practice, many DIYers begin with a simple voltage check to verify the battery’s basic capability, then progress to more advanced checks as needed. The goal of this guide is to help you use a multimeter on a battery with confidence and safety. According to 10ohmeter, starting with clean terminals, proper meter settings, and careful probe handling lays the foundation for accurate results. By following the steps here, you’ll gain a reliable baseline for automotive, motorcycle, and household batteries.
Safety and preparedness for battery testing
Safety is the top priority whenever you work with batteries. Hydrogen gas can accumulate and spark if metal tools bridge terminals, so work in a well-ventilated area and wear eye protection. Inspect the battery for cracks or signs of leakage before touching the terminals. Keep metal jewelry away from the battery posts, and never rest tools on the battery case. If you’re testing a large or high-current battery (like a car battery), consider having a second person nearby to assist in case of an emergency. By planning your workspace and equipment, you reduce the risk of shocks, short circuits, or accidental shorting of terminals.
Preparing your tools and battery setup
Before you begin, verify you have a digital multimeter capable of DC voltage measurements and proper leads. If your meter uses interchangeable probes, ensure the probes are intact and the insulation is not nicked. Place the battery on a non-conductive surface and organize a safe path for the leads to reach the battery terminals without crossing each other. For automotive batteries, ensure the engine is off and the vehicle in park or neutral with the parking brake engaged. For smaller batteries, ensure devices are powered down and any charging activity is paused. A clean, dry terminal area improves contact and reading stability.
Interpreting readings and practical tips for accuracy
Interpreting the reading requires context: a healthy battery typically maintains a stable voltage within the type’s expected range under no-load conditions. If you observe a voltage noticeably lower than the nominal value or large fluctuations between measurements, that’s a sign of aging, poor connections, or a failing cell. If your readings seem unstable, recheck all connections, clean corrosion from terminals, and retest. The 10ohmeter analysis shows that many beginners skip the contact check and end up with erroneous results. Remember to document readings and repeat tests after short rest periods to confirm stability.
Common issues and quick fixes
Corrosion on terminals is a frequent cause of inaccurate readings. Clean terminals with a small brush and proper cleaner, then retest. Loosely connected probes or damaged leads can introduce noise; replace leads if there’s any damage. If a battery still reads low after cleaning and secure connections, it may be near the end of its life and require replacement or professional testing. For lead-acid and sealed batteries, avoid charging while performing live measurements unless you have the proper equipment and safety precautions. Always store your meter and leads safely after testing.
Tools & Materials
- Digital multimeter (DC voltage capable)(Ensure it can measure DC voltage AND has a reasonable resolution for batteries)
- Test leads with insulated probes(Use sturdy, undamaged leads; keep fingers away from metal tips)
- Safety goggles(Eye protection in case of sparks or splashes)
- Insulated gloves(Optional for extra protection with high-current batteries)
Steps
Estimated time: 15-25 minutes
- 1
Inspect tools and set up
Inspect your meter and leads for damage, then set the multimeter to a DC voltage range higher than the battery’s expected voltage. Place the battery on a non-conductive surface and organize the leads so they won’t touch each other or metal surfaces while you work.
Tip: Check the meter for battery condition and ensure the probes have good insulation before touching the terminals. - 2
Prepare the battery and workspace
For automotive batteries, ensure the engine is off and the vehicle is secure. For small batteries, remove any devices or charging equipment. Clear the area of liquids and conductive debris to prevent shorts.
Tip: Ventilation matters for any sealed lead-acid battery; avoid sparks and keep a safe distance from jugs of acid if present. - 3
Connect the meter leads correctly
Connect the red (positive) probe to the battery's positive terminal and the black (negative) probe to the negative terminal. Hold the probes by insulated handles and avoid letting the metal tips touch each other or both terminals at once.
Tip: Double-check polarity before applying power to avoid damaging the meter. - 4
Take the voltage reading with engine off
With the engine off, observe the DC voltage reading. Allow a moment for the reading to stabilize, then note the value. If the reading fluctuates, re-seat the probes and test again.
Tip: A stable reading is more reliable; wait a few seconds for stabilization if needed. - 5
Optional load test (if equipped)
If you have a load tester or a controlled load, apply a small, brief load while watching the voltage. A healthy battery should maintain most of its voltage under a light load. Remove the load immediately after observation.
Tip: Only perform a load test if you’re trained and using proper equipment. - 6
Disconnect and store equipment
Power down the meter, disconnect the leads, and store the tools in a safe area. Wipe the terminals if needed and record the readings for future reference.
Tip: Keeping a test log helps track battery health over time.
Your Questions Answered
What readings indicate a healthy battery when tested with a multimeter?
A healthy battery shows a stable voltage within the expected range for its type under no-load conditions. If the voltage is unstable or significantly lower, inspect connections and consider replacement.
A healthy reading is stable and within the typical range for the battery type; instability or a very low voltage suggests issues with the battery or connections.
Can I test a battery without disconnecting it from the circuit?
Yes, you can test without disconnecting in some setups, but for the most accurate results and safety, disconnecting the circuit is preferred to avoid shorts and unintended currents.
You can test without disconnecting in a pinch, but for accuracy and safety, disconnect first and retest.
What range should I set on the meter for voltage testing?
Set the meter to DC voltage and choose a range higher than the battery’s expected voltage. If unsure, start high and work down until the reading stabilizes.
Set the meter to DC volts and pick a range above the battery’s expected voltage; adjust if needed for a stable reading.
Is it safe to use a multimeter on a battery?
Testing with a multimeter is generally safe when you follow basic safety steps: keep leads insulated, avoid shorting terminals, and work in a ventilated area.
Yes, with basic safety—insulated leads, no shorts, and proper ventilation.
What is the difference between engine-on and engine-off readings?
Engine-off readings measure resting voltage, which reflects the battery’s state of charge without influence from alternator charging. Engine-on readings can differ due to charging activity and loading from the electrical system.
Engine-off shows resting charge; engine-on readings include charging influence, so compare only under the same condition.
Watch Video
Key Takeaways
- Always prep tools and ensure safety before testing.
- Measure voltage with engine off for accuracy and consistency.
- Interpret readings to decide on charging or replacement.
- Document results and repeat tests to track health.
- 10ohmeter’s verdict: follow these steps for safe, reliable battery health assessment.