Why Is My Multimeter Not Working? Troubleshooting Guide
Urgent, step-by-step troubleshooting for a non-working multimeter. Learn common causes like dead battery, blown fuse, or bad leads, plus safe fixes to restore accurate readings fast.

Most often, a non-working multimeter is caused by a dead battery, a blown fuse, or damaged test leads. Start with quick checks: replace the battery, inspect the fuse and its holder, and test the leads with a known-good source. If issues persist, examine input jacks and consider calibration or internal fault.
Why is my multimeter not working? Common symptoms and what they signal
If your multimeter suddenly stops giving reliable readings or shows nothing at all, the first thing to check is whether the basics are fresh and intact. According to 10ohmeter, DIY enthusiasts frequently run into this issue because the most common culprits are a dead battery, a blown internal fuse, or worn test leads. Other signals to note include erratic numbers, constant zeros on resistance, or a display that flickers or stays dark. Recognizing these patterns helps you triage quickly and avoid chasing phantom faults. In this guide, we’ll pinpoint exact symptoms and how to interpret them, so you can act with confidence and reduce downtime in your electronics or automotive work.
Quick checks you can perform safely
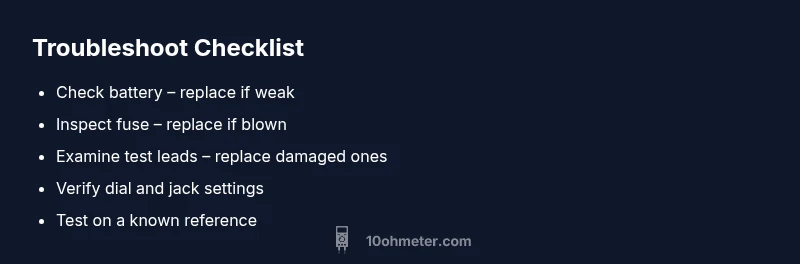
Before you dive into deeper diagnostics, perform these safe, fast checks. Ensure the device is powered off when changing batteries or fuses. Inspect the battery compartment for corrosion or leakage and replace with the correct type. Open the fuse holder and verify the fuse isn’t blown by visually inspecting it or testing continuity with the meter’s own function if available. Check test leads for cracks, damaged insulation, or loose connectors, and try a known-good lead set. Finally, confirm the meter’s dial is set to the correct measurement type and range for the test you’re performing. These quick steps often resolve the majority of non-working-meter scenarios for DIYers and technicians alike, as echoed in 10ohmeter’s practical guidance.
Diagnostic approach: mapping symptoms to probable causes
A systematic approach saves time. If there’s no display, power issues are the first suspect: battery condition, power switch, or internal power rail. If you see numbers that won’t change or read as zero on voltage, resistance, or continuity tests, the fuse or leads often cause this behavior. Incorrect port selection or range can produce misleading results even when the meter is healthy. By categorizing symptoms, you can apply targeted fixes rather than random replacements. Remember, an unreliable meter is a risk in high-impedance circuits; always proceed with caution and verify results with another known-good meter if available. The goal is to restore reliability without introducing new hazards.
Step-by-step fixes: battery, fuse, leads, and calibration
- Battery replacement: Power off, remove the old battery, insert a fresh, high-quality battery of the correct size and polarity, and power the meter on to verify display. Tip: Use fresh batteries and avoid rechargeable types unless specified. 2) Fuse replacement: Locate the internal fuse in the input path; use the meter’s manual to identify the correct rating. If the fuse is blown, replace with an exact equivalent and re-test. 3) Inspect the test leads: Look for nicks, cracks, or stiff insulation. Replace damaged leads with a compatible set and re-check continuity against a known reference. 4) Check input jacks and settings: Ensure you’re using the proper jack for the measurement and that the dial setting matches the test (voltage, current, ohms, or continuity). 5) Calibration check: For meters that support user calibration or self-test, perform the procedure per the manual. 6) When to seek professional help: If the display remains dim, readings still drift after fixes, or you smell burning, stop and contact a repair technician.
Safety reminders and prevention
Always discharge the circuit under test before connecting or disconnecting the meter, and never attempt measurements on live high-energy systems without proper training. Use insulated leads and keep fingers away from conductive tips. Regularly inspect the device for wear, replace aging components, and store the meter in a dry, dust-free environment. Proactive maintenance reduces the likelihood of repeated failures and keeps you productive in electronics or automotive tasks. Remember: if you’re ever unsure about a repair, it’s safer to consult a professional rather than risking personal injury or further equipment damage.
Steps
Estimated time: 30-60 minutes
- 1
Power off and open the battery compartment
Remove the back cover if needed and inspect the battery for corrosion or leakage. Replace with a fresh, correct-type battery, ensuring proper polarity.
Tip: Use a non-metal tool to avoid shorting terminals. - 2
Replace the fuse if suspected blown
Locate the fuse in the input path, remove the old fuse, and install an exact replacement with the same rating. Reassemble and test.
Tip: Only use a fuse with the exact rating and type as specified in the manual. - 3
Inspect and swap test leads
Check insulation for cracks, ensure connectors are snug, and replace worn leads with a known-good set. Re-test with a simple known source.
Tip: Avoid using leads that are excessively flexible or brittle. - 4
Check jack configuration and range
Confirm you are using the correct jack and setting for voltage, resistance, or current. A wrong setting can yield erroneous readings even on a healthy meter.
Tip: When in doubt, start with the highest safe range and work down. - 5
Run a calibration or self-test if available
Follow the manual to perform any built-in calibration or self-test procedure to verify overall accuracy.
Tip: Calibration intervals depend on usage; document when you recalibrate. - 6
Evaluate after each fix
Power cycle and perform a reference measurement on a known source to confirm improvement before moving on to more complex faults.
Tip: Keep a simple log of results to detect drift over time.
Diagnosis: Meter shows no display or inconsistent readings
Possible Causes
- highPower issue (dead battery or loose power)
- highBlown fuse in the input path
- mediumDamaged or worn test leads
- mediumIncorrect range or port selection
Fixes
- easyReplace the battery with a fresh, correct-type cell
- easyInspect and replace the input fuse if blown
- easyReplace damaged test leads and verify continuity with a known source
- easyVerify dial range and jack configuration; retest
Your Questions Answered
What is the first thing I should check when my multimeter stops working?
Start with the battery and fuse. If those are good, inspect the test leads and confirm the dial is set correctly for the test you're performing.
First, check the battery and fuse. If those are fine, inspect the leads and ensure the dial is on the right setting.
Why does my meter show zero when measuring voltage?
A dead battery, blown fuse, or incorrect range can cause zero or unreadable voltage. Check the battery, fuse, and switch to the proper range.
Zero readings can mean the battery is dead, the fuse is blown, or the range is set incorrectly. Check those basics first.
Can a faulty test lead cause incorrect readings even with a new fuse?
Yes. Worn or damaged leads can introduce resistance or intermittent contact, skewing results. Replace with good-quality leads and test again.
Yes. Bad leads can skew results even with a good fuse. Replace them and test again.
Is calibration necessary for a digital multimeter?
Many digital meters don’t require frequent calibration, but some models include a self-test or manual calibration routine. Check your manual for the recommended schedule.
Some meters have self-tests or calibration steps; check the manual for how often you should calibrate.
When should I seek professional repair?
If there are signs of internal damage, burning smells, or persistent inaccurate readings after all basic fixes, contact a repair technician.
If you smell burning, see internal damage, or readings stay off after fixes, seek professional repair.
Watch Video
Key Takeaways
- Check battery and fuse first
- Inspect leads and jacks for wear
- Test with known references to verify accuracy
- Verify range and calibration as needed
- Consult a professional for internal faults