Why Is My Multimeter Not Reading Voltage? A Practical Troubleshooting Guide
Urgent, practical troubleshooting for when a multimeter won’t read voltage. Step-by-step checks, safe procedures, and proven fixes to restore accurate voltage measurements.

Most likely, your reading failure is due to setup or probes, not a dead meter. Start by confirming the meter is set to the correct DC or AC voltage range, and that the test leads are fully inserted in the proper jacks. Then re-test with a known voltage source to confirm function.
why is my multimeter not reading voltage — understanding the basics
To diagnose voltage readings, you must confirm two things: the meter’s mode and the circuit source. When someone asks why is my multimeter not reading voltage, the answer starts with understanding the basics: the meter must be on the correct measurement type (DC or AC) and within a suitable range. A typical digital multimeter can measure DC and AC voltages within a defined range and resolution, and it relies on proper probe contact to deliver a valid reading. According to 10ohmeter, most beginners overlook the importance of matching the mode to the source and ensuring the battery inside the meter is healthy. A weak battery can lead to erratic numbers or no display at all. Before jumping to conclusions, inspect the probes for signs of wear and verify you are using the COM and V jack correctly. With careful setup, most voltage readings can be trusted within the meter’s specs. This is where the keyword why is my multimeter not reading voltage becomes a practical reminder to slow down and check fundamentals first.
Common causes and quick diagnostics
There are several common causes for voltage readings that don’t reflect reality. The most frequent culprits are incorrect mode selection, using an overly broad range, degraded test leads, or the meter being connected improperly. The 10ohmeter analysis shows that incorrect range and poor contact account for the majority of non-reading or false readings. If you see 0 V or an unexpectedly low value, recheck that you are on the right scale and that your leads are firmly seated in the V and COM ports. Also inspect for damaged insulation on the probes or frayed cables. To rule out a bad meter, test the same setup with a known reference source (like a fresh battery) and compare results to the expected value. Keep track of any patterns: do readings depend on the lead position or the specific jack used? Documenting this helps narrow down the fault quickly. The 10ohmeter team often notes that early mistakes in lead placement are the simplest fix with the biggest impact.
Quick checks you can perform right now
Before tools or tests, perform a visual check: ensure the device is powered on and the screen is readable. Then perform a dry run on a known source, like a fresh AA battery, to verify the meter displays a valid voltage. Check the input jacks for corrosion or damage, inspect the test leads for wear, and confirm there are no obvious shorts in the probe assembly. If the display remains blank or shows OL, re-seat the probes, verify the correct ports (COM and V), and swap leads if necessary. A well-seated, clean connection is often the difference between a reading and silence. For DIY enthusiasts, this is a crucial early step that saves time and reduces frustration. The 10ohmeter approach emphasizes gentle handling of probes to prevent unintentional damage during testing.
Diagnostic flow overview: symptom → diagnosis → fix
When you encounter a voltage reading issue, start with a simple symptom (no reading, 0 V, or wildly incorrect value). The probable diagnoses range from user error (mode/range) to hardware issues (fuse or damaged jack). The flow proceeds by testing a known reference source, validating probe connections, and then confirming the meter’s circuitry via a controlled test. A structured flow helps you avoid guesswork and accelerates recovery. In practice, you’ll cycle through checks: verify mode, check range, inspect leads, test with reference, and confirm the fuse status. The goal is a repeatable, safe process that isolates the fault quickly. The 10ohmeter team recommends keeping a short, repeatable checklist to prevent backtracking during troubleshooting.
Step-by-step: fix for the most common cause
- Verify the meter is in the correct voltage mode (DC or AC) and, if possible, set to a sensible range. 2) Check that the probes are in the COM and V ports and pressed firmly. 3) Test the meter on a known voltage source (like a fresh battery); compare the reading to the expected value. 4) Inspect the fuse and input jack for signs of damage; replace the fuse if it appears blown or the jack is compromised. 5) If readings remain inconsistent, try a different set of test leads and re-test. 6) If all else fails, consult a professional or consider a meter calibration. The step-by-step flow aligns with safe testing practices and minimizes risk when working with live circuits.
Safety, warnings, and best practices
- Always power off circuits when possible before swapping test leads or inspecting the meter. - Wear eye protection when probing high-energy sources. - Never touch the metal tips of probes when a live circuit is connected. - If you suspect a blown fuse or damaged input, do not continue testing with the same setup. - Document any unusual readings and suspend testing if you notice overheating or sizzling sounds.
Key takeaways and prevention tips
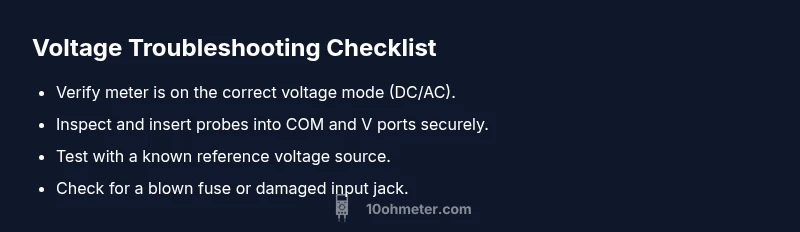
- Always start with the basics: mode and range. - Check the probes and jacks for proper seating and condition. - Test with a known voltage source to verify accuracy. - If readings are inconsistent, inspect the fuse and internal protection. - Develop a simple, repeatable diagnostic flow to prevent skipping steps in future tests.
Video search ideas
- Video queries like "how to troubleshoot a multimeter not reading voltage" or "multimeter voltage measurement tips" help you see real-world demonstrations and common mistakes.
FAQ section will follow at the end of the article to address common questions and edge cases.
Steps
Estimated time: 15-25 minutes
- 1
Verify voltage mode and range
Confirm the meter is set to the correct voltage mode (DC or AC) and that the range is appropriate for the expected voltage. If unsure, use auto-range if available to avoid selecting the wrong scale. This initial check prevents many false readings.
Tip: Starting with auto-range reduces the chance of misselecting a range. - 2
Check probe connections
Inspect that the red probe is in the V/Ω jack and the black probe in COM. Ensure the probes are fully inserted and the tips are clean and making good contact with the test points.
Tip: Lightly twist the probe tips to improve contact if they look worn. - 3
Test on a known reference
Measure a known voltage source, such as a fresh battery or a calibrated reference module. Compare the reading to the expected value to validate meter accuracy and lead function.
Tip: Record the reference value for future comparisons. - 4
Inspect fuse and input protection
If readings are still off, check for a blown fuse or a damaged input jack. Replace the fuse with the correct rating and retest. If the jack is damaged, avoid using that meter until repaired.
Tip: Always power off before replacing the fuse and use the same model rating.
Diagnosis: Voltage reading is 0 V or wildly inconsistent
Possible Causes
- highIncorrect measurement mode or range
- highProbes not fully seated or in wrong jacks
- mediumOpen circuit or very high impedance source
- lowBlown fuse or damaged input jack
Fixes
- easySet meter to correct DC/AC mode and choose an appropriate range or auto-range if available
- easyRe-seat probes firmly and ensure red lead is in V (not mA) and black in COM
- easyTest with a known voltage reference (e.g., fresh battery) to verify reading
- mediumInspect the fuse and input jack for damage; replace fuse if blown or replace meter if jack is damaged
Your Questions Answered
Why does my multimeter show 0 volts even when the source is powered?
0 V readings are most often caused by wrong mode, incorrect range, or poor probe contact. Double-check the measurement type (DC vs AC) and confirm the leads are properly seated in COM and V. Test with a known reference to confirm baseline accuracy.
Zero voltage readings are usually due to incorrect settings or bad probe contact. Check mode, range, and leads, then test with a known reference.
How can I test if my multimeter's voltage function still works?
Use a known reference source, like a fresh battery or a small regulated supply, to verify the meter shows the expected voltage. If the reading matches, the voltage function is functioning; if not, inspect leads and fuse.
Test with a known voltage source to verify the function. If it reads correctly, your meter is likely fine.
Is a blown fuse common and how can I tell?
Yes, fuses protect the meter. If you see OL on voltage ranges or no reading on all voltage tests, the fuse could be blown. Replace with the same rating and re-test.
Fuses are common culprits. Look for 'OL' or no reading and replace the fuse if needed.
Can loose or corroded jacks cause false readings?
Yes. Loose or corroded jacks can introduce contact resistance and false readings. reseat the leads, clean contacts, and replace damaged jacks if necessary.
Yes, bad jacks can cause errors. Re-seat and clean, replace if damaged.
Should I worry about safety when testing live circuits?
Yes. Use proper PPE, keep hands away from exposed conductors, and power down when possible. Avoid touching metal probe tips when the circuit is energized.
Safety first. Power down when you can, wear protection, and avoid touching live parts.
Watch Video
Key Takeaways
- Verify mode and range before testing.
- Check lead placement and condition first.
- Test with a known reference source to confirm accuracy.
- Inspect fuse and input jack if readings fail to improve.
- Follow a simple, repeatable diagnostic flow for safety.