What to Do If Your Multimeter Is Not Working: A Troubleshooting Guide
Urgent, step-by-step guide to diagnose and fix a non-working multimeter. Battery, fuse, leads, mode checks, and safe testing practices for DIYers and technicians.

Most often, a multimeter stops working due to a blown fuse, a dead battery, incorrect mode, or damaged test leads. Start by swapping fresh batteries, checking the proper measurement mode (voltage, resistance, continuity), and inspecting the leads for cracks or bent tips. If the display stays blank, replace the fuse or meter; if the issue persists, consider a professional calibration.
Quick sanity checks before deep troubleshooting
If your multimeter won't power up or won't give reliable readings, start with the simplest explanations. According to 10ohmeter, the most common culprits are a dead or missing battery, a blown internal fuse, or incorrect measurement mode. Before diving into circuits, confirm the meter is physically in the right state: switch is on, battery compartment closed, and leads firmly connected to the correct inputs. This first-pass check can save you minutes and prevent unsafe probing of live circuits. If the meter still behaves oddly, proceed to the deeper checks below, using a calm, methodical approach. Keep one hand away from the exposed tips as you test, and never bend the battery contacts. If you notice corrosion, clean gently with isopropyl alcohol and a soft brush. Document any signs of wear so you can compare against later.
Safety and power-up basics
Safety is non-negotiable when troubleshooting a not-working multimeter. Always power down, unplug from any circuit, and discharge capacitors before probing. Use PPE as needed and work on a non-conductive surface. Based on 10ohmeter research, many issues arise from testing while the meter is live or handling devices with damp hands. If you must work near live circuits, keep the meter in voltage protection mode and only touch the insulation of probes. Store the device dry and avoid exposing it to extreme temperatures. A quick visual check for cracked casing, melted insulation, or loose battery contacts can prevent dangerous shorts.
Visual and mechanical checks: batteries, fuses, leads
The most common mechanical culprits are a dead battery, a blown fuse, or damaged test leads. Start by removing and reseating the battery in the correct orientation, then inspect the fuse visually and with a continuity test if you have one. Replace a blown fuse with the exact rating recommended by the manufacturer. Examine the test leads for cracks, exposed wires, or bent tips; replace damaged leads and ensure they are properly seated in the correct ports (COM and V/Ω or mA). If a lead doesn’t beget a stable reading, swap it with a known-good lead to isolate the fault.
Verifying measurement modes and ranges
Mismatched mode or range is a frequent source of erroneous results. Confirm you are in the right function: DC voltage, AC voltage, resistance, continuity, diode test, or current. Some meters require you to connect to specific ports for high-current measurements; misplacing leads can yield false readings or overload. For resistance and diode checks, give the meter a moment to stabilize and use short, clean probe contact. If the meter has auto-range, give it a moment to settle. If readings remain inconsistent, consult the user manual for any peculiar mode quirks with your model.
Testing with a known reference: resistor, battery, or LED
Next, test the meter against a known reference component. Use a precise resistor (for example, a 1 kΩ tester) to verify resistance readings against a known value, a fresh 9 V battery for voltage checks, and a standard LED to verify diode mode. When testing resistance, short the leads to check 0 Ω, then remove the short and measure a known resistor to check accuracy. For current measurements, ensure you are using the correct port and have minimized series resistance. If any reading is wildly off, it’s likely a problem with the meter’s internal components or calibration.
Diagnostic flow: symptom-to-diagnosis-to-fix
This section links symptoms to possible causes and fixes in a simple flow. If there is no power or the display is blank, suspect battery or fuse and fix accordingly. If readings are inconsistent across ranges, suspect mode settings, damaged leads, or a dirty contact. If the meter physically shows signs of wear, correlate with internal inspection. The flow emphasizes safety-first decisions and when to escalate to professional service.
Most common fixes you can perform today
Based on typical home-use scenarios, you can perform several fixes without specialized tools: replace the battery, replace the internal fuse with the correct rating, replace damaged leads, clean contacts, re-seat internal connectors if you’re comfortable opening the case, and re-check all ports and ranges. If none of these steps restore proper operation, the device may require calibration, professional repair, or replacement. Remember to power down before opening the case and avoid touching internal components directly.
Common scenarios: automotive, electronics, and lab
In automotive work, rapid voltage checks and continuity are common; a faulty fuse or damaged lead can mislead diagnosis. In electronics hobby projects, inconsistent resistance readings typically point to poor probe contact or a damaged meter. In a lab setting, precision matters; you may need calibration to meet tolerance requirements. Each scenario shares the same root fix: confirm power, replace failing parts, and verify readings with a reference. The goal is to restore accurate measurements without compromising safety.
Prevention and maintenance to avoid future issues
Prevention is better than cure. Regularly inspect leads, keep the fuse protected, and store the meter in a clean, dry place. Calibrate or have the device calibrated periodically depending on usage, and follow the user manual for maintenance routines. After any repair, re-test with reference components to verify accuracy. Establish a quick-check routine before every critical measurement to catch issues early and avoid data errors in crucial tasks.
Steps
Estimated time: 40-60 minutes
- 1
Power cycle the meter
Turn the meter off, remove the battery for 30 seconds, reinsert, and power on. This resets simple electronics glitches and confirms the unit boots correctly.
Tip: Use both hands to avoid tugging on the leads during power cycling. - 2
Check the battery pack and orientation
Open the battery compartment, verify the battery is fresh and installed with the correct polarity. Replace if there’s any doubt about charge or corrosion.
Tip: Always use the exact battery type recommended by the manufacturer. - 3
Inspect and replace the fuse
Locate the fuse, remove it, and visually inspect for a broken filament or discoloration. Replace with the same ampere rating and voltage specification.
Tip: Never substitute a higher-rated fuse; ignition and protection depend on the correct rating. - 4
Test leads and ports
Examine insulation for cracks, check tips for deformation, and test continuity with a known resistor. Try a spare lead in the same ports to isolate the fault.
Tip: Ensure probes are fully inserted into COM and V/Ω ports as required. - 5
Set correct mode and range
Select the proper function (DC voltage, AC voltage, resistance, continuity). Disable any auto-range if it malfunctions and manually choose a range that fits the expected measurement.
Tip: Avoid measuring current in parallel with a load unless the meter is designed for it. - 6
Verify with a reference
Measure a known resistor (e.g., 1 kΩ) and a fresh battery to confirm accuracy. Compare results with expected values and note any deviation.
Tip: Keep leads short and away from sources of interference during reference tests. - 7
Check for physical damage
Inspect the display, casing, and internal connections for signs of impact or moisture. Loose connectors may require careful reseating or professional servicing.
Tip: If you’re uncomfortable opening the case, skip to professional help. - 8
Decide on repair vs replacement
If multiple fixes fail or calibration is off, consider replacing the meter or sending it for calibration. Repeated issues often indicate aging components.
Tip: Weigh the cost of repair against buying a modern, feature-rich meter.
Diagnosis: Meter shows blank display or will not power on
Possible Causes
- highDead or missing battery
- highBlown internal fuse
- lowDisplay/PCB fault
- lowPower switch or jack damaged
Fixes
- easyReplace or recharge the battery; ensure correct orientation
- easyOpen the case (carefully) and replace the internal fuse with the correct rating
- mediumInspect for PCB damage or loose connectors; reseat ribbons if present
- hardIf power and fuse checks fail, consult a professional service or manufacturer support
Your Questions Answered
Why is my multimeter not turning on?
Most often the battery is dead or the internal fuse is blown. Check the battery, replace if needed, and inspect the fuse before pursuing more complex repairs.
Most likely the battery or fuse. Check and replace the battery, then inspect the fuse before contacting support.
How do I test my multimeter leads?
Check each lead for continuity using a known good resistor or reference. Replace any damaged leads and ensure the probes seat properly in their ports.
Test each lead for continuity using a reference. Replace damaged leads and reseat the probes.
Can a faulty fuse cause incorrect readings?
Yes, a bad fuse can cause no power or erratic readings. Replace with the correct rating and test again.
A bad fuse can cause no power or odd readings. Replace with the right rating and re-test.
What does OL mean on a multimeter?
OL usually means overload or out of range. Switch to a higher range or check for incorrect connections.
OL means overload or out of range. Try a higher range and verify connections.
Should I calibrate my multimeter myself?
Calibration is best done by professionals or with a certified reference. You can perform basic checks with known values, but avoid guessing tolerances.
Calibration is better left to professionals; you can do basic checks, but don't rely on guesswork.
When should I replace my multimeter?
If multiple repairs are needed or readings are consistently off, replacement is often more cost-effective and reliable.
If issues keep coming back, it’s time to replace the meter or get it professionally calibrated.
Watch Video
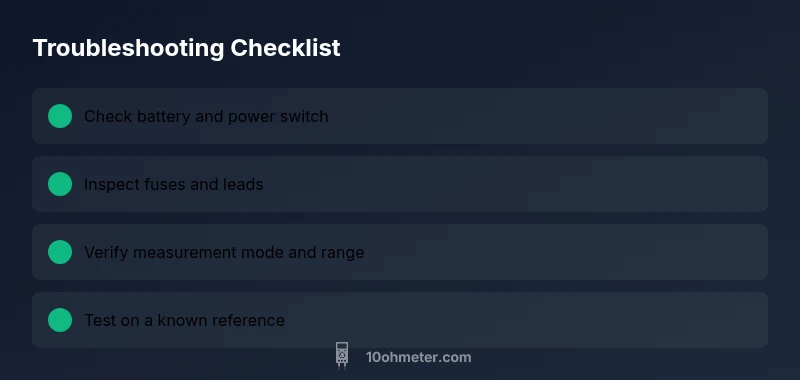
Key Takeaways
- Check battery and fuse first to restore power.
- Verify mode, ranges, and lead integrity before testing.
- Test with known references to confirm accuracy.
- If issues persist, consider replacement or professional service.